

1995-1996 Mazda Millenia Headlight: Fixing Haze, Moisture, and Aiming Issues
Your definitive guide to diagnosing common headlight problems, finding a quality used assembly, and replacing it without removing the bumper.
- The most common failure is lens hazing, which dangerously reduces light output. A used OEM assembly with a clear lens is the best-value fix.
- Replacement does not require removing the front bumper; a hidden bolt is accessed through the wheel well.
- These are standard halogen headlights using separate 9005 (high) and 9006 (low) bulbs. No complex electronics are involved.
- Aiming is mandatory after replacement. These headlights have a built-in bubble level to assist with proper alignment.
Headlight System Overview: Simple and Effective Halogen
The 1995-1996 Mazda Millenia uses a standard halogen headlight system, which was common for the era. This is a straightforward and reliable setup that does not involve the complex ballasts, igniters, or computer modules found in later HID/Xenon or LED systems. This simplicity is a major advantage for diagnosis and repair.
- Lighting Technology: Halogen. These headlights use incandescent bulbs filled with halogen gas to produce a bright, yellowish-white light. They are not interchangeable with HID or LED systems without extensive modification.
- Bulb Types: The assembly uses two separate bulbs: a 9006 (HB4) for the low beam and a 9005 (HB3) for the high beam.
- Trim Level Differences: For the 1995-1996 model years, all trim levels of the Millenia were equipped with the same type of halogen headlight assembly. There were no premium lighting options like HID or LED from the factory.
Symptoms of a Failing Headlight Assembly
Problems with your Millenia's headlights can range from a simple burnt-out bulb to a failing assembly housing. Here’s what to look for:
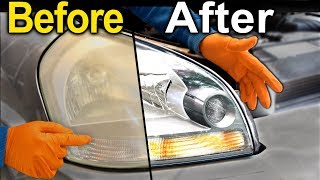
- Dim or Yellow Light Output: This is the most common issue. Over time, the polycarbonate lens is damaged by UV rays from the sun, causing it to become hazy, yellow, and cloudy. This oxidation on the surface scatters the light beam, drastically reducing visibility at night.
- Moisture or Condensation Inside the Lens: If you see water droplets, fog, or a 'fishbowl' effect inside the headlight, it means the factory seal has failed. This can be due to age, impact damage, or improperly installed rear bulb covers. Persistent moisture will damage the reflective surfaces and cause bulbs to fail prematurely.
- One or Both Headlights Don't Work: While often just a burnt-out bulb, this can also point to a corroded bulb socket, a bad wiring connector, or a blown fuse.
- Flickering Lights: This usually indicates a poor electrical connection at the bulb's plug or a bulb that is about to fail completely.
- Physical Damage: Cracks in the lens or housing from road debris or minor impacts will allow moisture in and can compromise the structural integrity of the assembly.
Pro Tip: A general Mazda Technical Service Bulletin (TSB 09-003/19) notes that minor fogging can be a natural occurrence due to temperature changes. However, if you see large water droplets or the condensation doesn't clear after running the headlights for a while, the seal has failed and the assembly needs inspection or replacement.
Buying a Used 1995-1996 Millenia Headlight Assembly
Given that new OEM headlights are extremely expensive (often over $400 per side) and new aftermarket options are scarce, a quality used OEM assembly is the best value for most owners. Used OEM parts guarantee the correct fit, light pattern, and durability that cheap aftermarket parts often lack. Here's what to inspect:
- Lens Clarity: This is the most important factor. Look for a lens that is clear and free of deep hazing or yellowing. Minor surface scratches are acceptable, but avoid any with cloudy interiors or deep pitting.
- Mounting Tab Integrity: This is critical for a secure, vibration-free fit. The Millenia headlight has three main mounting points: two on the top, and one on the outer side that is notoriously hard to see. Carefully inspect all three points. Look for any cracks, stress marks, or signs of a previous repair with epoxy or glue. A broken tab will cause the headlight to vibrate and make proper aiming impossible.
- Check for Cracks and Seals: Examine the entire housing, especially the seams where the lens meets the black plastic body. Look for any cracks that could let water in. Ensure the large, round rubber caps that seal the bulb access ports on the back are included and are not dry-rotted or missing.
- Wiring and Connectors: Check the wiring pigtails coming from the assembly. Ensure the connectors are not cracked, and the wires are not frayed or cut.
Cost of Replacing a Mazda Millenia Headlight Assembly
The cost can vary significantly depending on the type of part you choose and whether you do the work yourself.
| Part Type | Estimated Cost | Notes |
|---|---|---|
| New OEM | $350 - $450+ per side | Extremely expensive and may have limited availability from dealers. Offers perfect fit but is not cost-effective. |
| New Aftermarket | $100 - $150 (if found) | Availability is very limited for this model year. Quality, fit, and longevity can be inconsistent compared to OEM. |
| Used OEM | $60 - $90 per side | The best value. Provides original factory quality and fit at a fraction of the price of new. |
| Shop Labor | $100 - $180 | Expect 1.0 to 1.5 hours of labor. The passenger side may take longer due to the washer fluid reservoir. |
Replacement Overview: No Bumper Removal Needed
While many cars require removing the entire front bumper to change a headlight, the 1995-1996 Millenia allows for replacement without this step, though it requires some patience. The key is accessing a hidden bolt through the wheel well.
- Remove the plastic trim panels from the top of the radiator support, above the headlights.
- Unbolt the two 10mm bolts on the top of the headlight assembly.
- Turn the steering wheel to gain access to the wheel well liner. Remove the screws holding the front portion of the liner and pull it back to see behind the bumper.
- Using a ratchet with an extension, locate and remove the third 10mm bolt holding the side of the headlight assembly. This is the trickiest step.
- Once all three bolts are out, carefully pull the assembly forward, disconnect the electrical connectors, and remove it from the vehicle.
- Installation is the reverse of removal. Transfer your bulbs to the new assembly or install new ones.
Warning: The passenger side is more difficult as the windshield washer fluid reservoir is in the way, making access to the side bolt much tighter.
Required After Install: Headlight Aiming
You MUST aim the headlights after replacing an assembly. Misaligned headlights are dangerous and illegal. The Millenia has a helpful feature for this: a built-in bubble level on the top of the assembly.
- Park the car on a level surface, 25 feet away from a flat wall.
- Turn on the low beams.
- On the back of the headlight assembly, you will find gear-driven adjusters for vertical and horizontal aim. Use a screwdriver or socket to turn them.
- Adjust the beam until the top of the cutoff line on the wall is slightly below the height of the center of the headlight lens itself. The main goal is to illuminate the road without shining into the eyes of oncoming drivers.
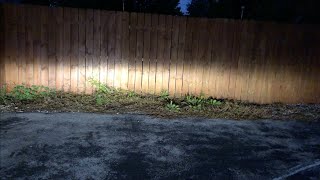
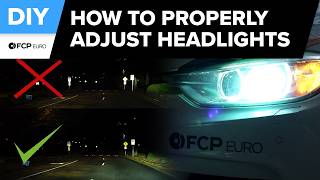
- Use the built-in bubble level as a guide to get the assembly properly oriented. 🎬 Watch: A step-by-step walkthrough for aiming and aligning your headlights
Frequently Asked Questions
Can I just polish my old, hazy headlights?
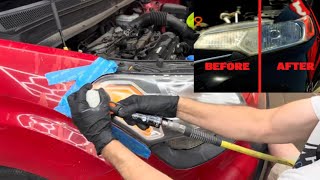
Yes, you can use a headlight restoration kit to sand and polish the oxidized layer off your lenses. This can significantly improve clarity for a low cost. However, this is often a temporary solution, as the factory UV protective coating is removed. The hazing will likely return within 6-12 months unless a new UV sealant is applied correctly.
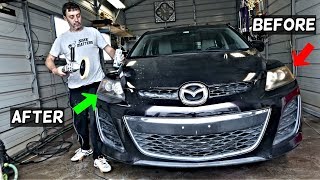
🎬 See this guide for a permanent headlight restoration methodAre the driver and passenger side headlights interchangeable?
No, they are not. Headlight assemblies are specific to the left (driver) and right (passenger) sides of the vehicle.
Do I need to buy new bulbs with a used assembly?
It is highly recommended. The condition and remaining life of bulbs included with a used assembly are unknown. Installing new 9005 and 9006 bulbs ensures you get the best possible performance and won't have to access them again for a long time. Always handle new halogen bulbs with a glove or clean cloth to avoid getting skin oils on the glass.
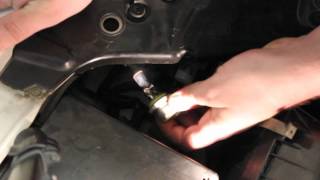
🎬 Watch: How to replace the headlight bulbs on your MilleniaMy new headlight has moisture inside. Is it defective?
Not necessarily. If it's a light fog that appeared after a car wash or temperature change, turn the headlights on for 20-30 minutes to see if the heat clears it up. This can be normal. However, if you see large water droplets or the condensation persists, it indicates a bad seal, a crack, or a missing rear bulb cover, and the unit should be inspected for replacement.
Helpful Videos

Technical Specifications
OEM Part Numbers: T0015135XA (Right/Passenger Side Headlight Assembly) 8BT6-51-040 (Left/Driver Side Headlight Assembly) TA0151350B (Right/Passenger Side Corner/Signal Lamp - Separate Part)
Lighting Technology: Halogen Low Beam Bulb: 9006 / HB4 High Beam Bulb: 9005 / HB3
We Have This Part in Stock



The information in this article is provided for general reference and educational purposes only. Vehicle specifications, procedures, and part compatibility can vary by production date, trim level, and region. Always consult your vehicle's factory service manual and verify part numbers before purchasing or performing repairs. Safety-critical components such as airbags, seat belts, and braking systems should be installed by a qualified professional.
- Mazda Millenia:
- 🎬 Helpful Videos
- 🛍️ Shop This Part
- Headlight System Overview: Simple and Effective Halogen
- Symptoms of a Failing Headlight Assembly
- Buying a Used 1995-1996 Millenia Headlight Assembly
- Cost of Replacing a Mazda Millenia Headlight Assembly
- Replacement Overview: No Bumper Removal Needed
- Required After Install: Headlight Aiming
- Frequently Asked Questions
- 🎟️ Get 5% Off