

1999-2002 Land Rover Discovery Headlight: Solving Moisture, Wiring, and Fitment Issues
Your definitive guide to diagnosing, replacing, and buying a used halogen headlight assembly for the Discovery Series II.
- This is a halogen assembly; do not use HID/LED bulbs in it as it creates an unsafe beam pattern.
- Moisture inside the lens is the most common failure, caused by bad seals or cracks in the housing.
- When buying used, the most critical inspection point is the integrity of the plastic mounting tabs, which are often broken.
- For 1999 models, this part ONLY fits the Discovery Series II, not the older Discovery I.
- Headlight aiming is required after replacement and is a simple procedure using adjusters on the back of the unit.
Understanding the 1999-2002 Discovery Headlight Assembly
The headlight assembly used in the 1999-2002 Land Rover Discovery II is a single-piece halogen unit. From the factory, these vehicles were not equipped with HID/Xenon, LED, or adaptive headlight technology. This is a crucial point for buyers, as these different lighting types are not interchangeable without significant and complex modifications to the vehicle's wiring and computer systems.
- Headlight Type: Standard Halogen. It uses separate bulbs for the main beam (H7 55W) and a small "city light" or parking bulb.
- No External Modules: As a halogen unit, it does not require any external ballast, igniter, or LED driver. All power is supplied directly from the vehicle's standard wiring harness.
- Compatibility Warning (1999 Models): For the 1999 model year, Land Rover produced both the older Discovery I and the new Discovery Series II. This headlight assembly fits only the Discovery Series II. It is not physically or electrically compatible with the Discovery I.
Warning: While you can find aftermarket LED or HID bulbs designed to fit a halogen housing, this is strongly discouraged. The reflector inside the OEM halogen assembly is specifically engineered for the light output of a halogen filament. Installing a much brighter, differently shaped LED or HID light source will create a dangerous and illegal beam pattern, causing excessive glare for oncoming drivers while often providing poor road illumination.
Common Failure Symptoms
Diagnosing a headlight issue can be complex, as the problem could be the bulb, the assembly, the wiring, or the switch. Here are the most common symptoms related to the assembly itself:
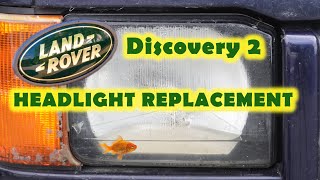
- Moisture or Condensation Inside Lens: This is the most frequent complaint. 🎬 Watch: How to handle dampness and water in your headlights It indicates a failed seal between the lens and the housing or a crack in the housing itself. While some minor fogging that clears quickly can be normal, persistent water droplets or pooling water will damage the reflective surfaces and cause bulbs to fail prematurely.
- Dim or Yellowed Light Output: Even with a new bulb, light output can be poor. This is usually caused by two things: a hazy, yellowed, or UV-damaged outer lens that scatters the light, or a damaged internal reflector. The reflective chrome coating can fade or burn over time, especially if a higher-wattage bulb was used.
- Loose or Shaky Beam Pattern: If your headlight beam vibrates excessively while driving, it's a sign of broken mounting points. The plastic tabs and internal adjusters can become brittle and break, preventing the assembly from being held securely.
- Electrical Issues (Flickering/Intermittent Operation): While often a wiring or ground issue elsewhere on the vehicle, the internal wiring and bulb connectors within the assembly can also degrade. Heat and age can make the plastic connectors brittle and cause poor contact with the bulb.
Known Issues, Recalls, and Technical Service Bulletins (TSBs)
For the 1999-2002 model years, there are no major recalls or TSBs issued by the NHTSA specifically for the headlight assemblies themselves. Most lighting-related complaints stem from age-related material degradation rather than a manufacturing defect.
- No Headlight-Specific Recalls: Searches for recalls on the 1999-2002 Discovery do not show any actions related to the headlight housings, wiring, or failures. A recall for later model years (2018-2020) regarding an auto high-beam indicator does not apply to this vehicle.
- Common Forum Complaints: Owner forums are filled with discussions about two primary issues: moisture ingress and dim lights due to poor grounds or failing column stalks. Bad earth connections are a well-known problem on the Discovery II and can cause a variety of strange lighting behaviors, including one light being dim while the other is bright.
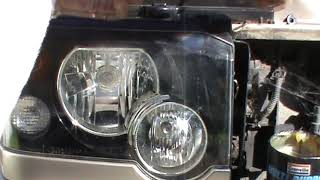
Pro Tip: Before replacing a dim headlight assembly, check the vehicle's ground connections first. A corroded or loose ground wire near the headlight is a common and inexpensive cause of dim lighting on a Discovery II. Also, inspect the multi-function switch on the steering column, as its internal contacts can wear out 🎬 Watch: Troubleshooting common Land Rover Discovery 2 headlight problems, causing intermittent high or low beam operation.
Buying a Used 1999-2002 Discovery Headlight Assembly
A used OEM (Original Equipment Manufacturer) headlight is often a better choice than a cheap aftermarket replacement. Genuine Land Rover parts generally have superior plastic quality, better lens clarity, and more precise reflector geometry, ensuring a proper fit and correct beam pattern. Here’s what to look for:
Physical Inspection Checklist:
- Lens Condition: Look for a clear, un-yellowed lens. Minor surface hazing can often be polished out, but deep crazing (a network of fine cracks), rock chips, or internal yellowing means the lens is beyond saving.
- Mounting Tabs: This is critical. Carefully inspect all mounting points on the back of the housing. These are made of plastic and are notoriously brittle. They often break when the headlight is removed from a vehicle. An assembly with broken tabs will not mount securely, leading to a vibrating beam.
- Housing Integrity: Check the black plastic housing for any cracks, especially around the seams and mounting tabs. A crack is a guaranteed entry point for water.
- Seal Integrity: Examine the seal where the clear lens meets the black housing. Look for any signs that it has been pried open or resealed with excessive amounts of silicone. A factory seal is the most reliable.
- Internal Reflector: Peer inside the lens. The chrome reflector should be bright and shiny. Avoid any assembly where the reflector looks burnt, faded, or has a milky appearance, as this will severely reduce light output.
- Connectors and Wiring: Check the condition of the electrical connector plug and any visible internal wiring. Look for corrosion on the pins or cracked, brittle insulation.
Replacement Overview and Alignment
Replacing the headlight assembly on a Discovery II is a straightforward, tool-free job 🎬 See this step-by-step Discovery 2 headlight replacement walkthrough that is very feasible for a DIY mechanic.
- Remove the plastic trim piece located below the headlight assembly. It is held in by clips.
- The headlight assembly itself is held in by three mounting posts on the back that snap into grommets on the vehicle body.
- Firmly and carefully pull the entire assembly straight forward to release it from the mounts.
- Disconnect the main electrical connector from the back of the housing.
- Installation is the reverse of removal. Be sure to line up the mounting posts with the grommets before pushing the assembly into place.
Headlight Aiming (Required After Installation)
Anytime you replace a headlight assembly, you must check and adjust the aim. Failure to do so can result in poor visibility and blinding oncoming traffic.
The adjusters are located on the back of the assembly and can be accessed through two holes above the headlight. You will see toothed wheels inside that can be turned with a screwdriver. The basic procedure is as follows:
- Park the vehicle on a level surface, 25 feet away from a flat wall.
- Turn on the low beams. The top of the horizontal cutoff line of the beam pattern should be slightly below the height of the center of the headlight bulb itself.
- One adjuster controls the vertical (up/down) aim, and the other controls the horizontal (left/right) aim. Adjust as needed to achieve the correct pattern.
| Part Type | Estimated Price Range |
|---|---|
| New OEM (Genuine Land Rover) | $400 - $600+ |
| New Aftermarket | $100 - $200 |
| Used OEM (Salvage) | $75 - $150 |
| Shop Labor (Installation & Aiming) | $75 - $150 |
Frequently Asked Questions (FAQ)
Can I just replace the lens if it's foggy?
No, the lens and housing are manufactured as a single, sealed unit. While some ambitious DIYers attempt to cut them apart and reseal them, this is a difficult process that often fails, leading to more moisture problems. The most reliable solution for a damaged lens is to replace the entire assembly.
How can I fix moisture inside my headlight?
For a temporary fix, you can remove the assembly, take out all the bulbs and rubber caps, and use a hairdryer on a low heat setting to dry the inside. To prevent it from returning, you must find and seal the leak. This usually involves applying a bead of clear silicone sealant around the entire seam where the lens meets the housing. Also, ensure the rubber vents on the back are clear and properly seated.
Is this the right or left side headlight?
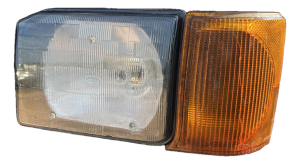
This guide refers to part number XBC105160, which is the right-hand (RH), or passenger side, assembly for a left-hand drive (LHD) vehicle, such as those in the US market. The left-hand (driver side) part number is different (typically XBC105170).
Why are my new bulbs still dim?
If new bulbs don't solve the problem, the issue is likely electrical. The most common culprits on a Discovery II are a poor ground connection near the headlight, a corroded bulb connector, or a failing headlight switch on the steering column. A voltmeter can be used to check for a voltage drop between the battery and the bulb connector to diagnose the issue.
Helpful Videos
Technical Specifications
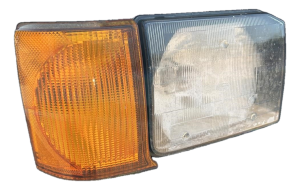
OEM Part Numbers: XBC105160
Technology: Halogen Vehicle Side: Right Hand (Passenger Side) Vehicle Drive: Left Hand Drive (LHD) Main Beam Bulb: H7 55W Position Bulb: T10 (W5W)
We Have This Part in Stock

The information in this article is provided for general reference and educational purposes only. Vehicle specifications, procedures, and part compatibility can vary by production date, trim level, and region. Always consult your vehicle's factory service manual and verify part numbers before purchasing or performing repairs. Safety-critical components such as airbags, seat belts, and braking systems should be installed by a qualified professional.
- Land Rover Discovery:
- 🎬 Helpful Videos
- 🛍️ Shop This Part
- Understanding the 1999-2002 Discovery Headlight Assembly
- Common Failure Symptoms
- Known Issues, Recalls, and Technical Service Bulletins (TSBs)
- Buying a Used 1999-2002 Discovery Headlight Assembly
- Physical Inspection Checklist:
- Replacement Overview and Alignment
- Headlight Aiming (Required After Installation)
- Frequently Asked Questions (FAQ)
- 🎟️ Get 5% Off