

2011-2017 Hyundai Sonata Headlight Guide: Generation Gaps & Tech Types
This guide clarifies the critical differences between the two distinct generations (2011-2014 and 2015-2017) and their unique headlight technologies, ensuring you get the right part.
- The 2011-2014 (YF) and 2015-2017 (LF) Sonata use completely different headlight assemblies that are not interchangeable.
- For 2015-2017 models, you must match the technology: Halogen and HID/Xenon assemblies are not plug-and-play with each other.
- When buying a used assembly, the integrity of the mounting tabs and the clarity of the lens are the most important factors to inspect.
- Replacement of the headlight assembly on these models requires the removal of the front bumper cover.
Critical: Two Generations, Zero Interchangeability

Warning: The 2011-2017 Hyundai Sonata spans two completely different vehicle generations. Parts are NOT interchangeable between them. You must correctly identify your vehicle's model year before purchasing a headlight assembly.
- 6th Generation (YF): 2011, 2012, 2013, 2014 model years.
- 7th Generation (LF): 2015, 2016, 2017 model years.
Installing a headlight from the wrong generation is impossible without extensive bodywork and wiring modifications. Always confirm your Sonata's model year before ordering.
Generation 1: 2011-2014 (YF) Sonata Headlights

Technology and Trim Differences
The YF Sonata primarily used projector-style halogen headlights. This means a lens focuses the light from a halogen bulb into a controlled beam. These were standard on most trims like the GLS. Higher trims like the SE and Limited also used halogen projectors, sometimes with a different internal bezel color (e.g., black vs. chrome). While aftermarket HID (High-Intensity Discharge) conversion kits are available, factory-equipped HID headlights were not a common option in the North American market for this generation.
- Standard Bulb Type: Halogen (H7 or H11 for low beam, depending on the specific assembly).
- Key Identifier: Smooth, flowing design that integrates with the body lines of the YF Sonata.
Known Issues & Common Problems
- Premature Bulb Burnout: Some owners report frequent low beam bulb failure. This can sometimes be caused by voltage irregularities or simply the type of bulb used.
- Flickering Lights: A number of complaints point to headlights flickering or turning off intermittently while driving. This could be related to a faulty multifunction switch in the steering column, a bad ground, or other electrical issues, rather than the assembly itself.
- Lens Hazing: Over time, the polycarbonate lens can become cloudy or yellowed from UV exposure, reducing light output and creating a safety hazard.
Generation 2: 2015-2017 (LF) Sonata Headlights

Technology and Trim Differences
The LF Sonata offered more variety in headlight technology. Base models like the SE and Eco came with projector halogen headlights. Higher trims, such as the Sport and Limited, offered several upgrades, creating significant compatibility challenges.
- Projector Halogen: Standard on SE, Eco, GL, and GLS trims. These assemblies will not work on a car originally equipped with HID or LED lights.
- HID (Xenon): Available on Limited and Sport 2.0T models. These headlights provide a brighter, whiter light and require a ballast to operate. An HID assembly can be identified by markings on the lens and the presence of the external ballast module. The bulb type is typically D3S.
- Dynamic Bending Light (DBL): Some HID-equipped models also featured headlights that swivel with the steering wheel to illuminate turns. These are the most complex and expensive variant.
- LED Accents: Many Sport and Limited models included LED daytime running light strips within the headlight assembly, even on halogen models. A failure of this LED strip requires replacement of the entire assembly.
Compatibility Warning: Halogen and HID/Xenon headlight assemblies for the 2015-2017 Sonata are NOT interchangeable. The wiring harnesses and control modules are completely different. 🎬 Watch: Differences between HID, LED, and halogen headlights Attempting to 'upgrade' from halogen to factory HID requires extensive and costly modifications.
Symptoms of a Failing Headlight Assembly

- Moisture or Condensation Inside: A common failure where the seal around the lens breaks down, allowing water to enter. This can short out bulbs, corrode wiring, and leave permanent water marks inside the lens.
- Dim or Yellowed Output: Even with a new bulb, a hazy, yellowed, or pitted lens will scatter light and severely reduce visibility at night.
- Flickering or Intermittent Operation: While often a bulb or ballast issue, internal wiring damage within the assembly can also cause this symptom.
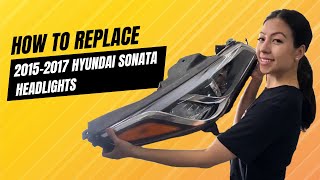
- Non-Functioning LED DRLs: On 2015-2017 models, the integrated LED accent light is not a separately serviceable part. If it fails, the entire assembly must be replaced. 🎬 See how to replace a 2015-2017 headlight assembly
- Physical Damage: Cracks in the lens or housing from impacts can allow moisture in and will fail a safety inspection. Broken mounting tabs will cause the headlight to vibrate, leading to a shaky beam pattern and eventual failure.
Buying a Used 2011-2017 Sonata Headlight Assembly: A Buyer's Guide
A used OEM headlight is often a better choice than a cheap aftermarket unit, as factory parts generally have better optics, fitment, and durability. Here’s what to inspect:
- Check All Mounting Tabs: This is the most critical inspection point. The assembly is secured by several plastic tabs. During accidents or even careless removal, these tabs can crack or break off completely. A headlight with even one broken tab will not mount securely, leading to vibration and poor alignment.
- Inspect the Lens Condition: Look for a clear, brilliant lens. Avoid any assembly with hazing, yellowing, or deep scratches. Check for a 'tide line' or mineral deposits on the inside of the lens, which indicates a past problem with water intrusion.
- Verify the Seal Integrity: Examine the seam where the clear lens is bonded to the black plastic housing. Look for any signs of prying, resealing with silicone (a common sign of a failed repair attempt), or gaps that could let moisture in.
- Confirm the Technology Type (2015-2017): Double-check if you are buying a Halogen or an HID assembly. An HID unit will have a large square metal box (the ballast) attached to the bottom or back and will often have warning labels regarding high voltage. Do not buy an HID assembly for a car that came with halogens, or vice-versa.
- Ask About Included Components: Clarify with the seller if bulbs, bulb covers, and (for HID models) the ballast and igniter are included. Often, these are sold with the assembly, but it's essential to confirm.
Headlight Assembly Replacement Overview
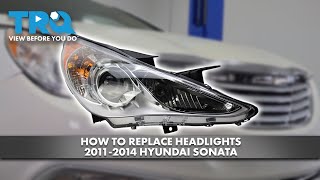
Replacing the headlight assembly on either generation of the 2011-2017 Sonata is a moderately difficult job that is feasible for a DIYer with basic tools. The key step is that the front bumper cover must be removed to access all the bolts securing the headlight assembly.
- Disconnect the negative battery terminal.
- Remove the plastic clips and screws holding the top of the bumper cover in the engine bay.
- Remove screws in the front of each wheel well that secure the bumper to the fender.
- Remove clips and bolts underneath the front of the vehicle.
- Carefully pull the sides of the bumper cover away from the fenders to release the clips, then pull the entire cover forward. Disconnect fog light connectors if equipped.
- With the bumper removed, you will have clear access to the 2-3 bolts holding the headlight assembly in place.
- Disconnect the main electrical connector from the back of the headlight.
- Install the new assembly, ensuring all tabs and hooks are properly seated before tightening the bolts.
Pro Tip: Before fully reinstalling the bumper, connect the new headlight and test all functions (low beam, high beam, turn signal, DRL) to ensure it works correctly.
Post-Installation: Headlight Aiming
Whenever a headlight assembly is replaced, it must be aimed to ensure it illuminates the road correctly and doesn't blind other drivers. This is a legal requirement and critical for safety.
The process involves parking the car on a level surface 25 feet away from a flat wall. On the back of the headlight assembly, you will find adjustment screws or gears. Typically, a Phillips screwdriver is used to turn these adjusters. One screw adjusts the vertical (up/down) aim, and another may be present for horizontal (left/right) aim. The goal is to have the top of the low beam's cutoff line sit at a specific height on the wall, as detailed in the vehicle's service manual.
Cost of Replacement
| Part/Service | Estimated Cost |
|---|---|
| New OEM Assembly (Halogen) | $400 - $700 per side |
| New OEM Assembly (HID/Xenon) | $1,000 - $1,600+ per side |
| New Aftermarket Assembly (Halogen) | $80 - $250 per side |
| Used OEM Assembly | $100 - $400 per side, depending on condition and type |
| Shop Labor for Replacement | $150 - $300 |
Frequently Asked Questions (FAQ)
Can I upgrade my halogen headlights to brighter LED or HID bulbs?
While you can replace halogen bulbs with aftermarket LED or HID bulbs, it is often not recommended for projector housings designed for halogens. The optics are different, which can result in a poor beam pattern with excessive glare for oncoming drivers. Furthermore, installing aftermarket HID kits requires mounting external ballasts and wiring, and may not be legal in all areas.
My new headlight has moisture inside. Is it defective?
Minor, temporary fogging can occur under certain atmospheric conditions and may clear on its own. However, if you see large water droplets, pooling water, or persistent condensation that doesn't go away, the assembly's seal is defective and it should be replaced.
Why did my LED daytime running light stop working on my 2016 Sonata?
The LED DRL strip is integrated into the headlight assembly and its internal driver is not sold as a separate part. Unfortunately, a failure of the DRL requires replacing the entire headlight assembly.
Do I need to replace my headlights in pairs?
It is highly recommended. If one headlight lens is old and hazy, replacing only that one will result in mismatched light output and an uneven appearance. Replacing both at the same time ensures consistent performance and a clean look. At a minimum, you should replace bulbs in pairs to ensure matching brightness and color.
Helpful Videos
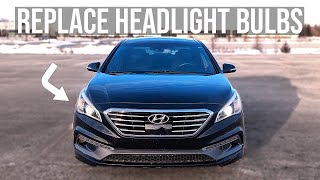
Technical Specifications
OEM Part Numbers: 92101-3Q000 92102-3Q000 92101-4R050 92102-4R050 92101-C2000 92102-C2000 92101-C1000 92102-C1000
Vehicle compatibility is split by generation: 2011-2014 (YF) and 2015-2017 (LF). The LF generation further splits between Halogen and HID (Xenon) types. HID bulbs are typically D3S. Halogen bulbs are typically H7 or H11.
We Have This Part in Stock



The information in this article is provided for general reference and educational purposes only. Vehicle specifications, procedures, and part compatibility can vary by production date, trim level, and region. Always consult your vehicle's factory service manual and verify part numbers before purchasing or performing repairs. Safety-critical components such as airbags, seat belts, and braking systems should be installed by a qualified professional.
- Hyundai Sonata:
- 🎬 Helpful Videos
- 🛍️ Shop This Part
- Critical: Two Generations, Zero Interchangeability
- Generation 1: 2011-2014 (YF) Sonata Headlights
- Technology and Trim Differences
- Known Issues & Common Problems
- Generation 2: 2015-2017 (LF) Sonata Headlights
- Technology and Trim Differences
- Symptoms of a Failing Headlight Assembly
- Buying a Used 2011-2017 Sonata Headlight Assembly: A Buyer's Guide
- Headlight Assembly Replacement Overview
- Post-Installation: Headlight Aiming
- Cost of Replacement
- Frequently Asked Questions (FAQ)
- 🎟️ Get 5% Off