

2001-2010 Hyundai Elantra Headlight: Decoding Generations, Facelifts, and Body Styles
Don't buy the wrong part; this guide clarifies the critical differences between the 2001-2003, 2004-2006, and 2007-2010 Elantra headlight assemblies.
- There are three incompatible headlight groups for 2001-2010 Elantras: 2001-2003, 2004-2006, and 2007-2010 Sedans. Verify your exact year before buying.
- The 2007-2010 Elantra Touring (wagon) uses completely different headlights than the sedan of the same years.
- When buying used, prioritize units with clear lenses, no internal moisture, and all mounting tabs intact and unbroken.
- All factory 2001-2010 Elantras use halogen headlights. Installing aftermarket LED or HID bulbs in the original reflector housings is not recommended and can create dangerous glare.
Critical Compatibility Warnings: Read Before Buying
Major Compatibility Differences: The 2001-2010 Hyundai Elantra spans two vehicle generations with three distinct, non-interchangeable headlight designs. Buying the wrong one means it will not fit your vehicle.
- 2001-2003 Elantra (XD Generation): Pre-facelift models have a unique headlight shape.
- 2004-2006 Elantra (XD Generation): The mid-cycle facelift introduced completely different headlights that are not compatible with earlier models.
- 2007-2010 Elantra (HD Generation): These are for sedan models only and will not fit the Elantra Touring (wagon/hatchback).
Key Differences by Elantra Generation
To ensure you get the right part, identify your specific Elantra model year and body style first. The assemblies are not cross-compatible between these major groups.
2007-2010 Elantra (HD Generation)
Warning: These headlights fit 4-door sedan models ONLY. They are not compatible with the 2009-2012 Elantra Touring (wagon) models, which use a different assembly and bulb types.
- Vehicle: 2007-2010 Hyundai Elantra Sedan
- Headlight Type: All trims use reflector-style halogen headlights. No factory HID or LED options were offered.
- Bulb Types:
- Low Beam: H11B
- High Beam (Sedan): H1
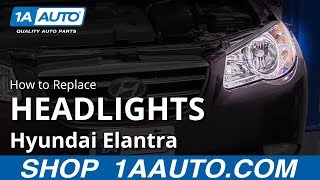
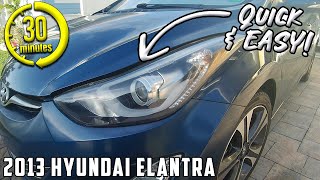
- Known OEM Part Numbers: 92101-2H050, 92101-2H051 (Left/Driver); 92102-2H050, 92102-2H051 (Right/Passenger) 🎬 Watch this step-by-step 2007-2010 Elantra headlight assembly replacement guide
2001-2006 Elantra (XD Generation)
This generation is split into two incompatible groups due to a 2004 model year facelift.
2004-2006 Elantra (Post-Facelift)
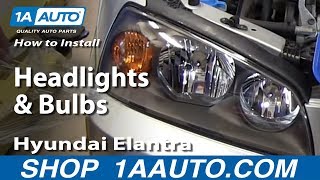
- Vehicle: 2004, 2005, 2006 Hyundai Elantra (Sedan and Hatchback)
- Headlight Type: Reflector-style halogen headlights.
- Bulb Types:
- Low Beam: H7
- High Beam: H1
- Known OEM Part Numbers: 92101-2D550, 92102-2D550
2001-2003 Elantra (Pre-Facelift)
- Vehicle: 2001, 2002, 2003 Hyundai Elantra (Sedan and Hatchback)
- Headlight Type: Reflector-style halogen headlights.
- Bulb Types:
- Low Beam: H7
- High Beam: H1
- Known OEM Part Numbers: 92101-2D120, 92101-2D150
Symptoms of a Failing Headlight Assembly
- Dim or Yellowed Lens: The most common failure is UV damage causing the polycarbonate lens to become hazy, cloudy, or yellow. This severely reduces light output and can be a safety hazard.
- Moisture or Condensation: Water droplets or fog inside the lens indicate a failed seal. This can lead to corrosion of the reflective surfaces and electrical connectors, and may cause bulbs to burn out prematurely.
- Cracked Housing or Lens: Physical damage from impacts or debris can break the assembly, allowing water in and compromising its structural integrity.
- Flickering or Inoperative Lights: While often a bulb issue, this can also be caused by a corroded bulb socket or a damaged internal wiring harness within the assembly.
- Loose Fit or Vibration: Broken or cracked mounting tabs will prevent the headlight from being secured properly, causing the light beam to vibrate or shake while driving.
Buying a Used Headlight Assembly: What to Inspect
A quality used OEM headlight is often superior to a cheap new aftermarket one in terms of beam pattern and durability. Here’s what to look for:
- Lens Clarity: Inspect the lens for deep crazing (a network of fine cracks), yellowing, and haziness. Minor surface hazing can often be polished out, but a deeply yellowed or crazed lens cannot be fully restored.
- Seal Integrity: Check for any signs of moisture inside the housing, like water lines or a foggy film on the interior of the lens. A compromised seal is the number one reason for premature failure.
- Mounting Tab Integrity: This is critical. Carefully inspect all mounting tabs and points where the assembly bolts to the car. Ensure none are cracked, broken off, or show signs of a shoddy plastic-weld or epoxy repair. A single broken tab can make the headlight impossible to secure and aim correctly.
- Housing and Connectors: Look for cracks in the black plastic housing itself. Check the electrical connector pins for any green or white corrosion, which indicates water damage.
- OEM Markings: Look for manufacturer markings like "Hyundai" or "Mobis" on the housing. OEM parts are built to a higher standard than many aftermarket alternatives, with better optics and more durable plastics.
Pro Tip: If one of your headlights is new or crystal clear and the other is hazy, it's best to replace them in pairs to ensure a matched appearance and balanced light output.
Known Issues, Recalls, and Service Bulletins
No specific recalls were found for headlight assemblies on the 2001-2010 Hyundai Elantra. However, some owners report issues with premature bulb burnout, which can sometimes be traced to a poor connection within the assembly's socket or a leak causing moisture damage. Condensation is a common complaint on many vehicles of this era; Hyundai even includes desiccant packs inside some newer headlight models to absorb moisture, highlighting the prevalence of this issue.
Replacement Overview
Replacing the headlight assembly on most Elantra models from this period is a straightforward DIY task, but often requires removing the front bumper cover to access all the mounting bolts.
- Disconnect the Battery: A good safety practice before working with any electrical components.
- Remove the Front Bumper Cover: This typically involves removing a series of clips and screws in the wheel wells, under the front edge, and on top near the radiator support.
- Unbolt the Headlight Assembly: With the bumper removed, you can access the 2-3 10mm bolts holding the assembly in place.
- Disconnect Wiring: Unplug the main electrical harness from the back of the assembly.
- Install the New Assembly: Bolt the new assembly in place, reconnect the wiring, and reinstall the bumper cover.
Aiming Your New Headlights (Required)
Warning: You MUST aim your headlights after installation. Failure to do so can result in poor visibility for you and dangerous glare for other drivers.
The basic procedure involves parking the car on a level surface 25 feet from a flat wall. The adjustment screws are on the back of the headlight housing. Use a Phillips screwdriver to turn them. 🎬 Watch how to adjust and aim your Elantra headlights properly One screw adjusts vertical (up/down) aim, and sometimes a second adjusts horizontal (left/right) aim. The goal is to have the brightest part of the beam's cutoff line slightly below the height of the center of your headlight lens.
Cost Comparison
| Part Type | Estimated Cost (per side) |
|---|---|
| New OEM | $250 - $360 |
| New Aftermarket | $60 - $130 |
| Used OEM | $50 - $100 |
| Shop Labor | $100 - $200 |
Frequently Asked Questions (FAQ)
Can I upgrade my halogen headlights to LED or HID?
While you can buy LED or HID bulbs that fit the H7, H1, or H11B sockets, it is generally not recommended for these vehicles. The halogen reflector housings are not designed for the light source of an LED or HID bulb, which can create a scattered, uncontrolled beam pattern that causes dangerous glare for oncoming traffic and poor visibility for you. A proper retrofit involves installing projector lenses, which is a much more complex and expensive process.
How can I fix condensation inside my headlight?
For minor condensation that appears in certain weather, you can try removing the dust caps on the back of the headlight on a warm, dry day to let the moisture evaporate. For persistent water buildup, the seal has failed. The best long-term solution is to replace the assembly. Some DIYers attempt to remove the assembly, dry it out with a hairdryer, and apply a new bead of butyl sealant around the lens, but this is a difficult repair with mixed results.
Will a headlight from a 2006 Elantra fit my 2003 Elantra?
No. The 2004-2006 Elantra received a facelift with a different front-end design. The headlights from a 2004-2006 model will not physically fit on a 2001-2003 model, or vice-versa.
Why is my new aftermarket headlight not as bright as the original?
The quality of aftermarket headlights can vary greatly. Cheaper units may use lower-quality reflectors and lenses that do not project light as effectively as the original OEM part. The beam pattern can be splotchy with poor distance, even if the lens is perfectly clear. This is a key reason why a good-condition used OEM part is often a better choice than a new, cheap aftermarket one.
Helpful Videos
Technical Specifications
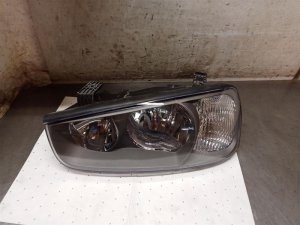
OEM Part Numbers: 92101-2D120 92101-2D150 92101-2H000 92101-2H010 92101-2H050 92101-2H051 92102-2D550 92102-2H050
Lighting Technology: Halogen Reflector
We Have This Part in Stock




The information in this article is provided for general reference and educational purposes only. Vehicle specifications, procedures, and part compatibility can vary by production date, trim level, and region. Always consult your vehicle's factory service manual and verify part numbers before purchasing or performing repairs. Safety-critical components such as airbags, seat belts, and braking systems should be installed by a qualified professional.
- Hyundai Elantra:
- 🎬 Helpful Videos
- 🛍️ Shop This Part
- Critical Compatibility Warnings: Read Before Buying
- Key Differences by Elantra Generation
- 2007-2010 Elantra (HD Generation)
- 2001-2006 Elantra (XD Generation)
- Symptoms of a Failing Headlight Assembly
- Buying a Used Headlight Assembly: What to Inspect
- Known Issues, Recalls, and Service Bulletins
- Replacement Overview
- Aiming Your New Headlights (Required)
- Cost Comparison
- Frequently Asked Questions (FAQ)
- 🎟️ Get 5% Off