

2012-2016 Honda CR-V Headlight Guide: Avoiding the 2015 Facelift Mismatch
A complete guide to the critical differences between 2012-2014 and 2015-2016 Honda CR-V headlight assemblies, including halogen types, LED DRLs, and part numbers.
- Headlights for 2012-2014 models are NOT interchangeable with 2015-2016 models due to a mid-generation facelift.
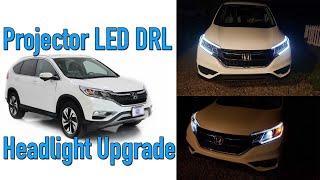
- For 2015-2016, LX trims have basic halogen lights, while EX, EX-L, SE, and Touring trims have halogen projectors with an integrated LED DRL strip.
- When buying a used assembly, the most critical inspection is for broken or repaired mounting tabs, as they are essential for a secure fit and proper aim.
- Replacement of the entire assembly requires removing the front bumper cover and aiming the new light after installation.
Headlight Variants: The Critical 2014 / 2015 Split

The single most important factor when replacing a 4th generation Honda CR-V headlight is the model year. The assembly was completely redesigned for the 2015 facelift, making the parts incompatible without major modifications. Buying the wrong year is a common and costly mistake.
2012-2014 Honda CR-V Headlights
For these pre-facelift models, all trim levels (LX, EX, EX-L) used the same headlight assembly. This simplifies purchasing.
- Lighting Type: Standard Halogen Reflector.
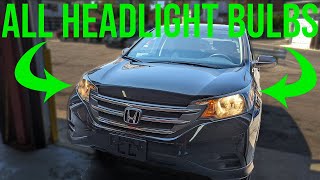
- Bulb Type: Uses a single, dual-filament 9003 / H4 / HB2 bulb for both the low and high beam functions.
- Appearance: A simpler, one-piece chrome reflector bowl design without any LED accents.
2015-2016 Honda CR-V Headlights
The 2015 facelift introduced two different types of halogen headlights, distinguished by trim level.
- LX Trim: This base model uses a standard halogen headlight without any LED accents.
- EX, EX-L, SE, and Touring Trims: These higher trims feature a halogen headlight that includes a distinctive LED Daytime Running Light (DRL) strip along the bottom edge. The low beam is a projector-style lens, offering a sharper cutoff than the earlier reflector style.
- Bulb Types (for EX, EX-L, etc.): Uses two separate bulbs: an H11 for the low beam projector and a 9005 for the high beam reflector.
Warning: The 2012-2014 (H4 bulb) and 2015-2016 (H11/9005 bulbs) assemblies are not interchangeable. They have different shapes, mounting points, and electrical connectors. Attempting to swap them requires changing the front bumper, grille, and custom wiring.
Symptoms of a Failing Headlight Assembly

Failure isn't always just a burned-out bulb. The entire assembly can degrade, leading to safety issues.
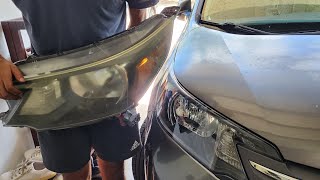
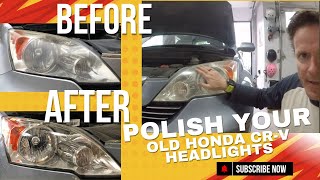
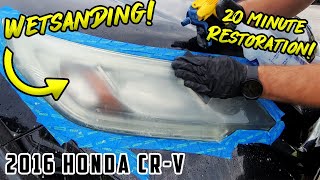
- Dim or Yellowed Lens (Hazing): The most common issue is UV damage to the outer polycarbonate lens. This causes oxidation that appears as a yellow, cloudy, or hazy surface, 🎬 Watch: How to restore hazy lenses by hand. significantly reducing light output and creating glare for oncoming drivers.
- Moisture or Condensation Inside: Finding a light fog inside the lens after a car wash or on a humid day can be normal, according to Honda TSBs 22-BD-002H and 19-BD-003H-1. However, if you see large water droplets, streaks, or water pooling at the bottom of the housing, the seal has failed, which can cause chronic bulb failure and corrosion of the reflective surfaces.
- Intermittent or Dead Low Beams: While often a bulb or fuse issue, some owners report intermittent low beam operation. This can sometimes be traced to a faulty connection at the bulb or a problem with the vehicle's combination switch.
- Poor Light Output: Many owners of 2012-2014 models complain about inherently dim headlights, even when the lenses are clear. This is a design characteristic of the reflector-style lights, not necessarily a failure.
- Physical Damage: Cracks in the lens or broken mounting tabs from a minor impact will cause the assembly to fail a safety inspection and can lead to moisture intrusion and improper headlight aim.
Buying a Used Headlight Assembly: What to Look For

A used OEM headlight is often a better choice than a cheap aftermarket part due to superior optics, beam pattern, and durability. Here’s how to inspect a used unit:
- Verify the Year and Trim: First, confirm you have the right part. Check for the LED DRL strip for 2015-2016 EX/EX-L/Touring models. The back of the housing should have part numbers molded into the plastic for verification.
- Inspect All Mounting Tabs: This is the most critical inspection point. The plastic tabs are brittle and often break during removal. Check every single tab and mounting point for cracks or previous repairs (epoxy, glue). A broken tab will prevent the headlight from being secured firmly, causing vibration and making proper aiming impossible.
- Check the Lens Condition: Look for deep scratches, stress cracks (fine, web-like cracks inside the plastic), and severe hazing. Minor hazing can be polished out, but deep internal crazing or cracks cannot.
- Look for Signs of Moisture: Check the inside of the lens and the chrome reflectors for any water lines, mineral deposits, or a chalky appearance. This indicates the seal has previously failed.
- Examine the Rear Housing and Vents: Ensure the black plastic housing has no cracks. Check that the small vent caps (usually gray or black rubber caps) are present and intact. These allow the headlight to breathe and release condensation; if they are missing, the light will quickly fill with moisture.
- Inspect Electrical Connectors: Look at the connector ports for any signs of corrosion, melted plastic, or bent pins.
Pro Tip: Honda knows the mounting tabs are a weak point. If you find a used headlight with a broken tab but is otherwise in great condition, Honda sells a 'Replacement Stay Kit' (Part # 06150-T0A-A21) specifically to repair certain broken mounting brackets on the back of the assembly.
Known Issues, Recalls, and TSBs
- No Headlight Recalls: There are no active recalls for the headlight assemblies on the 2012-2016 Honda CR-V. An earlier recall for low beam failure applied only to 2002-2004 models and is not relevant to this generation.
- TSB for Normal Condensation: Honda has released multiple Technical Service Bulletins (including 22-BD-002H) to inform technicians that a light fogging inside the lens is normal and should clear on its own by running the headlights. Assembly replacement is only recommended for pooling water or condensation that does not clear.
Replacement Overview
Replacing the headlight assembly is a feasible DIY project for those with moderate experience, but it is more involved than simply changing a bulb.
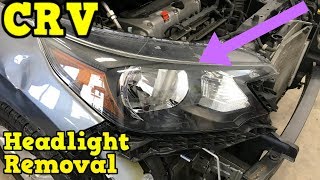
- Difficulty: 3/5. The main challenge is the required removal of the front bumper cover. 🎬 Watch: Step-by-step guide to removing the 2012-2014 headlight assembly.
- Tools Needed: Basic hand tools including a 10mm socket, Phillips screwdriver, and a plastic trim removal tool to release clips without scratching the paint.
- Process: The front bumper cover must be unclipped from the fenders and grille and removed. This provides access to the 10mm bolts and clips securing the headlight assembly. After swapping the electrical connectors and bulbs, the new assembly is bolted in, and the bumper is reinstalled.
- Aiming is Required: After installation, the headlights MUST be aimed. The beam height can be adjusted using a Phillips screwdriver on an adjustment screw located on the back of the assembly. Park the vehicle on a level surface facing a wall from 25 feet away and adjust the beam cutoff to the specified height.
Cost of Replacement
| Part Type | Estimated Cost (Per Side) |
|---|---|
| New OEM | $450 - $760 |
| New Aftermarket (CAPA Certified) | $110 - $300 |
| Used OEM | $125 - $250 |
| Shop Labor | $150 - $300 |
Frequently Asked Questions (FAQ)
Can I upgrade my 2013 CR-V to the 2015 style with the LED strip?
No, not without significant and expensive modifications. You would need to replace the front bumper cover, grille, and create custom wiring harnesses for the different bulb connectors and the LED DRL power source. It is not a plug-and-play swap.
Is this headlight a Halogen, HID, or LED assembly?
All factory headlights for the 2012-2016 CR-V are Halogen. None were offered with HID (Xenon) or full LED main beams from the factory. The 2015-2016 EX, EX-L, SE, and Touring models simply add an LED strip for the Daytime Running Light (DRL) function; the actual low and high beams are still halogen bulbs. These assemblies do not require an external ballast or igniter.
Do I need to get the headlights aimed after replacing one?
Yes, absolutely. Any time an assembly is unbolted and reinstalled, its aim will be affected. Improperly aimed headlights can be dangerous, either by failing to illuminate the road properly or by blinding oncoming drivers. Professional aiming is recommended, but it can be done at home by parking on a level surface 25 feet from a wall and adjusting the beam cutoff to the correct height.
Why did my low beam stop working but the high beam is fine?
This depends on your model year. On a 2012-2014 model, this is impossible if the bulb is the cause, as a single dual-filament H4 bulb produces both beams. If one beam is out, the bulb is bad. On a 2015-2016 model, the low (H11) and high (9005) beams are separate bulbs. In this case, the H11 low beam bulb has likely burned out. It could also be a specific fuse or relay for the low beam circuit.
Helpful Videos
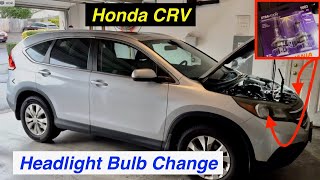
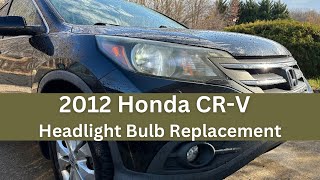
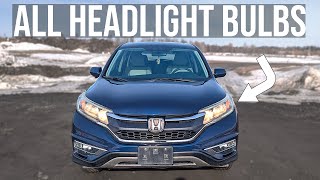
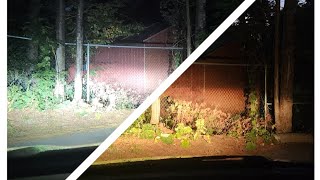
Technical Specifications
OEM Part Numbers: 33100-T0A-A01 33150-T0A-A01 33150-T1W-A01 33100-T1W-A11 06150-T0A-A21
Lighting Technology: Halogen 2012-2014 Bulb Type: 9003 / H4 / HB2 (Dual-filament for Low/High Beam) 2015-2016 Bulb Types (EX, EX-L, SE, Touring): H11 (Low Beam), 9005 (High Beam)
We Have This Part in Stock



The information in this article is provided for general reference and educational purposes only. Vehicle specifications, procedures, and part compatibility can vary by production date, trim level, and region. Always consult your vehicle's factory service manual and verify part numbers before purchasing or performing repairs. Safety-critical components such as airbags, seat belts, and braking systems should be installed by a qualified professional.
- Honda CR-V:
- 🎬 Helpful Videos
- 🛍️ Shop This Part
- Headlight Variants: The Critical 2014 / 2015 Split
- 2012-2014 Honda CR-V Headlights
- 2015-2016 Honda CR-V Headlights
- Symptoms of a Failing Headlight Assembly
- Buying a Used Headlight Assembly: What to Look For
- Known Issues, Recalls, and TSBs
- Replacement Overview
- Cost of Replacement
- Frequently Asked Questions (FAQ)
- 🎟️ Get 5% Off