

2006-2012 Honda Civic Headlight: A Guide to Generations, Body Styles, and Common Issues
This guide clarifies the critical differences between 8th Gen (2006-2011) and 9th Gen (2012) Civic headlights, ensuring you buy the correct part for your car.
- The 2006-2011 (8th Gen) and 2012 (9th Gen) Civic use completely different headlights that are not interchangeable.
- Within each generation, headlights for the 2-door Coupe and 4-door Sedan are also not interchangeable.
- When buying used, the most critical inspection points are the mounting tabs. Do not buy assemblies with broken or repaired tabs.
- All factory headlights for this period are halogen reflector types. Aftermarket HID or LED bulbs will not work correctly in the stock housing.
- Headlight aiming is mandatory after replacement to ensure safety and proper road illumination.
A Critical Warning: 2006-2011 vs. 2012

Warning: The most important thing to know is that the 2006-2012 Honda Civic spans two different vehicle generations. Headlight assemblies are NOT interchangeable between them.
- 8th Generation: 2006, 2007, 2008, 2009, 2010, 2011
- 9th Generation: 2012, 2013, 2014, 2015
A headlight for a 2012 Civic will not physically fit on a 2011 Civic, and vice-versa. You must order the correct part for your specific year.
8th Generation Honda Civic (2006-2011)

Variants and Compatibility
For the 8th generation, the primary compatibility difference is between the 2-door Coupe and the 4-door Sedan. The headlights have a different shape and mounting points and are not interchangeable. When buying a replacement, you must match it to your car's body style. There was a minor facelift for the 2009 model year, but the headlight assemblies remained physically interchangeable from 2006 through 2011, as long as you stick to the same body style (Coupe or Sedan).
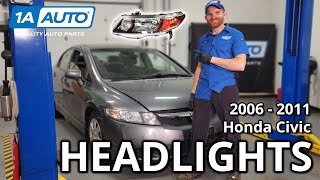
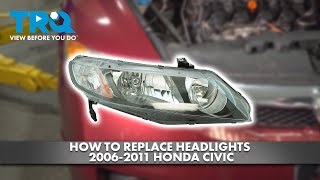
🎬 Watch: Step-by-step headlight replacement for 2006-2011 models.- Coupe Models (2006-2011): Use a specific headlight assembly.
- Sedan Models (2006-2011): Use a different, non-interchangeable headlight assembly.
Headlight Technology and Bulbs
All North American 8th generation Civics came from the factory with halogen reflector headlight assemblies. They do not require any external ballasts, igniters, or LED driver modules. The bulbs are common and readily available.
- Low Beam Bulb: 9006 (HB4)
- High Beam Bulb: 9005 (HB3)
- Front Turn Signal Bulb: 1157A (Amber)
9th Generation Honda Civic (2012)
Variants and Compatibility
The 2012 model year marked a complete redesign. Just like the previous generation, the Coupe and Sedan models have unique headlight assemblies that cannot be swapped. Furthermore, there are often different part numbers for Hybrid and non-Hybrid models, though the physical fitment is often the same. Always verify the part number for your specific trim.
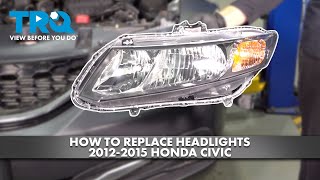
🎬 See this video for replacing the 2012-2015 headlight assembly.- 2012 Civic (All non-hybrid models): Part number 33100-TR0-A01 is a common example for the right-hand side.
- 2012 Civic Hybrid: Uses different part numbers, such as 33100-TR2-A01.
Headlight Technology and Bulbs
The 2012 Civic also used standard halogen reflector headlights. They are simple, reliable, and do not use complex ballasts or modules. The bulbs are standard types available at any auto parts store.
Symptoms of a Failing Headlight Assembly

Failure isn't always a burnt-out bulb. The entire assembly can degrade, causing safety issues.
- Dim or Yellowed Light Output: The most common issue is the plastic lens oxidizing from UV exposure. It becomes hazy, yellow, and cloudy, which severely restricts the amount of light passing through. This can make driving at night dangerous even with new bulbs.
- Moisture or Condensation Inside: If you see water droplets or fogging inside the lens that doesn't clear up, the factory seal has failed. This moisture will cause chrome reflectors to peel, corrode bulb sockets, and lead to premature bulb failure.
- Flickering Lights: While often a sign of a failing bulb, flickering can also be caused by a loose connection or corrosion in the bulb socket within the assembly.
- Frequent Blown Fuses or Bulbs: If bulbs burn out constantly on one side, it could point to an electrical issue within the assembly's wiring or a bad seal allowing moisture in.
- Physical Damage: Cracks in the lens or housing from road debris or minor impacts can compromise the seal, allowing moisture in and eventually leading to failure. Broken mounting tabs will cause the headlight to vibrate and make proper aiming impossible.
Known Issues, Recalls, and TSBs
There are no major recalls specifically for the headlight assemblies on 2006-2012 Honda Civics. However, a related recall is worth noting:
- NHTSA Recall 12V-136: This safety recall was for 2002-2003 Civics and 2004-2005 Pilots. A terminal in the headlight switch could overheat, causing the low-beam headlights to fail suddenly. While this recall does not cover the 2006-2012 models, an unexpected loss of low beams is a symptom owners should be aware of, as it could point to an issue with the combination switch on the steering column rather than the headlight assembly itself.
- Clear Coat Peeling: The most widely reported owner complaint for the 8th generation (2006-2011) is the factory clear coat on the top surface of the headlight lens peeling and flaking, leading to a hazy and degraded appearance.
Buying a Used Headlight Assembly: A Buyer's Checklist
Buying a used OEM headlight is an excellent way to save money while retaining factory quality, fit, and performance. However, you must inspect the part carefully.
- Confirm the Generation and Body Style: Double-check that the part is from the correct year range (06-11 or 2012) AND the correct body style (Coupe or Sedan). Bring a photo of your car's headlights to compare.
- Inspect All Mounting Tabs: This is the most critical inspection point. There are several plastic tabs used to bolt the assembly to the car. These are brittle and often break during removal. A single broken tab can cause the light to vibrate, fail inspection, and create an annoying rattle. Do not accept a part with broken or repaired tabs.
- Examine the Lens for Clarity: Look for hazing, yellowing, or peeling clear coat. Minor hazing can be polished out with a restoration kit, but deep yellowing or widespread peeling means the lens needs professional resurfacing or replacement.
- Check for Cracks: Inspect the entire lens and the black plastic housing for any cracks, no matter how small. A tiny crack will allow moisture in and ruin the headlight.
- Look for Internal Moisture Stains: Check the inside of the lens and the chrome reflector for a 'water line' or chalky white residue. This is a sure sign the seal has failed in the past, and the part should be avoided.
- Verify Harness and Sockets: Ensure the wiring pigtails and bulb sockets are present and free of corrosion. Green or white crusty buildup indicates water damage.
Cost Comparison
Prices for a single headlight assembly can vary widely. Here are typical cost ranges:
| Part Type | Price Range (per side) | Notes |
|---|---|---|
| New OEM | $275 - $470 | Highest quality, perfect fit, but most expensive. |
| New Aftermarket | $50 - $150 | Varying quality. May have different beam patterns or premature sealing issues. CAPA certified parts are recommended. |
| Used OEM | $75 - $200 | Excellent value. Offers OEM quality and fit at a lower price, but requires careful inspection. |
| Shop Labor | $100 - $300 | Replacement typically requires removing the front bumper cover, adding to the labor time. |
Replacement and Aiming

Replacing the headlight assembly on a 2006-2012 Civic is a feasible DIY project but requires some work. The front bumper cover must be partially or fully removed to access the lower bolts holding the assembly in place.
Pro Tip: After installation, you MUST aim the headlights. Failure to do so will result in a poor beam pattern that either doesn't illuminate the road properly or blinds oncoming drivers.
Simple Aiming Procedure:
- Park the car on a level surface, 25 feet away from a flat wall.
- Measure from the ground to the center of your headlight bulb. Mark this height on the wall with a horizontal line of tape.
- Turn on the low beams. The top of the bright cutoff line for each headlight should be about two inches below the tape line on the wall.
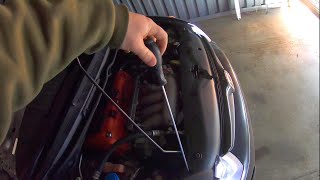
- On the back of the headlight assembly, you will find adjustment screws. On the 8th-gen Civic, there are markings indicating which way to turn the screw for 'Up' and 'Down' movement. Use a long Phillips screwdriver 🎬 Watch: A quick DIY guide to aiming your 8th gen headlights. to make the adjustments.
Frequently Asked Questions
Will a headlight from a 2011 Civic fit my 2012 Civic?
No. They are from two different generations of the Civic and have completely different shapes, sizes, and mounting points. They are not interchangeable.
Can I use a headlight from a Coupe on my Sedan?
No. Within the same generation, the Coupe and Sedan models have differently shaped headlights that are not compatible with each other.
How can I fix my cloudy or yellowed headlights?
For light to moderate hazing, you can use a headlight restoration kit. These kits involve sanding the damaged layer off the plastic lens and applying a new UV protective coating. For severe yellowing or peeling, or if you want a permanent solution, replacing the entire assembly is the best option.
Do I need to aim my headlights after replacing them?
Yes, absolutely. Any time a headlight assembly is removed and reinstalled, the alignment will be affected. Proper aiming is required for safety and is a simple procedure you can do at home with a tape measure and a screwdriver.
Why are my new LED bulbs not bright in my stock headlights?
The factory halogen headlight assemblies are designed with a reflector bowl that is optically matched to the specific size and position of a halogen bulb's filament. LED replacement bulbs have a different shape and light source, which results in an uncontrolled and scattered beam pattern. This creates glare for other drivers while putting less useful light on the road. For a true upgrade, a full projector headlight assembly designed for LEDs is required.
Helpful Videos

Technical Specifications
OEM Part Numbers: 33100-TR0-A01 33100-TR2-A01 33151-SVB-A01 33151-SNA-A02 33150-TR2-A01
Technology: Halogen Reflector. Bulbs (8th Gen): 9006 Low Beam, 9005 High Beam.
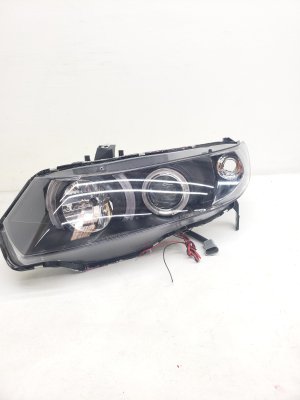
We Have This Part in Stock



The information in this article is provided for general reference and educational purposes only. Vehicle specifications, procedures, and part compatibility can vary by production date, trim level, and region. Always consult your vehicle's factory service manual and verify part numbers before purchasing or performing repairs. Safety-critical components such as airbags, seat belts, and braking systems should be installed by a qualified professional.
- HONDA Civic:
- 🎬 Helpful Videos
- 🛍️ Shop This Part
- A Critical Warning: 2006-2011 vs. 2012
- 8th Generation Honda Civic (2006-2011)
- Variants and Compatibility
- Headlight Technology and Bulbs
- 9th Generation Honda Civic (2012)
- Variants and Compatibility
- Headlight Technology and Bulbs
- Symptoms of a Failing Headlight Assembly
- Known Issues, Recalls, and TSBs
- Buying a Used Headlight Assembly: A Buyer's Checklist
- Cost Comparison
- Replacement and Aiming
- Frequently Asked Questions
- 🎟️ Get 5% Off