

2011-2019 Ford Explorer Headlight Guide: Solving Issues with Halogen, HID, and LED Types
This guide covers the critical differences between headlight types, common failures like moisture and burnout, and how to choose the correct used assembly for your 2011-2019 Ford Explorer.
- Crucially, you must identify if your Explorer has Halogen, HID/Xenon, or LED headlights before buying a replacement; they are not interchangeable.
- Moisture inside the lens is a major problem that can destroy expensive HID ballasts or LED driver modules. Inspect used parts carefully for signs of water intrusion.
- Replacement requires partially removing the front bumper cover, making it a more involved job than on many other vehicles.
- Always inspect all mounting tabs on a used assembly. Broken tabs are common and will prevent the light from being aimed correctly.
Variant Differences: Halogen vs. HID vs. LED

One of the biggest challenges when replacing a headlight on a 2011-2019 Ford Explorer is identifying the correct type for your specific vehicle. Ford offered three different, non-interchangeable headlight technologies across various trims and model years. Installing the wrong type will result in connectors that don't match, improper function, and potential electrical system damage.
- Halogen Headlights: Found on most Base and XLT models, these are the most common type. They use a standard halogen bulb (typically type 9005 for both high and low beams in a single capsule, or H11 for low and 9005 for high on later models) inside a reflector or simple projector housing. They produce a yellowish-white light and are the least expensive to replace.
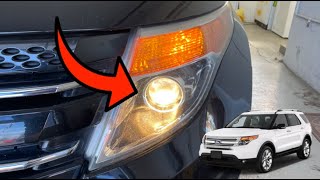
- High-Intensity Discharge (HID/Xenon): Standard on many Limited, Sport, and Platinum trims from 2011-2015, and some later models. These use a D3S bulb, an igniter, and a ballast to create a very bright, bluish-white light. The ballast, a small metal box usually mounted to the bottom of the headlight housing, is required to provide the high voltage these bulbs need. You cannot put an HID bulb in a halogen housing or vice-versa without extensive modification.
- LED Headlights: Became common on higher trims (Limited, Platinum) from 2016-2019. These assemblies often feature a signature C-shaped LED accent light. The main lighting is produced by integrated LED modules that are not designed to be serviced separately from the assembly. These units require a specific LED driver module, which functions similarly to an HID ballast. The 2018-2019 models in particular have a distinct full-LED version for XLT, Limited, and Platinum trims.
Warning: The wiring harnesses and control modules for Halogen, HID, and LED headlights are different. They are not plug-and-play. Attempting to 'upgrade' from halogen to factory LED, for example, requires a new wiring harness and potentially reprogramming the vehicle's Body Control Module (BCM).
Known Issues, Recalls, and TSBs

While generally reliable, these headlight assemblies have several well-documented issues.
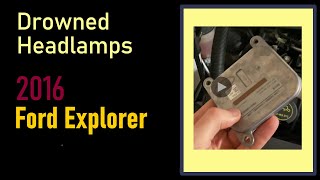
- Moisture and Condensation: This is the most common complaint, especially for the 2016+ models with LED lights. Seals around the lens can fail, or vent caps can be improperly installed, allowing moisture inside after a car wash or heavy rain. While Ford states that a fine mist that clears within 48 hours can be normal, any large droplets, streaks, or standing water is a defect. This moisture can short out and corrode the expensive HID ballasts or LED driver modules located at the bottom of the housing.
- Headlights Turn Off While Driving (TSB 14-0109): Some 2011-2014 Explorers may experience the low beams suddenly turning off. This was traced to fatigue-cracked solder joints in the Light Control Module (LCM). Ford issued a technical service bulletin to address this. A related recall (15V861) was also issued for this problem, with the fix being the installation of an LCM bypass module.
- Premature Bulb Burnout: Often caused by moisture inside the housing or touching the new bulb's glass with bare hands during installation, which leaves oils that create hot spots.
- Recall for Glare (NHTSA 20V435000): On some 2011-2017 models, the low beams were found to be too bright, causing glare for oncoming traffic. The remedy was a software update performed by the dealer.
Pro Tip: On 2016+ LED headlights, there are ventilation tabs on the back of the unit. Some owners report that ensuring these tabs are removed or punctured allows the headlight to 'breathe' properly, reducing condensation issues.
🎬 See how to fix excessive moisture in your headlight unitBuying a Used Headlight Assembly: What to Inspect

A used OEM headlight is often a better choice than a cheap aftermarket one due to superior beam pattern, fit, and material quality. However, careful inspection is key.
- Verify the Type: First, confirm if your Explorer needs a Halogen, HID, or LED unit. Look for markings on your existing light, check your owner's manual, or identify features like the bright white HID light or the C-shaped LED strip on 2016+ models.
- Check All Mounting Tabs: The plastic mounting tabs are brittle and often break during removal. Pay close attention to the upper tabs and the one on the side near the fender. A broken tab will cause the headlight to vibrate, leading to a shaky beam and failed alignment.
- Inspect the Lens: Look for a clear lens. A light, hazy, or yellowed surface can often be restored with a polishing kit. However, avoid lenses with deep internal crazing (a web of tiny cracks), deep rock chips, or cracks that go all the way through, as these cannot be repaired and will allow moisture in.
- Look for Signs of Moisture: Check for a 'water line' or dried mineral deposits inside the lens. This is a clear sign the seal has failed, and the internal electronics may have been damaged.
- Confirm Included Components: Ask if the assembly includes bulbs, dust covers, and most importantly, the HID ballast or LED driver module. These modules can cost hundreds of dollars on their own, so an assembly that includes them is a much better value.
Replacement and Alignment
Replacing the headlight assembly on a 2011-2019 Explorer is a moderately difficult job for a DIYer, primarily because it requires partially removing the front bumper cover.
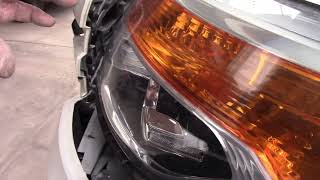
🎬 Watch: Step-by-step guide to removing the headlight assemblyBasic Replacement Steps:
- Partially remove the front bumper cover by taking out screws in the wheel wells, under the front edge, and on top under the hood.
- Gently pull the sides of the bumper cover away from the vehicle to access the headlight bolts.
- Remove the bolts securing the headlight assembly to the frame (typically two on top and one or two on the side/bottom).
- Pull the assembly forward and disconnect the main electrical connector.
- Installation is the reverse of removal. Be careful to align the new assembly with its mounting pegs before tightening bolts.
Required Headlight Aiming
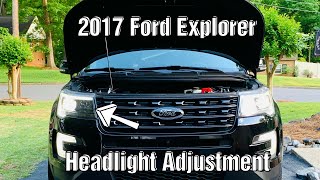
After replacing a headlight assembly, you must check and adjust the aim. Misaligned headlights can dangerously blind other drivers or fail to illuminate the road properly.
How to Aim:
- Park the vehicle on a level surface about 25 feet away from a flat wall or garage door.
- Turn on the low beams. You will see a distinct cutoff line in the beam pattern on the wall.
- Locate the adjustment screw on the back of the headlight assembly. It's typically a white, gear-like plastic screw accessible with a long Phillips head screwdriver through a hole in the top support. 🎬 Watch: How to properly adjust and aim your headlights
- Turn the screw to raise or lower the beam. The top of the beam's intense cutoff zone should be level with or slightly below the center-height of the headlight bulb itself.
Cost Breakdown
| Part Type | Estimated Cost |
|---|---|
| New OEM | $400 - $1,400+ (Halogen is cheaper, LED is most expensive) |
| New Aftermarket | $150 - $500 |
| Used OEM | $100 - $800 (Condition and type dependent) |
| Shop Labor | $200 - $400 (due to bumper removal) |
Frequently Asked Questions
Can I upgrade my halogen headlights to the factory LED or HID lights?
This is not a simple plug-and-play swap. It is a complex and expensive conversion that requires different headlight assemblies, new wiring harnesses, and reprogramming the vehicle's computer. For most owners, it is not a practical or cost-effective modification.
What bulb does my 2011-2019 Explorer take?
It varies significantly. Early halogen models often used a single 9005 bulb. Later halogen models used an H11 for the low beam and a 9005 for the high beam. Factory HID models use a D3S bulb. Factory LED models have integrated, non-replaceable LED modules. Always check your owner's manual or the old bulb to be certain.
My headlight is flickering or works intermittently. What's the cause?
For HID headlights, this is a classic symptom of a failing ballast or igniter. For halogen lights, it could be a loose connection, a failing bulb, or the LCM issue described in TSB 14-0109. For LED lights, it likely points to a failing driver module or moisture in the housing.
Is it okay to just replace the hazy lens?
Replacing just the lens is not recommended. Headlight assemblies are factory-sealed to keep moisture out. Breaking this seal to replace a lens is very difficult and often results in a leaky headlight that will suffer from chronic condensation and electrical problems. It is better to replace the entire assembly.
Helpful Videos
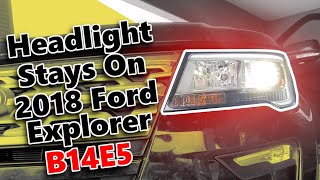
Technical Specifications
OEM Part Numbers: BB5Z-13008-B BB5Z-13008-N DB5Z-13008-A DB5Z13008A JB5Z-13008-K FB5Z-13008-B
Bulb Types: Halogen (9005, H11), HID (D3S), LED (Integrated Module).
We Have This Part in Stock



The information in this article is provided for general reference and educational purposes only. Vehicle specifications, procedures, and part compatibility can vary by production date, trim level, and region. Always consult your vehicle's factory service manual and verify part numbers before purchasing or performing repairs. Safety-critical components such as airbags, seat belts, and braking systems should be installed by a qualified professional.
- Ford Explorer: