

1991-1996 Ford Escort & Mercury Tracer Headlight: Solving Dimness, Hazing, and Moisture Issues
This definitive guide covers common failures, inspection tips for buying a used assembly, and the correct procedure for replacement and aiming.
- The most common issue is dim light output caused by hazy lenses and/or corroded wiring; restoring the lens and checking grounds can significantly improve brightness.
- When buying a used assembly, the integrity of the plastic mounting tabs is the most important factor to inspect.
- This assembly uses a single 9004 halogen bulb for both low and high beams; do not use aftermarket LED or HID bulbs in the stock housing.
- Aiming the headlights after installation is not optional; it is a critical safety step that must be performed.
Headlight Technology in the 1991-1996 Escort
The second-generation Ford Escort and its sibling, the Mercury Tracer, are equipped with composite halogen headlights. This was a significant upgrade from the sealed-beam headlights common on cars from the 1980s and earlier. Here’s what that means:
- Composite Design: The assembly consists of a durable plastic housing, a clear polycarbonate lens, and a reflector bowl, all built as one unit. This allows for more aerodynamic and model-specific styling compared to the generic round or rectangular sealed beams.
- Halogen Bulb: These headlights use a replaceable 9004 (also known as HB1) dual-filament halogen bulb. This single bulb contains two filaments—one for the low beam and one for the high beam. When you switch between them, you are simply activating a different filament inside the same bulb.
- No Special Modules: As a simple halogen system, it does not require any external ballasts, igniters, or LED driver modules found on modern HID/Xenon or LED headlights. Power is supplied directly from the vehicle's electrical system through a relay and the headlight switch.
Symptoms of a Failing Headlight Assembly
Problems with these headlights are rarely sudden. They typically degrade over time. Here are the most common symptoms:
- Dim or Yellow Light Output: This is the most frequent complaint. Over time, the polycarbonate lens is damaged by UV rays from the sun, causing it to become hazy, yellow, and cloudy. This oxidation on the lens surface scatters and absorbs light, drastically reducing visibility at night.
- Moisture or Condensation Inside: Finding water droplets or a foggy appearance inside the lens means the factory seal between the lens and the housing has failed. This moisture can cause the reflective chrome inside to peel, short out the bulb connector, and lead to chronic bulb failure.
- Cracked Lens or Housing: Physical damage from road debris or minor impacts can crack the lens or break the housing. A cracked lens will allow moisture in and can create a distracting glare for other drivers.
- Vibrating or Shaky Beam: If the light beam shakes or vibrates, especially when driving over bumps, it's a sure sign that one or more of the plastic mounting tabs on the assembly are broken.
- Headlights Don't Work at All: If a new bulb doesn't fix the problem, the issue could be corrosion in the bulb socket, a bad ground wire near the headlight, or a larger electrical issue like a failed relay or a problem in the multifunction switch on the steering column.
Known Issues, Recalls, and Technical Service Bulletins (TSBs)
For vehicles of this age, formal manufacturer campaigns are rare. Searches of the National Highway Traffic Safety Administration (NHTSA) database show no specific recalls for the headlight assemblies on the 1991-1996 Ford Escort. However, the platform has several well-documented, age-related issues:
- Wiring and Connector Corrosion: After decades of exposure to heat and moisture, the wiring and connectors for the headlight bulb can become brittle and corroded. This increases electrical resistance, which further dims the bulb and can eventually cause the connector to melt.
- Poor Grounds: Many owners have traced dim light issues to a corroded main ground wire for the headlight circuit. Cleaning the ground connection point on the chassis can often restore brightness.
- Fuse Box Problems: Some Escort models have experienced issues with dry or cracked solder joints within the main fuse/relay box, which can cause an intermittent loss of power to the headlights.
Warning: Do not install "plug-and-play" LED or HID bulbs into the original halogen housing. The reflector bowl is specifically designed for the size and position of a halogen filament. Using a different type of light source will result in an uncontrolled, scattered beam pattern that creates dangerous glare for oncoming drivers and often produces less usable light on the road, despite appearing brighter up close.
Buying a Used Headlight Assembly: What to Look For
A high-quality used OEM headlight is often a better choice than a cheap aftermarket replacement. OEM units generally have better optics, superior lens coatings, and a more precise fit. Here’s how to inspect a used assembly:
- Check All Mounting Tabs: This is the most critical inspection point. Carefully examine every plastic tab and mounting point around the perimeter of the housing. They should be intact, with no cracks or signs of being repaired with glue or epoxy. Even one broken tab can cause the headlight to vibrate and make proper aiming impossible.
- Inspect the Lens Condition: Distinguish between surface hazing and deep damage. Light, uniform yellowing or cloudiness on the surface can usually be polished clear with a headlight restoration kit. However, avoid lenses with deep crazing (a network of tiny cracks), flaking clear coats, or deep rock chips, as this damage is permanent.
- Look for Signs of Moisture: Check inside the lens for a "tide line," mineral deposits, or peeling of the chrome reflector. These are all signs that the assembly has had a water leak. A leaky headlight will be a constant source of problems.
- Examine the Bulb Connector: Look at the plastic connector where the 9004 bulb plugs in. Check for any signs of melting, discoloration, or green/white corrosion on the metal terminals. A damaged connector will need to be replaced.
- Verify the Side and Part Number: Confirm you are buying the correct side (LH for Driver, RH for Passenger). The Partslink numbers FO2502116 (Left) and FO2503113 (Right) are industry standards for this part.
Cost Comparison
Pricing can vary, but this provides a general expectation for the cost of the assembly itself.
| Part Type | Estimated Cost (per side) | Notes |
|---|---|---|
| New OEM | N/A | This part is generally discontinued and no longer available to purchase new from Ford. |
| New Aftermarket | $30 - $65 | Prices vary by brand and retailer. Fit and optical quality may not match OEM standards. |
| Used OEM | $40 - $75 | Offers the best fit and performance, provided it's in good condition. Price depends on condition and seller. |
Replacement and Alignment Guide
Step-by-Step Replacement Overview
Replacing the headlight assembly on a 1991-1996 Escort is a straightforward job suitable for a DIYer with basic tools. While specific steps may vary slightly by year, the general process is as follows:
- Open the hood to gain access to the back of the headlight assembly.
- Disconnect the electrical connector from the back of the 9004 bulb.
- The corner lamp (turn signal) is a separate unit. It may need to be removed first to access all of the headlight's mounting bolts.
- Locate and remove the bolts or nuts (typically 10mm) that secure the headlight assembly to the radiator support frame.
- Carefully pull the old assembly forward and out of the vehicle.
- Install the new assembly, ensuring all mounting tabs line up correctly. Re-install the bolts.
- Reconnect the electrical connector. Test the low and high beams before proceeding.
- Crucially, you must now aim the new headlight.
Headlight Aiming is Required
Pro Tip: Never skip the aiming step. A new headlight, even an identical OEM part, will not be perfectly aimed after installation. Improperly aimed headlights can blind other drivers or fail to illuminate the road adequately.
The procedure is simple and requires only a level surface, a wall, a tape measure, and a Phillips #2 screwdriver.
- Park the car on a level surface, exactly 25 feet from a flat, vertical wall (like a garage door). Ensure tire pressures are correct.
- Measure the distance from the ground to the center of the headlight lens.
- On the wall, make a horizontal line with tape at that exact height.
- Turn on the low beams. Cover one headlight with a towel or cardboard to isolate the beam of the one you are adjusting.
- The top of the bright, horizontal cutoff of the light beam should be exactly on or just slightly below your tape line on the wall.
- Locate the vertical adjustment screw on the back of the headlight assembly. Turn this screw with the Phillips screwdriver to raise or lower the beam until it is correctly aligned with the tape line.
- Uncover the adjusted headlight, cover the other one, and repeat the process.
Frequently Asked Questions (FAQ)
What headlight bulb does the 1991-1996 Escort use?
It uses a single 9004 / HB1 dual-filament bulb for both the low and high beams.
Are the headlights from a Mercury Tracer the same?
Yes, the headlight assemblies from the 1991-1996 Mercury Tracer are physically identical and directly interchangeable with the Ford Escort of the same years.
Is the corner turn signal lamp part of the headlight assembly?
No, the amber park and turn signal lamp that mounts next to the headlight is a separate part and is sold individually.
How can I fix my cloudy, yellow headlights?
For surface-level hazing and yellowing, a quality headlight restoration kit that involves sanding and polishing can be very effective. These kits can restore clarity for a fraction of the cost of a new assembly. However, if the damage is internal or the lens is cracked, the entire assembly must be replaced.
Technical Specifications & Part Numbers
| Specification | Value |
|---|---|
| Vehicle Fitment | 1991, 1992, 1993, 1994, 1995, 1996 Ford Escort & Mercury Tracer |
| Technology | Composite Halogen |
| Bulb Type | 9004 / HB1 (Low & High Beam) |
| OEM Part Number (Right / Passenger) | F1CZ-13008-A, F1CZ13008A |
| OEM Part Number (Left / Driver) | F1CZ-13008-B, F1CZ13008B |
| Partslink Number (Right / Passenger) | FO2503113 |
| Partslink Number (Left / Driver) | FO2502116 |
Technical Specifications
OEM Part Numbers: F1CZ-13008-A F1CZ13008A F1CZ-13008-B F1CZ13008B
Partslink (Left): FO2502116. Partslink (Right): FO2503113. Bulb Type: 9004 / HB1 Halogen.
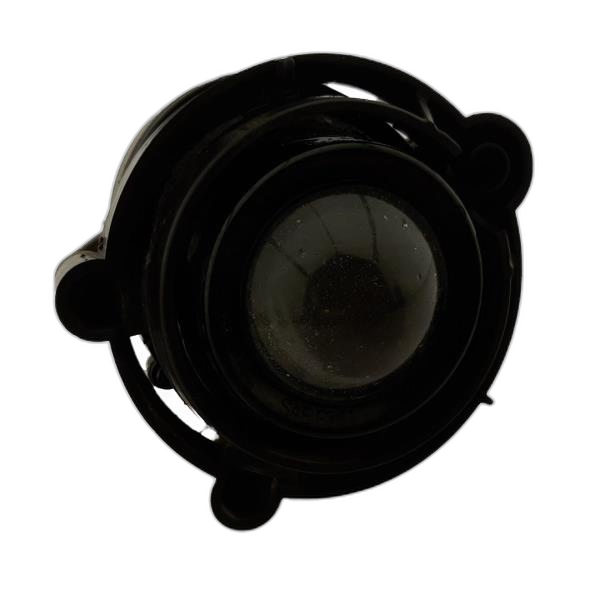
We Have This Part in Stock




The information in this article is provided for general reference and educational purposes only. Vehicle specifications, procedures, and part compatibility can vary by production date, trim level, and region. Always consult your vehicle's factory service manual and verify part numbers before purchasing or performing repairs. Safety-critical components such as airbags, seat belts, and braking systems should be installed by a qualified professional.
- Ford Escort:
- 🛍️ Shop This Part
- Headlight Technology in the 1991-1996 Escort
- Symptoms of a Failing Headlight Assembly
- Known Issues, Recalls, and Technical Service Bulletins (TSBs)
- Buying a Used Headlight Assembly: What to Look For
- Cost Comparison
- Replacement and Alignment Guide
- Step-by-Step Replacement Overview
- Headlight Aiming is Required
- Frequently Asked Questions (FAQ)
- Technical Specifications & Part Numbers
- 🎟️ Get 5% Off