

1993-1995 Chrysler Concorde & Eagle Vision Headlight Assembly: A Buyer's & DIY Guide
This guide covers common failures, replacement, and what to look for when buying a used OEM headlight assembly for your 1993-1995 Chrysler Concorde or Eagle Vision.
- This assembly fits both the 1993-1995 Chrysler Concorde and Eagle Vision.
- The primary cause of dim lights is a hazy, oxidized lens, not necessarily the bulb. Inspect lens clarity carefully when buying used.
- These are halogen assemblies using a 9007 bulb. Do not install LED or HID bulbs in them as it creates an unsafe beam pattern.
- No recalls were issued for the headlight assemblies themselves, but electrical issues may be linked to the main headlight switch, not the assembly.
Part Function and Type
The headlight assembly on the 1993-1995 Chrysler Concorde and Eagle Vision is a complete housing that includes the outer polycarbonate lens, the internal chrome reflectors, and the mounting points for the bulbs. These vehicles came from the factory with a single type of headlight technology: halogen.
This assembly uses a single 9007 dual-filament halogen bulb for both the low and high beams. A dual-filament bulb contains two separate filaments within the glass capsule; one illuminates for the low beam, and the other, positioned differently, activates for the high beam. This design is simple, cost-effective, and was the standard for most vehicles of this era.
Warning: These halogen assemblies are NOT compatible with modern HID/Xenon or LED bulbs without significant modification. Placing an LED or HID bulb into a halogen reflector housing will create an improper and dangerous beam pattern, scattering light and blinding other drivers while providing poor visibility for you. Upgrading requires a complete projector retrofit, which is a custom job.
Symptoms of Failure
A failing headlight assembly can present several symptoms, ranging from cosmetic flaws to critical safety issues.
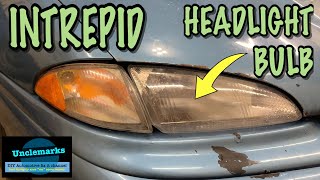
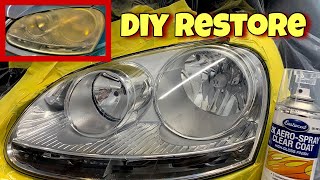
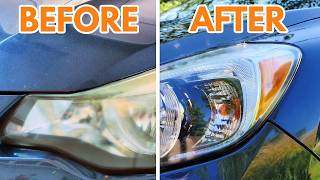
- Dim or Yellowed Output: The most common issue is the outer polycarbonate lens becoming hazy, cloudy, or yellowed from years of UV exposure and road debris. This oxidation significantly reduces the amount of light that can pass through, making your headlights appear dim even with new bulbs.
- Moisture or Condensation Inside: If the seal between the lens and the rear housing fails, moisture can get inside. This can cause condensation to form on the inside of the lens, which not only looks bad but can also short out bulbs and damage the reflective chrome coating over time.
- Burned Out Bulbs: While bulbs are a normal wear item, frequent or repeated bulb failure on one side can point to a bad electrical connection or moisture inside the assembly.
- Flickering Lights: If your headlights flicker, the issue could be a loose bulb, a corroded connector, or a problem with the vehicle's main headlight switch, which was a known issue on some Chrysler products of this era.
- Physical Damage: Cracks in the lens or broken mounting tabs from a minor impact are a common reason for replacement. A cracked lens will allow moisture in, and broken tabs will cause the headlight to vibrate or be improperly aimed.
Known Issues, Recalls, and TSBs
For the 1993-1995 model years, there are no specific NHTSA recalls or Technical Service Bulletins (TSBs) related to the headlight assemblies themselves. Most complaints from this era were related to other vehicle systems.
However, owners on forums have noted a few common experiences:
- Headlight-Off Delay: These vehicles feature a "delay off" function that keeps the headlights on for a short period after the ignition is turned off. This is a normal feature designed to light your path as you walk away from the car. It is not a fault. To bypass it, simply turn the headlight switch to the "off" position before shutting off the engine.
- Flickering or Inoperative Headlights: Some owners have experienced headlights that flicker or won't turn on. While this could be a bulb or assembly issue, it is often traced back to a failing main headlight switch on the dashboard, which contains an internal circuit breaker that can wear out.
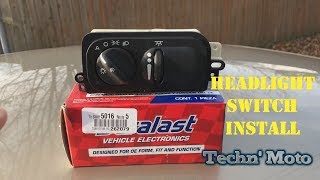
Pro Tip: Before replacing a headlight assembly for an electrical issue, always check the bulb, the fuse, and the wiring connector for corrosion. If those are fine, investigate the main headlight switch 🎬 See how to replace a faulty main headlight switch. as a potential cause.
Buying a Used Headlight Assembly
Given the age of these vehicles, a used OEM assembly is often the most practical and cost-effective option. Here’s what to inspect carefully:
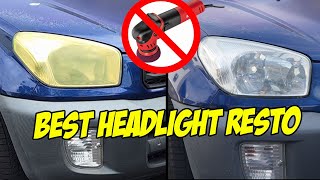
- Lens Clarity: This is the most important factor. Look for a clear, bright lens. Minor hazing can sometimes be polished out with a headlight restoration kit, but 🎬 Watch a pro demonstrate the best headlight restoration method. heavy, deep yellowing or internal cloudiness cannot be fixed. Avoid lenses with deep pitting or a sandblasted appearance.
- Mounting Tabs: Carefully inspect all mounting tabs and brackets. These are plastic and become brittle with age. Ensure none are cracked, broken, or have been poorly repaired. A headlight with a broken tab will never aim correctly and will vibrate while driving.
- Housing Integrity: Check the rear black plastic housing for any cracks or holes, especially around the seams and where the bulb sockets twist in. This can indicate past impact damage and will lead to moisture problems.
- Reflector Condition: Look inside the lens at the chrome reflector bowl. It should be bright and shiny. Avoid any assembly where the chrome is peeling, flaking, or looks burnt. Damaged reflector surfaces will ruin the beam pattern.
- Seals and Sockets: Check that the rubber gasket for the main bulb is present and pliable. Ensure the wiring pigtail and connector (if included) are not corroded or melted.
Replacement Overview
Replacing the headlight assembly on a Chrysler Concorde or Eagle Vision is a manageable DIY task for someone with basic tools. While the exact steps can vary slightly, the general process is as follows:
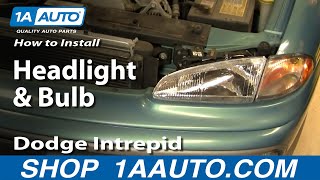
🎬 Watch this step-by-step guide on replacing the headlight assembly.- Disconnect the Battery: Always disconnect the negative battery terminal before working on any electrical components.
- Access the Fasteners: You will likely need to remove the front grille and possibly loosen the upper fasteners of the front bumper cover to gain access to all the headlight assembly bolts.
- Remove Bolts: The assembly is typically held in by several bolts, usually with 10mm heads. There are often two or three on top and one or two on the side.
- Disconnect Wiring: Once the assembly is loose, carefully pull it forward to access the back. Unplug the main wiring harness connector from the bulb.
- Installation and Aiming: Installation is the reverse of removal. After installing the new assembly, you must aim the headlights to ensure they are compliant and safe.
Headlight Aiming
Proper aiming is critical for safety. An improperly aimed headlight can blind other drivers or fail to illuminate the road adequately.
The general procedure is to park the car on a level surface 25 feet away from a flat wall. Measure the height from the ground to the small dot or crosshair symbol in the center of your headlight lens. On the wall, draw a horizontal line at that same height. The top edge of your low beam's bright "cutoff" line should be at or just slightly below this line. Adjusters, typically Phillips or Torx screws, are located on the back of the headlight housing for vertical and sometimes horizontal adjustments.
Cost Breakdown
| Part Type | Estimated Price Range | Notes |
|---|---|---|
| New OEM | $110 - $150+ (If found) | Mostly discontinued. Prices reflect remaining new-old-stock from dealer parts sites. |
| New Aftermarket | $35 - $75 | Widely available from online retailers. Quality can vary significantly. |
| Used OEM | $40 - $95 | A good value if you can find one in excellent condition. Prices vary based on condition and source. |
| Shop Labor | $75 - $150 | Typically 0.5 to 1.0 hour of labor for replacement, plus time for aiming. |
Technical Specifications & Part Numbers
- Light Source: Halogen, Reflector Style
- Bulb Type (High & Low Beam): 9007 / HB5 (Dual Filament)
- OEM Part Numbers (Verified):
- Left (Driver Side): 4601345
- Right (Passenger Side): 4762059
Part Number Warning: The Mopar parts catalog can be confusing for this era. Part number 4746437 is sometimes listed for the right side but is often shown as discontinued. Some aftermarket catalogs incorrectly cross-reference 4762059 to the left side. Always confirm the side by looking at photos or the physical part before purchasing.
Frequently Asked Questions (FAQ)
Do I need to replace the whole assembly if my bulb burns out?
No. The 9007 bulb is designed to be replaced separately. You only need to replace the entire assembly if the lens is hazy, cracked, or has internal moisture or reflector damage.
Are the headlights for the Chrysler Concorde and Eagle Vision the same?
Yes, for the 1993-1995 model years, the headlight assemblies are identical and interchangeable between the Chrysler Concorde and the Eagle Vision.
Why are my new bulbs still dim?
If you've installed new, quality halogen bulbs and your light output is still poor, the problem is almost certainly the headlight lens itself. Years of UV damage cause the polycarbonate to oxidize and turn hazy, which blocks light. The only solutions are to attempt a multi-stage polish with a restoration kit or replace the assembly.
Can I install brighter LED bulbs in my stock headlights?
It is strongly advised not to. The reflector inside the stock assembly is engineered specifically for the size and position of a halogen filament. An LED bulb's light source is different, and when placed in a halogen housing, it scatters light uncontrollably, creating glare for other drivers and often resulting in less focused light on the road for you. For a safe and effective upgrade, a proper projector retrofit is required.
Helpful Videos
Technical Specifications
OEM Part Numbers: 4601345 (Left) 4762059 (Right) 4746437 (Right, Discontinued)
Headlight Type: Halogen Reflector Bulb Type: 9007 / HB5 (Dual Filament High/Low Beam)
We Have This Part in Stock


The information in this article is provided for general reference and educational purposes only. Vehicle specifications, procedures, and part compatibility can vary by production date, trim level, and region. Always consult your vehicle's factory service manual and verify part numbers before purchasing or performing repairs. Safety-critical components such as airbags, seat belts, and braking systems should be installed by a qualified professional.
- Chrysler Concorde:
- Eagle Vision: