

1987-1990 Saab 900 Headlamp: Slope-Nose Fitment and Brittle Adjusters
This guide covers the unique composite headlights on the 1987-1990 'slope-nose' Saab 900, focusing on common failures and how to inspect a used assembly.
- Only fits 1987-1990 'slope-nose' models; pre-1987 'flat-nose' lights are not compatible.
- The most common failure is not the bulb, but brittle internal plastic adjusters that cause a 'floppy' headlight.
- When buying used, the condition of the internal silver reflector is the most critical factor for light output.
- Upgrading to LED or HID bulbs in the original halogen housing is not recommended due to improper beam patterns and glare.
The Critical 1987 'Slope-Nose' Headlight Change

The most important thing to understand about the 1987-1990 Saab 900 headlamp is that it only fits models with the updated 'slope-nose' or 'slant-nose' front end. In 1987, Saab restyled the 900, moving away from the classic 'flat-nose' design. This change also meant a switch in headlight technology.
- Pre-1987 'Flat-Nose': Used sealed beam headlights. The bulb, reflector, and lens were one integrated unit. When the filament burned out, you replaced the entire unit.
- 1987-1990 'Slope-Nose': Uses a composite headlamp assembly. This features a durable glass lens and a separate, replaceable 9004-type halogen bulb. This design allows for bulb replacement without changing the entire assembly.
Warning: Headlights from a pre-1987 'flat-nose' Saab 900 are not physically or electrically compatible with the 1987-1990 'slope-nose' models. Always verify your vehicle's body style before purchasing.
Symptoms of a Failing Headlamp Assembly

Failure in these assemblies is rarely about the bulb itself. More often, it's the housing and its components that degrade over time. Look for these signs:
- Dim or Poor Light Output: Even with a new bulb, the light may seem weak. This is almost always caused by the silver reflective coating inside the assembly peeling, hazing, or burning.
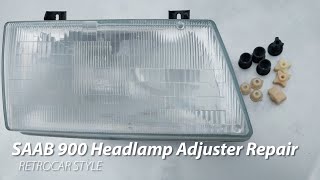
- 'Floppy' or Vibrating Headlight: If your headlight beam shakes when you drive or hit bumps, it's a classic sign of broken internal adjusters. These small plastic parts become extremely brittle with age and often snap.
- Moisture or Condensation Inside the Lens: Water droplets or a persistent fog inside the glass lens means the seal between the lens and the housing has failed. This moisture will quickly ruin the reflector and can cause electrical issues.
- Inability to Aim the Headlight: If turning the adjustment screws does nothing, the internal adjuster mechanisms are broken or the screws themselves are rusted and seized.
Pro Tip: The plastic adjusters are notoriously fragile. Aftermarket repair kits, often made from 3D-printed or machined aluminum parts, are available to rebuild a housing with broken adjusters, which can be a cost-effective alternative to replacing the entire assembly.
Buying a Used 1987-1990 Saab 900 Headlight: An Inspector's Guide

Since new OEM assemblies are scarce, buying a used unit is the most common option. A thorough inspection is critical to avoid buying a part that is no better than your old one.
Step 1: Inspect the Reflector Surface
This is the most important check. Shine a bright flashlight into the assembly and look at the silvered bowl behind where the bulb sits. Look for any signs of peeling, black or brown burn spots, or a hazy, non-reflective finish. A dull reflector will produce dim light, regardless of bulb quality. If the reflector is compromised, do not buy the assembly.
Step 2: Check for Moisture and Seal Integrity
Look for any dried water spots, mineral deposits, or a foggy film on the inside of the glass lens. This indicates a past or present leak. Gently try to press on the glass lens to see if it moves separately from the housing, which would indicate a failed seal.
Step 3: Test the Adjusters and Mounting Points
Gently shake the assembly. If you hear rattling, it's likely broken pieces of the internal adjusters. Inspect all plastic mounting tabs on the outer housing for cracks or breaks. Examine the adjustment screws; they should turn without excessive force. Ask the seller if the adjusters are known to be good. Because these are so prone to failure, many sellers will specify if they are intact.
Step 4: Examine the Glass Lens
Check the glass for major cracks, chips, or severe pitting from road debris. While minor pitting is normal for a used part, large chips or cracks will fail safety inspections and can allow moisture to enter.
A Note on 'E-Code' Headlights
You may encounter 'E-Code' or European-spec headlights during your search. These were standard in the rest of the world and are a popular upgrade for US-based enthusiasts. They use a different bulb (H4) and provide a sharper beam cutoff pattern that many find superior. They are a direct fit but are not technically DOT-compliant for US road use. They can be identified by different markings on the lens compared to the US-spec DOT versions.
Known Issues, Recalls, and Service Bulletins
A search of the National Highway Traffic Safety Administration (NHTSA) database shows no specific recalls or technical service bulletins (TSBs) for the headlamp assemblies on 1987-1990 Saab 900 models. The most common issues, such as the brittle adjusters and degrading reflectors, are considered age-related wear rather than manufacturing defects.
Headlight Replacement and Aiming

Replacement Overview
Replacing the assembly is straightforward for a DIY mechanic. The process typically involves:
- Removing the front grille (held by a few screws).
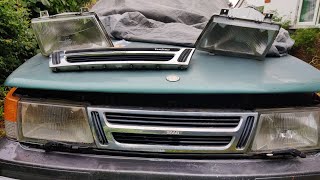
- Removing the corner indicator lamp, which provides access to the side bolts of the headlamp.
- Unscrewing the top and side bolts holding the headlamp bucket.
- Unplugging the main wiring connector and removing the assembly. 🎬 See a video walkthrough of removing the headlamp assembly
Warning: The plastic components and screws are old. Proceed slowly and use penetrating oil on any rusted fasteners. The plastic adjuster mechanisms are especially fragile and can break during removal if handled roughly.
Post-Installation Aiming is Required
Anytime you replace a headlamp assembly, you must aim it correctly. Improper aiming can blind other drivers or fail to illuminate the road properly. The basic procedure involves parking the car on a level surface 10-25 feet from a flat wall and adjusting the two screws on the back of the assembly. One screw controls vertical (up/down) aim, and the other controls horizontal (left/right) aim. The goal is to have the brightest part of the beam pattern fall slightly below the height of the center of the headlight and centered straight ahead.
Cost of a 1987-1990 Saab 900 Headlamp Assembly
| Part Type | Estimated Cost (per side) | Notes |
|---|---|---|
| New OEM (NOS) | $400 - $800+ | Extremely rare 'New Old Stock'. Often found on specialty sites or eBay. |
| New Aftermarket | $200 - $400 | Available from brands like Skandix. Quality and fit are generally good. |
| Used OEM | $75 - $250 | Most common option. Price varies wildly with condition, especially the reflector and adjusters. |
| Shop Labor (Install & Aim) | $75 - $150 | Typically around 0.5 to 1.0 hour of labor. |
Frequently Asked Questions (FAQ)
Can I just put an LED or HID bulb in my existing headlight?
This is strongly discouraged. The reflector in the Saab 900 assembly was designed specifically for the filament location of a halogen 9004 bulb. LED and HID light sources are shaped differently, and when placed in a halogen reflector, they scatter light uncontrollably. This creates excessive glare for oncoming drivers and often results in a poor, unfocused beam pattern that is less safe than the original halogen setup.
🎬 Watch: Saab 900 LED headlight upgrade and bucket repair guideMy headlight is floppy but the lens and reflector are good. What can I do?
This is the most common failure. You can purchase an aftermarket headlight adjuster repair kit. These kits replace the brittle OEM plastic pieces with more durable 3D-printed plastic or aluminum components, allowing you to rebuild your existing headlight housing.
🎬 Watch this step-by-step video on repairing Saab 900 headlight adjustersWhat is a 9004 bulb?
The 9004 (also called HB1) is a dual-filament halogen bulb, meaning it produces both the low beam and high beam from a single bulb. It was common in the 1980s and 90s but is known for having a relatively low-wattage (45W) low beam, which contributes to the perception of modest light output compared to modern cars.
How do I get moisture out of my headlight?
For minor condensation, you can try removing the bulb cover on the back of the assembly on a warm, dry day to let it air out. However, if you have standing water or it keeps returning, the main seal has failed. The only permanent fix is to replace the assembly or attempt to remove, clean, and reseal the lens to the housing, which is a difficult process.
Helpful Videos
Technical Specifications
OEM Part Numbers: 4092888 9556010 9556028 9557018 9557026 117859
Vehicle Fitment: 1987-1990 Saab 900 ('Slope-Nose' models) Bulb Type: 9004 (HB1) Halogen Lens Material: Glass Technology: Composite Assembly (separate bulb and housing)

The information in this article is provided for general reference and educational purposes only. Vehicle specifications, procedures, and part compatibility can vary by production date, trim level, and region. Always consult your vehicle's factory service manual and verify part numbers before purchasing or performing repairs. Safety-critical components such as airbags, seat belts, and braking systems should be installed by a qualified professional.
- Saab 900:
- 🎬 Helpful Videos
- The Critical 1987 'Slope-Nose' Headlight Change
- Symptoms of a Failing Headlamp Assembly
- Buying a Used 1987-1990 Saab 900 Headlight: An Inspector's Guide
- Step 1: Inspect the Reflector Surface
- Step 2: Check for Moisture and Seal Integrity
- Step 3: Test the Adjusters and Mounting Points
- Step 4: Examine the Glass Lens
- A Note on 'E-Code' Headlights
- Known Issues, Recalls, and Service Bulletins
- Headlight Replacement and Aiming
- Replacement Overview
- Post-Installation Aiming is Required
- Cost of a 1987-1990 Saab 900 Headlamp Assembly
- Frequently Asked Questions (FAQ)
- 🎟️ Get 5% Off