

2011 Nissan Quest Headlamp Assembly: Halogen vs. HID and Replacement Guide
This guide details the critical differences between Halogen and Xenon/HID headlights for the 2011 Nissan Quest, helping you choose the right part and avoid installation problems.
- The 2011 Quest has two incompatible headlight systems: Halogen (S, SV, SL trims) and Xenon/HID (LE trim only). They cannot be interchanged.
- When buying a used assembly, the most important inspection points are confirming the type (Halogen vs. HID) and checking that all mounting tabs are intact and unbroken.
- Replacement requires removing the entire front bumper cover, making it a moderately difficult job for a DIYer.
- Aiming the headlights after installation is mandatory for safety and to ensure proper road illumination.
Variant Differences: Halogen vs. Xenon (HID)

The single most important factor when replacing a headlamp assembly on a 2011 Nissan Quest is identifying the correct type. The van was offered with two completely different and non-interchangeable headlight systems based on the vehicle's trim level.
- Halogen Headlights: Standard on the S, SV, and SL trim levels. These are the most common type. They use halogen gas-filled bulbs (typically types HB3 and H11) and have a simpler electrical design.
- High-Intensity Discharge (HID/Xenon) Headlights: Standard exclusively on the top-tier LE trim level. These lights produce a brighter, whiter light and require a ballast and igniter to operate. The ballast is a small electronic box that converts the car's 12-volt power to the high voltage needed to start and run the HID bulb.
Warning: Halogen and HID assemblies are NOT interchangeable. They use different wiring harnesses, connectors, and mounting considerations. Attempting to install an HID assembly on a halogen-equipped vehicle (or vice-versa) will result in failure, as the wiring is incompatible. You cannot simply swap them without extensive and costly modifications to the vehicle's electrical system.
Symptoms of a Failing Headlamp Assembly

Headlight issues can stem from a bad bulb, a faulty assembly, or an electrical problem. Here are common symptoms pointing to a failing assembly:
- Moisture or Condensation Inside the Lens: If you see water droplets, fog, or a puddle inside the headlight, the seal between the lens and the housing has failed. This can short out bulbs and corrode internal wiring. While minor fogging can be normal in certain weather changes, persistent moisture indicates a bad seal.
- Yellow, Hazy, or Foggy Lens: The outer plastic lens can become cloudy and yellow from UV sun damage and road debris. This significantly reduces light output, making it harder to see at night and can be a safety inspection failure.
- Dim or Flickering Lights: While often caused by a dying bulb or a weak battery, flickering can also indicate a loose connection or corrosion within the headlamp assembly's wiring.
- Cracked Housing or Lens: Physical damage from impacts or stress can break the lens or the rear housing, allowing moisture in and compromising the mounting integrity.
- Melted Connectors or Housing: Using an incorrect, high-wattage bulb can generate excessive heat, melting the internal wiring connectors or the plastic housing itself.
Known Issues, Recalls, and Technical Service Bulletins (TSBs)
As of mid-2024, there are no specific NHTSA recalls for the headlamp assemblies on the 2011 Nissan Quest. However, Nissan has issued a general service bulletin (NTB03-074Q) regarding condensation in lamp assemblies. It states that temporary fogging due to temperature changes can be normal, as the assemblies are vented. However, if water accumulates in puddles or forms large droplets, the assembly is considered to have a fault.
Pro Tip: Before assuming a dim headlight is a bad bulb, check the lens clarity. A heavily oxidized lens can block as much as 50% of the light output. Sometimes, a lens restoration kit can improve visibility, but replacement is the only permanent solution for a damaged or moisture-filled assembly.
Buying a Used OEM Headlamp Assembly: What to Inspect

A used Original Equipment Manufacturer (OEM) assembly is often the best value, offering perfect fitment and factory quality at a lower cost than new. Here’s what to check:
- Confirm the Type (Halogen or HID): This is the most critical step. Ask the seller to verify which trim level the part came from (S/SV/SL or LE). Look for markings on the housing; Halogen units will often be marked with the bulb types like "H11," while HID units may have warnings about high voltage and specify a bulb type like "D2S." A new OEM Halogen assembly costs around $300, while a new OEM Xenon (HID) assembly can be over $900.
- Inspect All Mounting Tabs: Carefully check every mounting tab for cracks or breaks. The 2011 Quest headlamp is held in by several bolts, and the plastic tabs are brittle and can easily snap during removal. A broken tab can cause the headlight to vibrate, fit poorly, or be impossible to aim correctly.
- Check the Lens Condition: Look for deep scratches, stress cracks (spiderwebs), and any signs of hazing on the *inside* of the lens. Surface hazing on the outside can be polished, but internal damage is permanent.
- Look for Signs of Moisture: Check for a faint water line or mineral deposits on the chrome reflector inside the housing. This is a clear sign the assembly had a leak and may have hidden corrosion.
- Examine the Wiring Connector: Ensure the main electrical connector on the back of the housing is intact, with no cut wires or heavy corrosion on the pins.
Replacement Overview
Replacing the headlamp assembly on a 2011 Nissan Quest is a moderately difficult job that requires removing the front bumper cover. While it can be done by a DIY mechanic with the right tools, it is time-consuming.
- The front wheels should be removed for easier access to the fender liners.
- The plastic splash shield under the front of the vehicle must be unclipped and removed.
- Several screws and clips holding the top, sides (in the wheel wells), and bottom of the bumper cover must be removed.
- Once the fasteners are out, the bumper cover can be carefully pulled away from the vehicle.
- With the bumper removed, you will have clear access to the 10mm bolts holding the headlamp assembly to the radiator support and fender.
- After installing the new assembly, the bumper is reinstalled.
Aiming is Required: After installation, the headlights MUST be aimed. Failure to do so will result in poor visibility and can blind oncoming drivers. The adjustment is typically done via a wheel on the back of the assembly. The process involves parking the vehicle on a level surface 25 feet from a flat wall and adjusting the beam height to the specified level.
Cost Comparison
| Part Type | Estimated Cost (Per Side) |
|---|---|
| New OEM (Halogen) | $300 - $470 |
| New OEM (Xenon/HID) | $930 - $1,400+ |
| New Aftermarket (Halogen) | $150 - $420 |
| Used OEM (Halogen) | $100 - $250 |
| Shop Labor | $150 - $400 |
Frequently Asked Questions (FAQ)
Can I upgrade my halogen headlights to the factory HID/Xenon lights?
This is not a simple plug-and-play swap. It would require the HID-specific headlamp assemblies, ballasts, igniters, and a custom wiring harness to work. Due to the complexity and high cost of the OEM HID parts, this conversion is generally not considered practical.
Does the headlamp assembly include new bulbs?
New aftermarket assemblies often include new halogen bulbs. New OEM assemblies may or may not. Used assemblies may come with old bulbs, but it is highly recommended to install a fresh pair of bulbs during replacement to ensure longevity and matching brightness.
How can I fix a foggy or condensated headlight?
For minor fog that appears and disappears, no action is needed. For persistent moisture, the assembly must be removed. You can attempt to dry it out with a hairdryer on a low setting and then apply a bead of clear silicone sealant around the seam where the lens meets the black housing to reseal it. However, this is often a temporary fix, and replacement is the only guaranteed solution.
Why are my new headlights not as bright as I expected?
First, ensure you removed any protective film from the lens. Second, confirm you installed quality bulbs. Third, and most importantly, verify the headlights were aimed correctly after installation. Improper aiming is the most common cause of poor performance after replacement.
Helpful Videos
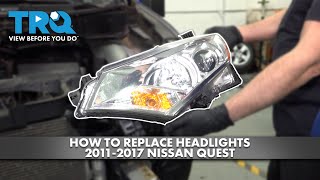
Technical Specifications
OEM Part Numbers: 26010-1JA0A 26010-1JA0B 26010-1JA0C 26010-1JA2A 26010-1JR0A 26060-1JA0A 26060-1JA0B 26060-1JA0C 26060-1JA2A 26060-1JR0A 26010-1JA1A
Bulb Types (Halogen Models): HB3 (High Beam), H11 (Low Beam). Bulb Types (Xenon/HID Models): D2S. Vehicle Fitment: 2011 Nissan Quest. Trim-specific: Halogen for S, SV, SL; Xenon/HID for LE.
We Have This Part in Stock


The information in this article is provided for general reference and educational purposes only. Vehicle specifications, procedures, and part compatibility can vary by production date, trim level, and region. Always consult your vehicle's factory service manual and verify part numbers before purchasing or performing repairs. Safety-critical components such as airbags, seat belts, and braking systems should be installed by a qualified professional.
- Nissan Quest:
- 🎬 Helpful Videos
- 🛍️ Shop This Part
- Variant Differences: Halogen vs. Xenon (HID)
- Symptoms of a Failing Headlamp Assembly
- Known Issues, Recalls, and Technical Service Bulletins (TSBs)
- Buying a Used OEM Headlamp Assembly: What to Inspect
- Replacement Overview
- Cost Comparison
- Frequently Asked Questions (FAQ)
- 🎟️ Get 5% Off