

1995-2003 Ford E-150 & E-350 Econoline Fuel Pump: Rear vs. Midship Tank and Port Count Guide
This guide covers the critical differences in fuel pumps for the 1995-2003 Ford E-350 Econoline and 1995-1996 Ford E-150 Econoline, focusing on tank location and port configuration to ensure you get the right part.
- The single most important step is to verify your van's fuel tank location (midship vs. rear) and the pump's port count (2-port vs. 3-port) before buying.
- Cutaway chassis models (used for box trucks/RVs) often have unique fuel systems; parts are not interchangeable with standard passenger or cargo vans.
- Symptoms like whining from the tank, engine sputtering under load, and hard starting are classic signs of a failing pump.
- Replacement is difficult and involves either dropping the heavy fuel tank or cutting an access panel in the van's floor, a common shortcut for these vehicles.
Critical Compatibility Warnings: Read Before Buying


Before purchasing a replacement fuel pump for a 1995-2003 Ford E-350 Econoline or a 1995-1996 Ford E-150 Econoline, you must verify three key details. Ordering the wrong part is a common and frustrating mistake. These vans were built in many configurations, and the fuel pumps are not interchangeable.
Warning: Failure to match your exact configuration will result in a part that does not fit or does not function. Always compare the replacement pump to your original unit before attempting installation.
1. Fuel Tank Location: Midship (Under Cab) vs. Rear (Aft-Axle)
Econoline vans were available with a single fuel tank or a dual-tank setup. This is the most important factor in choosing the correct pump.
- Midship Tank: This tank is located along the driver's side frame rail, roughly under the driver's cab area and in front of the rear axle. It is sometimes called the 'front' or 'side-mount' tank.
- Rear Tank: This tank is located at the very back of the van, behind the rear axle. It is sometimes called the 'aft-axle' tank.
The fuel pump assemblies for these two locations are different and cannot be swapped. If your van has dual tanks, you must identify which pump has failed. If you are replacing a tank, ensure the pump matches the tank's location.
2. Port Count: 2-Port vs. 3-Port Design
The top of the fuel pump assembly has ports where the fuel lines connect. Most vans use a 2-port design.
- 2-Port Design: This is the standard configuration for most cargo and passenger vans. It has one supply port and one return port.
- 3-Port Design: This version is less common and typically found on RVs, shuttle buses, or other vehicles with an auxiliary gas-powered appliance like a generator. The third port is used to supply fuel to that secondary device.
Visually inspect the top of your current fuel pump to confirm the number of ports before ordering.
3. Cutaway Chassis vs. Standard Van Body
The initial warnings to avoid parts for 'Cutaway' models unless you have one are correct. A cutaway chassis is a version of the van sold incomplete from the factory, intended for second-stage manufacturers to build into box trucks, shuttle buses, or RVs. These models often have unique fuel tank sizes, locations, and pump designs to accommodate the custom body. If you have a standard cargo or passenger van, ensure the part you are buying is not specified for a cutaway chassis.
Symptoms of a Failing Fuel Pump

Fuel pump failure often starts with subtle, intermittent symptoms that worsen over time until the vehicle will not start at all. Recognizing the signs early can prevent you from being stranded.
- Whining Noise From Fuel Tank: A loud, high-pitched whine from the rear of the van is a classic sign of a struggling fuel pump motor. You may notice it's louder when the fuel level is low.
- Engine Sputtering or Hesitation: The engine may sputter or lose power when accelerating or driving at highway speeds. This happens because the weak pump can't supply the extra fuel needed under load.
- Difficulty Starting or Long Crank Times: The engine may take longer than usual to start because the failing pump struggles to build adequate pressure in the fuel lines. In advanced cases, it may crank but refuse to start.
- Engine Stalling: The engine may stall unexpectedly, especially when warm or at idle, and may restart after cooling down. A complete stall while driving is a serious safety risk.
- Loss of Power Under Load: You may notice the van feels sluggish or weak when climbing hills or carrying a heavy load.
- Decreased Fuel Efficiency: An inefficient pump can sometimes send too much fuel, leading to a noticeable drop in gas mileage.
Diagnosing a Faulty Fuel Pump
Before replacing the pump, it's wise to perform a few diagnostic checks, as other cheaper parts can cause similar symptoms.
- Listen for the Pump: Turn the ignition key to the 'On' position (without starting the engine). You should hear a distinct 2-3 second humming or buzzing sound from the fuel tank area as the pump primes the system. If you hear nothing, the pump is likely not getting power or has failed completely.
- Check the Inertia Switch: Ford vehicles are equipped with an inertia switch (or fuel cutoff switch) that shuts off power to the fuel pump in a collision. On these vans, it's typically located in the passenger-side footwell, behind a kick panel. A hard bump can sometimes trip it. Ensure the button on top is pressed down.
- Check the Fuse and Relay: A blown fuse or a bad relay are common, inexpensive failures. Check the power distribution box under the hood for the fuel pump fuse and relay. You can try swapping the fuel pump relay with an identical one from a non-essential system (like the horn or ABS) to see if the pump starts working.
- Perform a Fuel Pressure Test: This is the most definitive test. Connect a fuel pressure gauge to the Schrader valve on the engine's fuel rail. With the key on and engine off, the pressure should jump to the manufacturer's specified range (typically 35-45 PSI for these models). If the pressure is low, nonexistent, or drops off quickly, the fuel pump is the likely culprit.
Buying a Used Fuel Pump: What to Inspect
A low-mileage, recycled OEM fuel pump can be a reliable and cost-effective alternative to expensive new OEM parts or lower-quality aftermarket units. Here’s what to check before you buy:
- Verify Compatibility: This is the most important step. Confirm the pump is from the correct tank location (midship or rear) and has the correct number of ports (2 or 3) for your van. Bring your old pump for a side-by-side comparison if possible.
- Check the Part Number: Match the OEM part number on the used unit to your original part or the numbers listed in this guide.
- Inspect the Electrical Connector: Look closely at the electrical pins on top of the pump assembly. They should be straight, clean, and free of any green or white corrosion. Corroded or burnt pins indicate an electrical issue that likely damaged the pump.
- Examine the Plastic Housing: The plastic top and body of the assembly should be free of cracks, especially around the ports and mounting flange. Old plastic can become brittle and crack during removal or installation.
- Look at the Fuel Strainer: The small filter sock at the bottom of the pump is a good indicator of the tank's health it came from. If it is black, sludged, or full of debris, the pump may have been overworked and could have a shortened lifespan. A clean, light-colored strainer is a good sign.
- Ask About Mileage: While not always possible, try to get a pump from a vehicle with the lowest mileage. Fuel pumps typically last over 100,000 miles, so a unit from a van with 50,000-80,000 miles is a great value.
Known Issues, TSBs, and Recalls
There are no major recalls or Technical Service Bulletins (TSBs) issued by the NHTSA specifically for fuel pump failure on the 1995-2003 Ford E-150 or E-350 Econoline models. A recall (20S13) was issued for some 2011-2021 E-Series vans for a wiring harness issue that could affect the fuel pump circuit, but this does not apply to the 1995-2003 generation.
Cost of Replacement
The cost to replace a fuel pump can vary significantly based on the parts used and labor rates.
| Part Type | Estimated Cost | Notes |
|---|---|---|
| New OEM | $700 - $1,500+ | Often discontinued or very expensive from the dealer. |
| New Aftermarket | $80 - $275 | Widely available from brands like Delphi, Denso, and others. Quality can vary. |
| Used OEM | $50 - $125 | A cost-effective option if inspected properly. |
| Shop Labor | $250 - $500 | Labor typically involves 2-4 hours of work. Dropping a full or rusty tank can increase the time. |
Replacement Overview & Difficulty

Replacing the in-tank fuel pump on an Econoline van is a moderately difficult job, primarily due to the challenge of accessing the pump.
- Difficulty Rating: 4 out of 5 (for tank drop method); 3 out of 5 (for access panel method)
- Estimated Time: 2-5 hours
There are two common methods for this repair:
Method 1: Dropping the Fuel Tank (The "Right" Way)
This is the manufacturer-recommended procedure. It involves siphoning as much fuel as possible from the tank, supporting the tank with a transmission jack, disconnecting the filler neck, vent hoses, electrical connectors, and fuel lines, and then undoing the tank straps to lower it from the vehicle. This is physically demanding, especially if the tank is heavy or the bolts are rusted. Once the tank is out, the lock ring holding the pump is removed, and the old assembly is swapped for the new one.
Pro Tip: Before installing the new pump, clean the inside of the fuel tank thoroughly to remove any sediment or rust that could damage the new pump.
Method 2: Cutting an Access Panel (The "Van Life" Way)
Because these are large vans, many owners and mechanics choose to cut an access hole in the metal floor directly above the fuel pump. This avoids the heavy work of dropping the tank. By carefully measuring the pump's location, a hole can be cut with a hole saw or angle grinder, providing direct access to the top of the tank and the pump assembly. After the replacement, a new metal panel is typically fabricated and screwed or riveted over the hole to seal the floor. While not a factory procedure, it is a very common and practical shortcut for these vehicles.
Frequently Asked Questions (FAQ)
Can I just replace the pump motor instead of the whole assembly?
Yes, it is often possible to buy just the pump motor and strainer and install it into your existing assembly. However, this is more intricate work and the fuel level sending unit on the original assembly may also be worn. For most DIY mechanics, replacing the entire module is faster, easier, and ensures all components are new.
My van has two tanks. How does the system work?
On dual-tank models, each tank has its own low-pressure fuel pump. A selector switch on the dash tells a frame-mounted selector valve which tank to draw fuel from. The fuel is then often sent to a single high-pressure pump on the frame rail before going to the engine. A failure in either in-tank pump or the selector valve can cause issues.
Why did my fuel pump fail?
The most common causes of premature fuel pump failure are frequently running the vehicle on a very low tank of gas, and fuel contamination. The fuel in the tank helps cool the pump motor, so running it low causes the pump to overheat. Dirt, rust, and water in the tank can also clog the strainer and overwork the pump motor, leading to burnout.
What is the difference between an E-350 Econoline and an E-350 Super Duty fuel pump?
The 'Super Duty' name was added to the E-350 in 1999. For the purpose of this part, the compatibility rules (tank location, port count, body style) are more important than the name badge. However, cost estimates for 'Super Duty' models are sometimes higher, potentially reflecting more complex configurations or higher labor rates at shops. Always verify the part by the specific configuration of your van.
Technical Specifications & Part Numbers
The following OEM part numbers are associated with this range of vehicles. This list is for reference; part numbers are often superseded. Always verify fitment with your vehicle's specific configuration.
| Part Number | Known Applications / Notes |
|---|---|
| F6TZ9A407BA / BB | Commonly for rear tank applications. |
| F6PZ9H307EB / EC | Often associated with midship ('under cab') tanks. |
| F2UZ9A299BA | Associated with fuel gauge sending units, sometimes part of the assembly. |
| F6UU9A407AA / BA / BC | Various applications, check against tank location and port count. |
Technical Specifications
OEM Part Numbers: F2UZ9A299BA F6PZ9H307EB F6PZ9H307EC F6TZ9A407BA F6TZ9A407BB F6UU9A407AA F6UU9A407BA F6UU9A407BC F6UUBA F6UUBB F6UZ9A407BA F6UZ9A407BB
System Pressure: Approx. 35-45 PSI. Voltage: 12V. Location: In-tank. Configurations: Midship (under cab) or Rear (aft-axle); 2-port or 3-port design.
We Have This Part in Stock
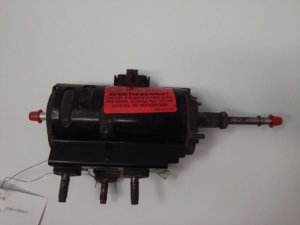


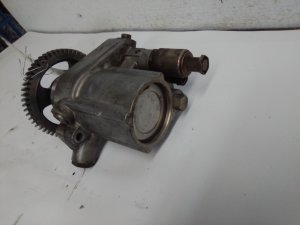

The information in this article is provided for general reference and educational purposes only. Vehicle specifications, procedures, and part compatibility can vary by production date, trim level, and region. Always consult your vehicle's factory service manual and verify part numbers before purchasing or performing repairs. Safety-critical components such as airbags, seat belts, and braking systems should be installed by a qualified professional.
- Ford E-150 Econoline:
- Ford E-350 Econoline:
- 🛍️ Shop This Part
- Critical Compatibility Warnings: Read Before Buying
- 1. Fuel Tank Location: Midship (Under Cab) vs. Rear (Aft-Axle)
- 2. Port Count: 2-Port vs. 3-Port Design
- 3. Cutaway Chassis vs. Standard Van Body
- Symptoms of a Failing Fuel Pump
- Diagnosing a Faulty Fuel Pump
- Buying a Used Fuel Pump: What to Inspect
- Known Issues, TSBs, and Recalls
- Cost of Replacement
- Replacement Overview & Difficulty
- Frequently Asked Questions (FAQ)
- Technical Specifications & Part Numbers
- 🎟️ Get 5% Off