

2015-2023 Ford F-150 High-Pressure Fuel Sensor: Stalling, Codes, and Replacement
Diagnose and understand the common failure points of the high-pressure fuel rail sensor (FRP) causing stalling, rough idle, and check engine lights on your F-150.
- The most common symptoms of failure are engine stalling, rough idle, and a check engine light with codes like P0087 or P0191.
- Replacement difficulty varies drastically by engine: it's easy on the 2.7L EcoBoost but requires removing the intake manifold on the 3.5L EcoBoost and 5.0L V8.
- Before replacing the sensor, check if your truck is part of the recall for the low-pressure fuel pump (certain 2021-22 models), which causes identical symptoms.
- A used OEM sensor is often a more reliable choice than a new, cheap aftermarket part due to precise factory calibration.
Symptoms of a Failing F-150 Fuel Pressure Sensor
When the high-pressure fuel sensor begins to fail, it sends incorrect or erratic data to the truck's computer. This can lead to a variety of frustrating and noticeable engine problems. Often, symptoms are worse when the engine is warm and may appear intermittently at first.
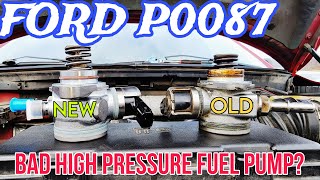
- Check Engine Light: This is the most common first sign. The PCM will detect that the sensor's readings are out of the expected range and trigger the light. Common codes include P0087, 🎬 Watch: Diagnosing a bad high-pressure pump with code P0087 P0190, P0191, P0192, and P0193.
- Engine Stalling: The engine may stall unexpectedly, especially when coming to a stop or during acceleration. This happens because the computer can't maintain stable fuel pressure.
- Hard Starting or No-Start: The engine may crank for an extended period before starting, or it may not start at all. The PCM may prevent the engine from starting if it doesn't see sufficient fuel pressure.
- Rough Idle: The truck may shake or run unevenly when stopped at a light or in park.
- Hesitation and Power Loss: When you press the gas pedal, the truck may hesitate or feel sluggish and underpowered. This is a direct result of the engine not getting the correct amount of fuel for the load demand.
- Poor Fuel Economy: If the sensor is faulty, the PCM might command the pump to send too much fuel, causing a noticeable drop in gas mileage.
Known Issues, Recalls, and Technical Service Bulletins (TSBs)
While the sensor itself is a common failure point, it's important to be aware of other related issues that can mimic the same symptoms.
Recall for Low-Pressure Fuel Pump
Important: Ford issued a recall (NHTSA Campaign Number 25V455) for certain 2021-2022 F-150 models due to a defective in-tank low-pressure fuel pump. The symptoms of this recall—engine stalling and power loss—are identical to a failed high-pressure sensor. Before replacing the sensor, check if your vehicle is affected by this recall, as the fuel pump replacement would be the correct repair and performed free of charge by a dealer.
Technical Service Bulletins (TSBs)
Ford has acknowledged issues related to the fuel pressure sensor circuit. TSB SSM 47337 was issued for some 2018 F-150s that may log codes P0192 and P0193. While not a recall, it indicates a known problem. Additionally, other TSBs have noted that on some F-150 platforms, the engine wiring harness can chafe against the cylinder head, causing a short in the sensor's circuit and triggering the same codes. Always inspect the wiring harness near the sensor for any signs of damage before replacing the part itself.
Buying a Used Fuel Pressure Sensor
A used OEM fuel pressure sensor from a low-mileage vehicle can be a reliable and cost-effective alternative to an expensive new dealer part. However, aftermarket sensors can be a gamble; their internal electronics may not be calibrated to the exact specifications the Ford PCM expects, leading to persistent performance issues or a short service life. A used OEM sensor was designed and calibrated for your truck's system from the start.
How to Ensure Compatibility
- Identify the Correct Part Number: Ford uses several part numbers depending on the engine and model year. Do not rely on numbers stamped on the plastic connector. Common service part numbers include JL3Z-9F972-A, ML3Z-9F972-A, and BL3Z-9F972-B. Verify the correct number for your specific VIN with a dealer or reliable online catalog before purchasing.
- Visually Match the Sensor: Compare the used sensor to your original part. Pay close attention to the shape of the electrical connector, the angle of the body, and the size of the threaded probe. While they may look similar, small differences can prevent proper installation.
- Inspect for Damage: Check the used sensor carefully. Ensure the plastic electrical connector is not cracked or melted. The pins inside should be straight and free of corrosion. Look at the metal body and threads for any signs of damage or cross-threading.
- Check the O-Ring: The sensor seals to the fuel rail with a small O-ring. Make sure the used part includes a clean, pliable O-ring. It is highly recommended to install a new O-ring regardless.
Replacement Guide
The difficulty of this job depends entirely on which engine your F-150 has. The location of the sensor varies from easily accessible to being buried under the intake manifold.
Safety Warning: The direct injection fuel system operates under extremely high pressure (over 2,000 PSI). This pressure can cause serious injury if not properly relieved before service. Always wear safety glasses and have a fire extinguisher nearby. Do not attempt this repair on a hot engine.
- 2.7L EcoBoost Engines: The sensor is typically located on the front of the driver's side fuel rail and is relatively easy to access. Replacement difficulty is about a 2 out of 5.
- 3.5L EcoBoost & 5.0L V8 (2018+) Engines: The sensor is located on the back of the fuel rail, underneath the intake manifold. The entire intake manifold must be removed for access, making this a much more involved job. 🎬 Watch: Step-by-step F-150 intake manifold removal walkthrough Replacement difficulty is a 4 or 5 out of 5.
Basic Replacement Steps
- Relieve Fuel System Pressure: The safest method is to remove the fuel pump relay or fuse and run the engine until it stalls. Attempt to start it again to ensure all pressure is gone.
- Disconnect the Battery: Disconnect the negative battery terminal to prevent any electrical issues.
- Access the Sensor: If required for your engine, remove the intake manifold.
- Prepare for Fuel Spillage: Place shop towels or rags underneath the sensor to catch any residual fuel that will leak out.
- Remove the Old Sensor: Disconnect the electrical pigtail connector. Using the appropriate size wrench, carefully unscrew the sensor from the fuel rail.
- Install the New Sensor: Lightly lubricate the new sensor's O-ring and threads with clean engine oil. Thread it into the fuel rail by hand to avoid cross-threading, then tighten it to the proper torque specification. If reusing the high-pressure fuel line, a related torque spec is 32 Nm (24 ft-lbs), but always verify the spec for the sensor itself.
- Reassemble: Reconnect the electrical connector, reinstall the intake manifold (if removed), and reconnect the battery.
- Prime and Check: Turn the ignition key to the 'On' position (without starting) several times for a few seconds each to allow the fuel pump to prime the system. Start the engine and carefully check for any fuel leaks around the sensor.
Cost Comparison
The cost for this repair is dominated by labor, especially on engines where the intake manifold must be removed.
| Part/Service | Estimated Cost |
|---|---|
| New OEM Sensor | $80 - $140 |
| New Aftermarket Sensor | $25 - $100 |
| Used OEM Sensor | $30 - $75 |
| Shop Labor (2.7L EcoBoost) | $100 - $200 (Approx. 1 hour) |
| Shop Labor (3.5L EcoBoost / 5.0L V8) | $350 - $550+ (3-5 hours due to intake removal) |
Frequently Asked Questions (FAQ)
Can I drive my F-150 with a bad fuel pressure sensor?
It is not recommended. The truck is prone to stalling unexpectedly, which can be dangerous in traffic. Continued driving could also lead to a no-start condition, leaving you stranded.
What's the difference between the high-pressure and low-pressure fuel sensors?
Modern F-150s have two fuel pumps and two pressure sensors. The low-pressure sensor is near the fuel tank and monitors the pump that sends fuel to the engine. The high-pressure sensor is on the engine's fuel rail and monitors the mechanical pump that pressurizes fuel for direct injection. The high-pressure sensor is the more common cause of the symptoms described in this guide.
Does a P0087 code always mean the sensor is bad?
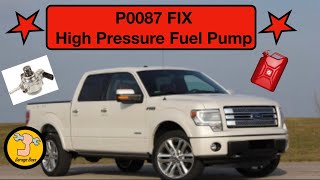
No. Code P0087 means "Fuel Rail/System Pressure - Too Low." While a faulty sensor can cause this code, it can also be caused by a weak high-pressure fuel pump, a failing low-pressure fuel pump (check for recalls), a clogged fuel filter, or a leak in the fuel line. Proper diagnosis is key.
Do I need to replace the wiring connector (pigtail) with the sensor?
Only if it shows signs of damage. Inspect the connector for melted plastic, corrosion on the pins, or broken locking tabs. On some Ford platforms, wire chafing is a known issue, so if the wiring is damaged, the pigtail should be replaced.
Helpful Videos
Technical Specifications
OEM Part Numbers: JL3Z-9F972-A ML3Z-9F972-A BL3Z-9F972-B CM5263 CM5333
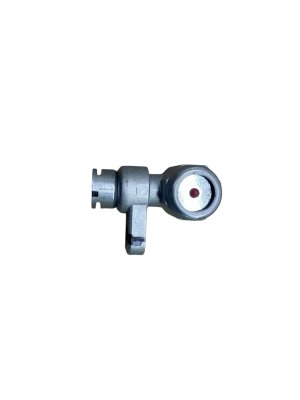
3-pin electronic sensor that mounts to the high-pressure fuel rail. It provides a variable voltage signal to the PCM corresponding to fuel pressure.
We Have This Part in Stock



The information in this article is provided for general reference and educational purposes only. Vehicle specifications, procedures, and part compatibility can vary by production date, trim level, and region. Always consult your vehicle's factory service manual and verify part numbers before purchasing or performing repairs. Safety-critical components such as airbags, seat belts, and braking systems should be installed by a qualified professional.
- Ford F-150:
- 🎬 Helpful Videos
- 🛍️ Shop This Part
- Symptoms of a Failing F-150 Fuel Pressure Sensor
- Known Issues, Recalls, and Technical Service Bulletins (TSBs)
- Recall for Low-Pressure Fuel Pump
- Technical Service Bulletins (TSBs)
- Buying a Used Fuel Pressure Sensor
- How to Ensure Compatibility
- Replacement Guide
- Basic Replacement Steps
- Cost Comparison
- Frequently Asked Questions (FAQ)
- 🎟️ Get 5% Off