

2008-2011 Toyota Land Cruiser Headlight Guide: Moisture Problems and Halogen Systems
This guide covers common failures like internal condensation, lens hazing, and replacement tips for the halogen headlights found on 2008-2011 Land Cruiser models.
- The 2008-2011 Land Cruiser uses halogen-based headlights in the US; they are not HID or LED from the factory.
- Moisture and condensation entering the housing is the most common failure mode, caused by deteriorating seals.
- When buying a used headlight, the most important inspection is for broken mounting tabs, which will prevent proper fitment and aiming.
- Headlight aiming is a required final step after any replacement to ensure safety and legality.
Headlight Variants: Halogen is Standard for 2008-2011

For the North American market, the 2008-2011 Toyota Land Cruiser (200 Series) was equipped exclusively with halogen headlight assemblies. Unlike some other markets or later model years that offered High-Intensity Discharge (HID/Xenon) or LED options, these vehicles use a simpler, more traditional lighting system.
- Low Beam Bulb: H11
- High Beam Bulb: 9005 / HB3
These headlights do not require external components like ballasts, igniters, or LED driver modules. The bulbs connect directly to the vehicle's standard wiring harness. While many owners choose to install aftermarket LED or HID bulbs into the halogen housing, it's important to note that the reflector optics were specifically designed for the filament position of a halogen bulb. Using other bulb types can result in an improper beam pattern, causing glare for other drivers and poor road illumination, even if the light appears brighter.
Symptoms of Headlight Failure

Headlight issues on the Land Cruiser range from simple bulb burnout to assembly failure. The most common problems are related to the housing itself.
1. Moisture or Condensation Inside the Lens
By far the most common complaint for these headlights is moisture getting trapped inside. This can appear as a light fog, large water droplets, or even standing water inside the assembly. This is caused by a breakdown of the butyl rubber seal between the clear polycarbonate lens and the black plastic housing, or by small cracks in the housing itself. If left unaddressed, the moisture will cause chrome reflector surfaces to corrode, lead to premature bulb failure, and can leave permanent mineral deposits on the inside of the lens.
2. Yellow, Hazy, or Foggy Lens (UV Damage)
The outer polycarbonate lens is susceptible to damage from the sun's ultraviolet (UV) rays. Over time, the factory protective coating wears off, causing the plastic to oxidize. This results in a yellow or cloudy appearance that significantly reduces light output and looks unsightly. While mild hazing can be temporarily fixed with a polishing kit, severe yellowing or internal crazing (fine spiderweb cracks) requires a full assembly replacement.
3. Dim or Burned-Out Bulbs
A straightforward issue where the halogen bulb's filament breaks. If both headlights go out at once, the problem is more likely a fuse, relay, or switch, not the bulbs themselves. When replacing a bulb, it is critical to avoid touching the glass with your bare hands, as skin oils can create hot spots that cause the bulb to fail prematurely.
Pro Tip: If you find moisture inside your headlight, you can try to dry it out. Remove the assembly, take out all the bulbs, and use a hairdryer on a low-heat setting to circulate air inside. Afterwards, carefully inspect the seam between the lens and housing and apply a bead of clear, automotive-grade silicone sealant to try and prevent future intrusion.
Recalls and Technical Service Bulletins (TSBs)
As of this writing, there are no major NHTSA safety recalls or TSBs specifically for headlight assembly failure on the 2008-2011 Toyota Land Cruiser in the US market. Recalls issued for this generation typically involve airbags, tire pressure monitoring systems (TPMS), or accessory items, not the factory headlights.
Buying a Used 2008-2011 Land Cruiser Front Lamp: What to Check

A used OEM headlight is often a better choice than a cheap aftermarket unit due to superior optics, materials, and fitment. However, you must inspect a used part carefully before buying.
- Verify the Part Number: The surest way to guarantee fitment. The last digit indicates a revision, with higher numbers being newer. The latest known versions are 81130-60D33 (Right/Passenger) and 81170-60D03 (Left/Driver).
- Inspect All Mounting Tabs: This is the most critical inspection point. There are several black plastic tabs used to bolt the assembly to the vehicle. These are brittle and often break during vehicle accidents or careless removal. A broken tab will cause the headlight to vibrate, fit poorly, and be impossible to aim correctly. Do not buy a headlight with broken or repaired (glued) tabs.
- Check for Signs of Moisture Intrusion: Look for a 'water line' or dried mineral deposits on the chrome reflectors or the inside of the lens. This is a clear sign the headlight had a bad seal. Even if it's dry now, it will likely leak again.
- Examine the Lens-to-Housing Seal: Look at the seam where the clear lens meets the black housing. It should be clean and uniform. Be wary of units with excessive or sloppy clear silicone applied to the seam, as this indicates a previous leak that someone tried to patch.
- Assess Lens Clarity: Check for deep scratches, rock chips, and internal 'crazing' (spiderweb cracks). Minor external hazing can be polished, but these other issues cannot. A clear, bright lens is essential for performance.
- Check the Connectors: Ensure the electrical connector sockets on the back of the housing are not cracked, melted, or filled with corrosion.
Replacement and Aiming Overview
Replacing the headlight assembly on a 200 Series Land Cruiser is a DIY-friendly job that does not require removing the entire front bumper.
The basic steps involve:
- Removing the front grille (held by clips and screws).
- Removing the corner marker light assembly next to the headlight.
- Unbolting the headlight assembly, which is typically held by three or four 10mm bolts.
- Disconnecting the electrical harness and removing the unit.
Headlight Aiming is Required After Installation
Any time a headlight assembly is replaced, it must be aimed to ensure it illuminates the road correctly and doesn't blind other drivers. This is done using adjustment screws on the back of the headlight housing.
- Park the vehicle on level ground about 25 feet away from a flat wall (like a garage door).
- Turn on the low beams. The top of the bright cutoff line for each beam should be slightly below the height of the center of the headlight bulb itself.
- Locate the vertical and horizontal adjustment screws on the back of the assembly. They can be turned with a Phillips screwdriver or a small socket.
- Adjust one headlight at a time (you can cover the other with a towel) until the beam pattern is at the correct height and pointing straight ahead.
| Part Type | Estimated Price |
|---|---|
| New OEM (Dealer) | $220 - $250 |
| New Aftermarket | $150 - $250 |
| Used OEM | $150 - $250 |
| Shop Labor for Replacement | $100 - $200 |
Frequently Asked Questions (FAQ)
Can I upgrade my halogen headlights to HID or LED?
You can replace the halogen H11 and 9005 bulbs with aftermarket LED or HID bulbs, but it is not always recommended. The reflector bowl is designed for a halogen filament, and other light sources can create an unfocused, glaring beam pattern. A proper upgrade involves retrofitting a projector lens into the housing, which is a complex and expensive job.
My headlight is foggy on the inside. Can I fix it or do I need a new one?
You can often fix minor condensation. The best method is to remove the headlight, take out the bulbs to allow airflow, and use a hairdryer on low heat to gently dry the interior. Once dry, you should apply a bead of automotive sealant around the entire lens/housing seam to prevent it from happening again. If the light has significant water inside or the seal is badly damaged, replacement is the best long-term solution.
Do I need to get my headlights aimed after replacing just one?
Yes. Even a small difference in manufacturing tolerances or installation can change the aim. It's crucial to check and adjust the aim of the new headlight to match the existing one and ensure it meets legal requirements.
Are the left and right headlights the same part?
No, they are not interchangeable. They are specific to the driver's side (Left Hand) and passenger's side (Right Hand). The part numbers are different for each side.
Technical Specifications
OEM Part Numbers: 81130-60D30 81130-60D31 81130-60D32 81130-60D33 81170-60D00 81170-60D01 81170-60D02 81170-60D03
Bulb Types: Low Beam H11, High Beam 9005/HB3. Lighting Technology: Halogen Reflector.
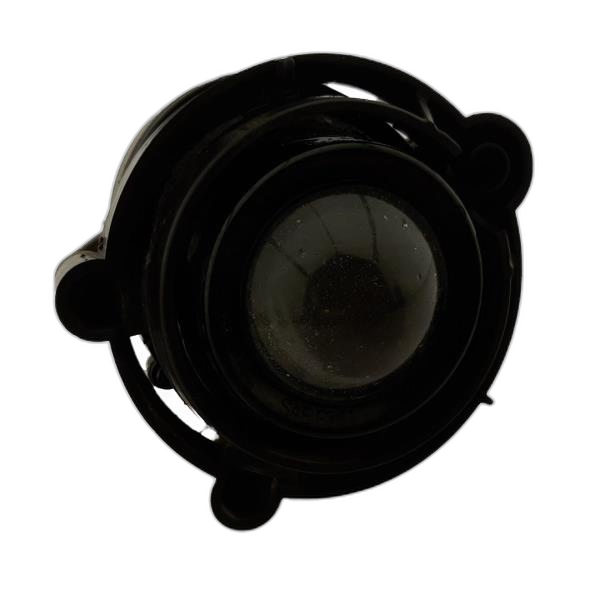
We Have This Part in Stock

The information in this article is provided for general reference and educational purposes only. Vehicle specifications, procedures, and part compatibility can vary by production date, trim level, and region. Always consult your vehicle's factory service manual and verify part numbers before purchasing or performing repairs. Safety-critical components such as airbags, seat belts, and braking systems should be installed by a qualified professional.
- Toyota Land Cruiser:
- 🛍️ Shop This Part
- Headlight Variants: Halogen is Standard for 2008-2011
- Symptoms of Headlight Failure
- 1. Moisture or Condensation Inside the Lens
- 2. Yellow, Hazy, or Foggy Lens (UV Damage)
- 3. Dim or Burned-Out Bulbs
- Recalls and Technical Service Bulletins (TSBs)
- Buying a Used 2008-2011 Land Cruiser Front Lamp: What to Check
- Replacement and Aiming Overview
- Headlight Aiming is Required After Installation
- Frequently Asked Questions (FAQ)
- 🎟️ Get 5% Off