

2025-2026 Tesla Model Y 'Juniper' Front Lamp: Matrix LEDs, Software Faults, and Replacement Guide
This in-depth guide covers the new adaptive Matrix LED headlights on the 'Juniper' Model Y, including common software errors, calibration needs, and critical compatibility warnings.
- The front lamps are specific to the 2025+ 'Juniper' Model Y and are NOT backward compatible with older models.
- Most 'failures' are software-related, often showing an 'Adaptive Headlight Unavailable' error that can be fixed by cleaning the camera area or recalibrating.
- Replacement requires removing the entire front bumper cover and performing software calibration and aiming after installation.
- When buying used, you must match the part number exactly to ensure compatibility (e.g., North American SAE spec vs. European spec).
Understanding the 2025-2026 'Juniper' Headlight System

The Tesla Model Y received a significant refresh for the 2025 model year, codenamed 'Juniper'. This update included a completely redesigned front end with new, lower-mounted front lamps. It's crucial to understand that these parts are not interchangeable with the earlier 2020-2024 Model Y vehicles.
Warning: These headlights are exclusively for the 2025 and newer 'Juniper' Model Y. They will not physically fit or electronically function on older Model Ys.
Standard vs. Premium Trim Variants
The 'Juniper' Model Y features two distinct front lamp configurations depending on the vehicle's trim level:
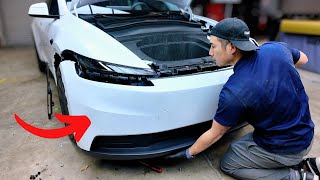
- Standard Trim: Features two separate headlight assemblies. The overall process for removal is simpler than the Premium trim. 🎬 Watch: How to remove the Standard trim front bumper
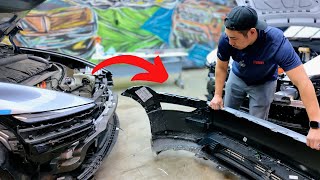
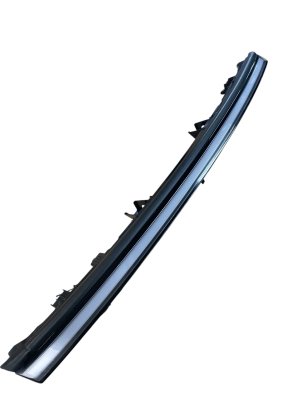
- Premium Trim: Features headlight assemblies that are physically integrated with a horizontal LED light bar that extends across the top. This makes the entire assembly a single, large, and expensive component. 🎬 See this Premium trim bumper removal walkthrough
Both versions utilize the same core Matrix LED and adaptive beam technology.
Symptoms of a Failing Front Lamp

Because this is a modern, software-controlled system, failures can present as electronic faults as often as physical issues.
- "Adaptive Headlight Features are Unavailable" Error: This is a common software-related fault. The message appears on the driver display and indicates the adaptive high beams are not working. It can sometimes be accompanied by a loss of other on-screen visuals like road markings and other cars.
- Daytime Running Light (DRL) Malfunction: You may see a specific alert, such as “Right daytime running lights malfunction detected.” Visually, this will appear as a section of the DRL strip being unlit when it should be on.
- Partial or Complete Failure: One or both headlights may fail to illuminate entirely. This could be due to impact damage, an internal fault in the LED driver, or a connection issue.
- Flickering or Asymmetric Beams: If one light appears dimmer, aimed incorrectly, or flickers, it can point to a failing internal module or a calibration problem.
- Physical Damage: Cracks, deep scuffs, or holes in the lens from road debris are common. This can not only look bad but also allow moisture inside, which will destroy the sensitive electronics over time.
Known Issues, Recalls, and Service Bulletins

As a relatively new vehicle, long-term issues are still emerging. However, early owner reports and service information point to a few key areas.
Software and Calibration Faults
The most frequently reported problems are software-based. The "Adaptive Headlight Features are Unavailable" error is often traced back to three main causes:
- Dirty Windshield: The system relies on the forward-facing cameras located in the upper-center of the windshield. Dirt, debris, or fogging in this area can prevent the system from working.
- Software Glitches: Sometimes, a recent over-the-air (OTA) software update can cause temporary issues. A vehicle reset or a subsequent software patch often resolves the problem.
- Lost Camera Calibration: The cameras may need to be recalibrated. Owners have reported success by initiating a camera calibration cycle from the vehicle's service menu to resolve the error.
Recalls and TSBs
As of June 2026, there are no active NHTSA recalls specifically for the headlights on the 2025-2026 Tesla Model Y. Recalls have been issued for this model year for issues like battery contactors and missing certification labels, but not the lighting system. Always check the official NHTSA website with your vehicle's VIN for the most up-to-date recall information.
Pro Tip: Before scheduling service for an adaptive headlight error, first ensure the windshield area in front of the cameras is perfectly clean. Then, try performing a soft reset by holding down both scroll wheels on the steering wheel. Finally, check for any pending software updates.
Buying a Used 2025-2026 Model Y Headlight
Given that a single new headlight assembly from Tesla can cost over $1,600, a used OEM part is an excellent value. However, you must be a careful shopper to avoid compatibility issues.
Physical Inspection Checklist
- Mounting Tabs: The assembly is held on by several plastic tabs and three main bolt points. These are the most common things to break in a minor collision. Inspect every tab for cracks or signs of repair (e.g., plastic welding, epoxy). A broken tab will prevent the headlight from being secured properly, leading to vibration and misalignment.
- Lens Condition: Look for deep scratches, rock chips, or stress cracks. Minor surface scuffs can be polished, but deep damage is permanent. Most importantly, check for any signs of hazing or condensation on the *inside* of the lens. This indicates the factory seal has failed and the internal electronics are compromised.
- Connectors and Wiring: Ensure the main electrical connector is intact with no bent or corroded pins. Check that any attached wiring pigtails are not cut or damaged.
Compatibility Verification
Critical Warning: Tesla uses different headlight versions for different markets (e.g., SAE for North America, ECE/Global for Europe). These parts are not interchangeable. For proper operation, both headlights must be the same type, and the car's software must be configured for that type. If you replace a single damaged SAE headlight with a used Global-spec one, it will not work correctly, and you will likely need to replace both and have the vehicle reconfigured by Tesla. Always match the part number from your original light exactly.
- Match Part Numbers: The most reliable way to ensure compatibility is to match the OEM part number exactly. Known part numbers include 2038294-00-C, 2038294-00-E, and 1918348-00-D, but always verify against your specific part.
- Avoid Cheap Aftermarket Copies: While tempting, new non-OEM aftermarket headlights often have poor beam patterns, use inferior LEDs, and are prone to premature failure or software incompatibility. A high-quality, used OEM headlight is almost always a better choice than a cheap new aftermarket one.
Replacement and Calibration Guide

Replacing a headlight on a 'Juniper' Model Y is a moderately difficult job, primarily because the front bumper must be removed.
Difficulty: 4/5
Estimated Time: 2.5 - 4 hours
Key Replacement Steps
- Remove Front Bumper: This is the most involved step. It requires removing numerous clips, screws, and bolts from the wheel wells, underbody, and frunk area before the entire bumper cover can be carefully detached.
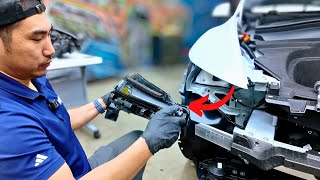
- Unbolt the Headlight: Once the bumper is off, the headlight is accessible. It is secured by three 10mm bolts.
- Disconnect Wiring: There is a single main electrical harness connected to the back of the assembly. It has a red locking tab that must be pulled out before the connector can be unplugged.
- Install New Headlight: Installation is the reverse of removal. Carefully position the new light, secure the bolts, and reconnect the harness.
Post-Installation Calibration (Required)
You cannot simply swap the hardware. The vehicle's software must recognize and be calibrated to the new headlight.
- Service Mode: It is recommended to put the car in 'Service Mode' via the touchscreen before disconnecting components.
- Software Reinstall/Configuration: In some cases, the car may not recognize the new light until a software reinstall is performed. This can be initiated from the service menu. In more complex cases, a technician with Tesla's Toolbox 3 software may need to configure the vehicle for the new part.
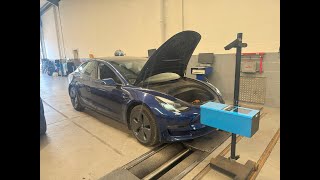
- Headlight Aiming: After installation, the headlights MUST be properly aimed. This can be done through the vehicle's touchscreen menu, which provides an adjustment interface. You will need to park the car on a level surface in front of a wall at a specified distance to correctly set the beam cutoff. 🎬 Watch: How to adjust and aim your Tesla headlights
- Camera Calibration: Since the adaptive features depend on the cameras, a camera calibration drive may be necessary after the repair.
Cost of Replacement
The cost to replace a 2025-2026 Model Y headlight can vary dramatically based on the source of the part and who performs the labor.
| Part Source | Estimated Cost (Per Side) |
|---|---|
| New OEM (from Tesla) | $1,600 - $1,800+ |
| Used OEM (Salvage/eBay) | $350 - $600 |
| New Aftermarket | $300 - $500 (Quality and compatibility vary widely) |
| Shop Labor Cost | $300 - $500 (Requires bumper removal and calibration) |
Frequently Asked Questions (FAQ)
Do I need to replace both headlights if only one is broken?
Not necessarily. If you replace the broken headlight with a used OEM part that has the exact same part number and specification (e.g., SAE for SAE), you can typically replace just the one. However, if you are changing types (e.g., from an SAE to a Global spec light), you MUST replace both headlights as a pair and have the vehicle's software reconfigured.
Can I drive with the "Adaptive Headlight Features are Unavailable" error?
Yes. When this error is present, the headlights typically revert to standard, non-adaptive operation (basic low and high beams). While your visibility may be slightly reduced without the adaptive function, the basic headlights will still work, and the car is safe to drive at night. However, you should get the issue diagnosed to restore full functionality.
Is replacing the headlight a feasible DIY job?
For an experienced DIY mechanic, yes. The main challenge is the careful removal and reinstallation of the front bumper cover without scratching paint or breaking clips. The software and calibration steps after installation are also critical. If you are not comfortable with both the mechanical and software aspects, it is best left to a professional.
What are Matrix LED headlights?
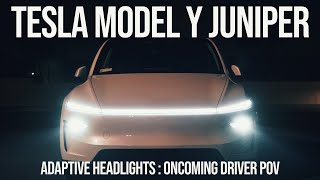
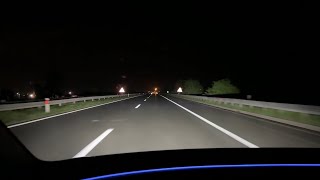
Matrix LED headlights use an array of many small, individually controlled LEDs instead of just one or two bulbs. By working with the car's cameras, this allows the system to turn off specific LEDs (pixels) to create a shadow around oncoming cars or preceding traffic. This lets you drive with your high beams on more often, illuminating more of the road without blinding other drivers.
Helpful Videos

Technical Specifications
OEM Part Numbers: 2038294-00-B 2038294-00-C 2038294-00-E 2038294-95-C 1918348-00-D
Technology: Full LED, Adaptive Matrix High Beam (ADB) Control: Software-controlled via forward-facing cameras Required Tools for Replacement: 10mm socket, ratchet, trim removal tools
We Have This Part in Stock


The information in this article is provided for general reference and educational purposes only. Vehicle specifications, procedures, and part compatibility can vary by production date, trim level, and region. Always consult your vehicle's factory service manual and verify part numbers before purchasing or performing repairs. Safety-critical components such as airbags, seat belts, and braking systems should be installed by a qualified professional.
- Tesla Y:
- 🎬 Helpful Videos
- 🛍️ Shop This Part
- Understanding the 2025-2026 'Juniper' Headlight System
- Standard vs. Premium Trim Variants
- Symptoms of a Failing Front Lamp
- Known Issues, Recalls, and Service Bulletins
- Software and Calibration Faults
- Recalls and TSBs
- Buying a Used 2025-2026 Model Y Headlight
- Physical Inspection Checklist
- Compatibility Verification
- Replacement and Calibration Guide
- Key Replacement Steps
- Post-Installation Calibration (Required)
- Cost of Replacement
- Frequently Asked Questions (FAQ)
- 🎟️ Get 5% Off