

2000-2002 Hyundai Accent Headlight: A Guide to Fitment, Haze, and Replacement
This guide covers the essential details for the pre-facelift 2000-2002 Hyundai Accent headlight, focusing on common problems, compatibility, and replacement.
- This headlight assembly only fits 2000-2002 Hyundai Accent models; the 2003 facelift version is different.
- The most common failure is lens hazing from UV damage, which severely reduces light output. Inspect used parts carefully for clarity.
- The assembly uses a single, inexpensive H4 (9003) halogen bulb for both high and low beams.
- Aiming the headlights after replacement is a mandatory safety step to ensure proper visibility and avoid blinding other drivers.
Vehicle Fitment and Generation Information

This headlight assembly is specifically for the 2000, 2001, and 2002 Hyundai Accent. This corresponds to the pre-facelift version of the second-generation Accent (also known as the LC series). It fits all trim levels (L, GS, and GL) and both sedan and hatchback body styles within these years.
Warning: The 2003 Hyundai Accent received a significant facelift, which included a completely redesigned headlight. Assemblies for 2003 and newer models are not physically or electrically compatible with the 2000-2002 models. Always verify the year of your vehicle before purchasing.
Headlight Technology and Specifications

The 2000-2002 Accent uses a basic and reliable halogen headlight system. It does not use more complex HID/Xenon or LED technology from the factory.
- Bulb Type: The main headlight bulb is a dual-filament H4 (also known as 9003 or HB2). This single bulb provides both the low and high beam functions.
- Simple System: As a standard halogen system, it does not require any external components like a ballast, igniter, or LED driver module. The bulbs are powered directly by the vehicle's standard 12V electrical system.
- No Adaptive Features: These headlights do not have auto-leveling motors or adaptive cornering functions. Some international models may have a manual leveling switch inside the cabin, but this is uncommon in the North American market.
Symptoms of Failure

Headlight issues on the Accent can range from simple bulb burnout to problems with the entire assembly.
- Dim or Yellow Light Output: This is most often caused by the plastic lens becoming hazy or yellowed from UV sun damage and oxidation. It can also indicate an aging halogen bulb that is losing its brightness.
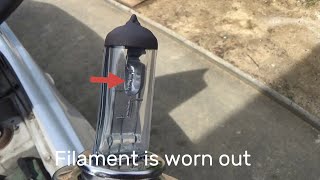
- One Headlight is Out: If either the low or high beam isn't working on one side, the most likely cause is a burned-out filament in the H4 bulb.
- Both Low Beams Are Out (High Beams Work): If both low beams fail simultaneously but the high beams still function, the problem could be related to the headlight switch on the steering column, a fuse, or a relay. Forum users have reported that a blown 10A fuse for one of the headlights can sometimes cause the light to appear very dim instead of going out completely.
- Moisture or Condensation Inside: Water droplets or fogging inside the lens indicates a failed seal between the lens and the housing. This can cause bulbs to burn out prematurely and will damage the reflective coating over time. Hyundai has issued general TSBs for other models regarding moisture in lamps, suggesting it's a known concern.
- Flickering Lights: This usually points to a poor electrical connection. Check for a loose connector at the back of the bulb or corrosion in the socket.
Buying a Used Front Lamp: What to Inspect

A used OEM headlight can be a great value, often offering better fit and optical quality than a cheap aftermarket part. However, careful inspection is crucial.
1. Verify Compatibility
First, ensure the part is from a 2000-2002 Accent. Cross-reference the OEM or Partslink number if possible. The visual difference between the pre-facelift (2000-2002) and post-facelift (2003+) headlights is distinct.
- Left (Driver Side) OEM Numbers: 92101-25000, 92101-25020, 92101-25050, 92101-25100
- Right (Passenger Side) OEM Numbers: 92102-25000, 92102-25010, 92102-25020, 92102-25050, 92102-25100
- Left (Driver Side) Partslink: HY2502123
- Right (Passenger Side) Partslink: HY2503123
2. Inspect the Lens Condition
This is the most important check for a used headlight. A hazy lens is the most common reason for replacement.
- Hazing and Yellowing: Look for a cloudy or yellow film on the lens surface. This is UV damage. While it can sometimes be polished out, a crystal-clear used lens is far superior.
- Moisture Stains: Check the inside of the lens for any dried water spots or a foggy residue. This is a clear sign of a bad seal.
- Cracks and Pitting: Inspect for any cracks, which will allow moisture in, and deep pits from road debris that can't be polished away.
3. Check All Mounting Tabs
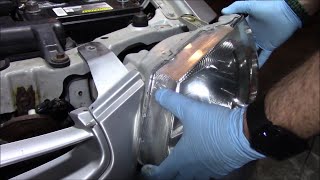
The plastic mounting tabs are brittle and often break during minor accidents or careless removal. A headlight must have all its mounting points intact to be installed securely and aimed correctly. A video guide for removal shows two 10mm bolts 🎬 Watch this video guide showing how to remove the headlight assembly and a plastic fastener holding the assembly in place, along with a guide stud on the side. Ensure these mounting holes are not cracked or broken.
4. Examine the Housing and Connectors
Flip the assembly over. The black plastic housing should be free of cracks. Check the electrical connector socket to ensure it isn't melted, corroded, or damaged. Make sure the rubber boot that seals the back of the H4 bulb is present and pliable.
Replacement and Aiming
Replacing the headlight assembly is a straightforward DIY job for those with basic tools.
Replacement Steps
- Open the hood and disconnect the negative battery terminal.
- Locate the fasteners holding the headlight. There are typically two 10mm bolts and one plastic push-pin fastener accessible from the top.
- Remove the fasteners. Some guides suggest marking the position of the bolts with a marker to help with initial alignment when reinstalling.
- Carefully pull the assembly forward to release it from a side clip and guide pin.
- Reach behind the assembly and disconnect the main headlight electrical connector and the turn signal socket by squeezing their release tabs.
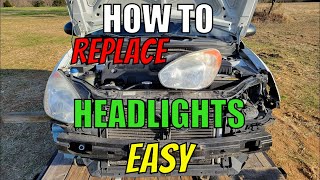
- Installation is the reverse of removal. 🎬 Watch this thorough walkthrough on replacing the headlight assembly
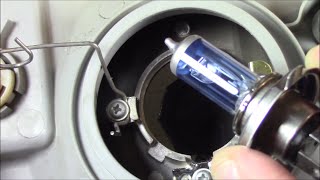
Pro Tip: It is often easier to remove the entire headlight assembly to change the H4 bulb than to try and do it in the car, where space is very tight, especially on the driver's side.
🎬 See how to replace an Accent LC headlight bulbHeadlight Aiming (Required After Replacement)
Anytime a headlight assembly is replaced, it must be aimed correctly. Failure to do so can dangerously blind other drivers or leave you with poor visibility.
- Park the car on a level surface, 25 feet away from a flat wall.
- Ensure tires are properly inflated and the car has a typical load (e.g., half a tank of gas).
- Turn on the low beams. You will see a cutoff line on the wall.
- Locate the adjustment screws on the back of the headlight assembly. There will be one for vertical (up/down) and one for horizontal (left/right) adjustment. A Phillips screwdriver is typically used.
- Adjust the screws so the top of the brightest part of the beam pattern is slightly below the center height of the headlight itself.
Cost Comparison
The cost for a replacement headlight can vary significantly based on the source.
| Part Type | Estimated Price (per side) | Notes |
|---|---|---|
| New OEM | $220 - $290 | Purchased from a Hyundai dealership or online OEM supplier. Offers guaranteed fit and quality. |
| New Aftermarket | $55 - $85 | Widely available from online retailers. Quality can vary; some may be prone to premature hazing or moisture leaks. |
| Used OEM | $40 - $100 | Found at salvage yards or online. A great value if you can find one with a clear lens and intact tabs. |
| Shop Labor | $65 - $135 | Typically takes about 0.5 to 1.0 hour of labor per side. |
Frequently Asked Questions
Do I need to replace my headlights in pairs?
It is highly recommended. Replacing both at the same time ensures even light output, color, and appearance. If you replace only one, especially with a new assembly, it will look much clearer than the old one on the other side.
Can I upgrade my 2001 Accent headlights to LED or HID?
While LED and HID conversion kits that fit an H4 base are sold, they are not a simple plug-and-play upgrade. The halogen reflector housing is not designed for the light source of an LED or HID bulb, which can result in a poor, scattered beam pattern that blinds other drivers and may be illegal for on-road use. Proper conversion requires a full projector retrofit.
What bulb does the 2000-2002 Hyundai Accent use for its headlights?
It uses a single H4 (also called 9003 or HB2) halogen bulb for both the low and high beams.
How can I fix my hazy, yellowed headlights?
You can use a headlight restoration kit, which typically involves several stages of wet sanding followed by a polishing compound and a UV protective sealant. This can significantly improve clarity, but the results may only last a year or two before the process needs to be repeated. For a longer-lasting fix, some professionals apply a 2K clear coat after restoration.
Helpful Videos
Technical Specifications
OEM Part Numbers: 92101-25000 92101-25020 92101-25050 92101-25100 92102-25000 92102-25010 92102-25020 92102-25050 92102-25100
Partslink Left: HY2502123, Partslink Right: HY2503123. Main Bulb Type: H4 (9003/HB2) Halogen.

The information in this article is provided for general reference and educational purposes only. Vehicle specifications, procedures, and part compatibility can vary by production date, trim level, and region. Always consult your vehicle's factory service manual and verify part numbers before purchasing or performing repairs. Safety-critical components such as airbags, seat belts, and braking systems should be installed by a qualified professional.
- Hyundai Accent:
- 🎬 Helpful Videos
- Vehicle Fitment and Generation Information
- Headlight Technology and Specifications
- Symptoms of Failure
- Buying a Used Front Lamp: What to Inspect
- 1. Verify Compatibility
- 2. Inspect the Lens Condition
- 3. Check All Mounting Tabs
- 4. Examine the Housing and Connectors
- Replacement and Aiming
- Replacement Steps
- Headlight Aiming (Required After Replacement)
- Cost Comparison
- Frequently Asked Questions
- 🎟️ Get 5% Off