

2014-2016 BMW S 1000 RR Rearsets & Footpegs: Crash Damage, Replacement & Cost
A detailed guide to inspecting, replacing, and understanding the costs associated with the footpeg and rearset assemblies on the 2014-2016 BMW S 1000 RR.
- Failure is almost always from crash damage; inspect used parts carefully for cracks and bends before buying.
- A new OEM rearset plate costs over $400 for one side, making used OEM parts (around $150-$250) an excellent value.
- Replacement is a simple DIY job. Use blue thread locker and torque the main mounting bolts to 22 Nm (16.2 ft-lbs).
- There are no recalls for the footpegs, but there are many high-quality adjustable aftermarket options if you need a replacement.
Understanding the Parts: Footpeg vs. Rearset
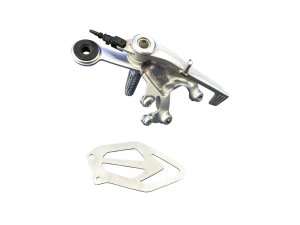
When dealing with foot controls, it's important to know the terms. The footpeg is the individual peg your boot rests on. The rearset (or footpeg plate) is the entire assembly that bolts to the motorcycle's frame. For the S 1000 RR, this includes the main aluminum plate, heel guard, and the mounting points for the brake or shift lever. The OEM part number 46717728308, for example, refers to the right-side rearset plate assembly, which costs over $400. Understanding this distinction is key when shopping for new or used parts.
Symptoms of Failure
Unlike electronic components, footpeg and rearset failures are almost always physical and visual. Damage typically occurs from the bike being dropped or in a crash.
- Bent or Broken Components: The most obvious symptom is a bent footpeg or a cracked/broken rearset plate. Even a slight bend can affect rider comfort and control. A broken peg or plate makes the motorcycle unsafe to ride.
- Scraped Pegs and "Hero Blobs": The small bolt hanging from the bottom of the peg is a "feeler" or "hero blob," designed to scrape the pavement first during aggressive cornering. Heavily ground-down feelers or pegs indicate hard use and potentially a drop.
- Loose or Wobbly Peg: The footpeg should pivot up and down firmly with a spring return, but it should have no side-to-side play. Wobble indicates a worn pivot pin or mounting hole, which can be distracting and unsafe.
- Poor Folding Action: If a peg doesn't stay folded up or droops down from the folded position, the internal spring or detent mechanism is worn or damaged.
- Excessive Vibration or Knocking: While unusual, a knocking feeling transmitted through the pegs could be a sign of a loose rearset mounting bolt. More commonly, this sensation is related to a worn chain or wheel bearing.
Warning: Never ride a motorcycle with a broken or missing rider footpeg. It is extremely dangerous and removes a critical point of control.
Buying a Used Foot Peg Set: What to Check
Due to the high cost of new OEM rearsets, buying a used set is a popular and smart option. However, since these parts are often damaged in crashes, a thorough inspection is critical.
- Check for Bends and Cracks: Lay the rearset plate on a perfectly flat surface. It should sit flush with no rocking. Inspect every corner and mounting hole for hairline cracks, especially around the main frame mounting points and the footpeg pivot area. A cracked rearset is junk and unsafe to use.
- Inspect the Footpeg Pivot: Ensure the footpeg itself is straight. Check the pivot hole for any elongation or excessive wear. Make sure the spring-loaded folding mechanism is crisp and holds the peg in both the up and down positions.
- Verify All Hardware is Present: A complete used assembly should include the main plate, the footpeg, the pivot pin, the retaining clip/circlip, and the spring. For the brake side, ensure the master cylinder mounting points are intact. For the shifter side, check the threads for the shift rod linkage.
- Examine for Grinding: Look at the outer tip of the footpeg and the bottom edge of the rearset plate. Deep grinding marks from a crash can create stress risers and weaken the aluminum, making it more prone to cracking. Surface scrapes are cosmetic, but deep gouges are a red flag.
- OEM vs. Aftermarket: Used OEM rearsets are often a better choice than cheap, no-name aftermarket sets found on sites like eBay. The quality of the aluminum and machining on genuine BMW parts is significantly higher, offering better durability and safety. Reputable aftermarket brands like Vortex, Woodcraft, or Gilles are excellent but will be more expensive.
Known Issues, TSBs, and Recalls
There are no specific recalls or Technical Service Bulletins (TSBs) from BMW or the NHTSA related to the footpegs or rearsets for the 2014-2016 S 1000 RR.
A recall was issued for some 2016-2017 models (NHTSA Campaign: 16V948000) for a rear suspension linkage bolt that could loosen. This recall is unrelated to the foot controls but is sometimes mentioned in the same model year context.
Replacement Guide
Replacing the rearsets on an S 1000 RR is a straightforward job that a DIY mechanic can accomplish with basic tools.
- Difficulty: 2/5
- Estimated Time: 1 hour
- Tools Required: Torx bit set (T45 for passenger pegs), Allen key set, socket set, torque wrench, blue thread locker.
Step-by-Step Replacement (Rider Rearsets)
- Prepare the Bike: Secure the motorcycle on a rear stand.
- Brake Side Removal: Disconnect the rear brake light switch if necessary. Unbolt the rear brake master cylinder from the rearset plate (usually two small bolts). Unbolt the main rearset assembly from the frame (usually two larger bolts).
- Shifter Side Removal: Disconnect the shift rod from the shift lever. This may involve loosening a lock nut and unthreading the linkage. Unbolt the main rearset assembly from the frame.
- Installation: Installation is the reverse of removal. Apply a small amount of blue thread locker to the main frame mounting bolts.
- Torque Bolts: Tighten the main rearset mounting bolts to the factory specification. Multiple sources indicate this is 22 Nm (16.2 ft-lbs). Do not overtighten.
- Final Adjustments: Reconnect and adjust the shift rod and brake pedal height to your preference. Ensure the rear brake is not dragging and that the bike shifts cleanly through all gears before riding.
Pro Tip: When removing the shifter side, take a photo of the shift linkage and note its position. This will make it easier to set the shifter height correctly during reassembly.
Cost Comparison
| Part | Price Range |
|---|---|
| New OEM Rearset Plate (One Side) | $415 - $450 |
| Used OEM Rearset Assembly (One Side) | $150 - $250 |
| New Aftermarket Rearsets (Premium: Vortex, Woodcraft) | $420 - $650 |
| New Aftermarket Rearsets (Budget/eBay) | $120 - $200 |
| Shop Labor for Installation | $100 - $300 |
Frequently Asked Questions (FAQ)
Can I replace just the footpeg itself?
Yes. The individual footpeg can often be replaced separately from the main rearset plate. This requires removing a circlip and driving out the pivot pin. However, if the mounting point on the rearset plate is bent or the pivot hole is worn, replacing only the peg won't solve any wobbling issues.
What is the difference between standard shift and GP shift?
Standard shift pattern is 1 down, 5 up. GP (Grand Prix) shift is the reverse: 1 up, 5 down. Many aftermarket rearsets allow you to switch between the two by changing the orientation of the shift linkage. This is a matter of rider preference, with GP shift being popular for track use as it makes upshifting while leaned over easier.
Are adjustable aftermarket rearsets worth it?
For many riders, yes. Aftermarket rearsets from brands like Vortex, Woodcraft, or Gilles Tooling offer multiple mounting positions for the footpeg. This allows you to move the peg up and back for more aggressive track riding (increasing ground clearance) or even lower for more comfort on the street. They are also typically stronger than the cast OEM units and designed for easier replacement of individual parts after a crash.
Why are used OEM rearsets so much cheaper than new?
Many riders upgrade to adjustable aftermarket rearsets for track use or aesthetic reasons, creating a large supply of perfectly good used OEM parts. Additionally, many bikes are parted out after being damaged, and if the foot controls survive, they enter the used market at a significant discount compared to the new price from a BMW dealer.
Technical Specifications
OEM Part Numbers: 46717728308
Rearset Mounting Bolt Torque: 22 Nm (16.2 ft-lbs)
We Have This Part in Stock

The information in this article is provided for general reference and educational purposes only. Vehicle specifications, procedures, and part compatibility can vary by production date, trim level, and region. Always consult your vehicle's factory service manual and verify part numbers before purchasing or performing repairs. Safety-critical components such as airbags, seat belts, and braking systems should be installed by a qualified professional.
- BMW S 1000 RR: