

2010-2016 Cadillac SRX Fog Light Bezel: Chrome, Black, and No-Fog-Light Variants Explained
This guide covers the common failure points, part number variations, and replacement tips for the fog light bezels on the second-generation Cadillac SRX.
- The most critical step is verifying compatibility: check for driver/passenger side, with or without a fog light opening, and chrome or black finish.
- Many base model SRX vehicles do not have fog lights and require a solid bezel (no hole).
- When buying used, the number one priority is to inspect for broken mounting tabs, which will prevent a secure fit.
- Replacement is a simple DIY job that can be done in under an hour by accessing the bezel through the wheel well, without removing the bumper.
Symptoms of Failure
As a cosmetic trim piece, the fog light bezel does not have functional failure symptoms that affect vehicle operation. Instead, failure is related to its physical condition. All symptoms are visual or audible.
- Physical Damage: This is the most common issue. Cracks, holes, or scuffs from impacts with curbs, road debris, or minor parking lot bumps are frequent.
- Broken Mounting Tabs: The bezel is held in place by plastic clips and tabs. These can become brittle with age and break during removal or from vibration, leading to a loose fit.
- Loose Fitment or Rattling: If the mounting tabs are broken or loose, the bezel can vibrate, causing a rattling or buzzing sound, especially at higher speeds. In severe cases, the bezel can fall off the vehicle entirely.
- Fading or Discoloration: Over time, exposure to UV rays from the sun can cause the black plastic to fade to a dull gray.
- Chrome Peeling: On models with chrome-accented bezels, the chrome layer can bubble, peel, or flake off due to weather exposure and age, leaving an unsightly finish.
Warning: A loose or damaged fog light bezel can detach from the vehicle while driving, creating a hazard for other motorists.
Known Issues, TSBs, and Recalls
There are no specific recalls or Technical Service Bulletins (TSBs) from GM or the NHTSA that directly address the fog light bezels on the 2010-2016 Cadillac SRX. Problems with this part are generally due to cosmetic wear and tear or physical damage from road hazards. While there are numerous recalls for the SRX of this generation for issues like suspension and airbags, none pertain to exterior trim pieces like the fog light bezel.
Variant Differences: The Key to Compatibility
Successfully replacing a fog light bezel on your SRX requires ordering the correct version. There are three main factors to consider:
- Side: Driver (Left) or Passenger (Right) side.
- Fog Lights: Does your SRX have factory fog lights? Base models were often sold without them, and these vehicles use a solid bezel with no opening. Vehicles with fog lights need a bezel with a hole for the lamp.
- Finish: Bezels came in at least two finishes: a standard textured black and a premium version with a chrome ring accent. You must match the finish to the other side for a consistent appearance.
| Part Description | Common Part Numbers | Notes |
|---|---|---|
| Driver Side, With Fog Light, Chrome | 25778388 | Fits models with fog lamps, features a bright chrome ring. |
| Passenger Side, With Fog Light, Chrome | 25778389, GM1039125 (Partslink) | The passenger-side counterpart to the chrome trim bezel. |
| Driver Side, WITHOUT Fog Light, Black | 22867259 (replaces 25778386) | This is a solid grille/bezel for models not equipped with fog lamps. |
Pro Tip: Before ordering, physically inspect your vehicle. The most common mistake is ordering a bezel with a fog light opening for a car that doesn't have fog lights, or vice-versa. The description for part number 22867259 explicitly states it is for models "without fog lamps".
Buying a Used Fog Light Bezel
A used OEM fog light bezel is an excellent value, but careful inspection is key.
- Check All Mounting Tabs: This is the most critical inspection point. Flip the bezel over and carefully inspect every single mounting tab and clip location. Look for any signs of stress (white marks on the black plastic) or outright broken tabs. A bezel with even one broken tab may not sit flush or could rattle after installation.
- Verify the Style: Double-check that you are buying the correct part for your car. Confirm it has the opening for a fog light if you need it, and that the finish (all black vs. chrome ring) matches the one on the other side of your vehicle.
- Inspect for Cracks and Damage: Look closely for hairline cracks, especially around the screw holes and tab slots. Minor scuffs on the surface can often be polished or are acceptable for a daily driver, but any cracks compromise the part's structural integrity.
- Chrome Condition: If buying a chrome-trimmed version, check for any signs of bubbling or peeling. Once the chrome starts to lift, it will only get worse.
Cost Breakdown
| Part | Price Range |
|---|---|
| New OEM (Dealer) | $220 - $320 per side |
| New Aftermarket | $30 - $60 per side |
| Used OEM | $40 - $100 per side |
| Shop Labor | $50 - $150 |
Replacement Guide
Replacing the fog light bezel on a 2010-2016 SRX is a relatively simple DIY project. While some videos show removing the entire front bumper cover, this is often not necessary. Access can usually be gained through the front wheel well.
Installation Difficulty: 2 out of 5
Estimated Time: 0.5 hours per side
Tools Required:
- 7mm socket
- Phillips head screwdriver
- Trim removal tool
Step-by-Step Process (Simplified):
- Access the Area: Turn the steering wheel all the way to one side to give yourself room to work in the wheel well. For even more room, you can remove the front wheel.
- Remove Fender Liner Screws: Use a Phillips screwdriver and 7mm socket to remove the screws holding the front portion of the plastic fender liner in place.
- Peel Back Fender Liner: Gently pull the fender liner back to gain access to the rear of the bumper and the fog light area. You may need to pop out one or two plastic push-pins.
- Release the Bezel: From behind, you will see the tabs holding the old bezel in place. Carefully squeeze the tabs while pushing the bezel outwards from the front of thebumper. A trim tool can help gently pry from the front without scratching the paint.
- Install New Bezel: Line up the new bezel and simply push it into place. You should hear and feel the clips snap securely into the bumper cover.
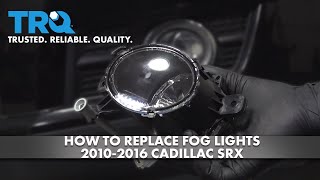
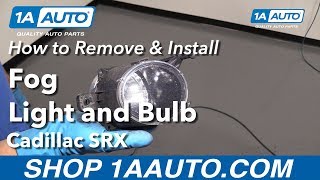
- Reassemble: Secure the fender liner with its screws and push-pins, and reinstall the wheel if you removed it. 🎬 See this video guide for accessing the fog light area
Pro Tip: When installing the new bezel, make sure all clips are properly aligned before applying pressure. Forcing it can break the new tabs. It should snap in with firm, even pressure.
Frequently Asked Questions
Do I need to remove the whole bumper to change the fog light bezel?
No, in most cases you do not. You can typically access the back of the bezel by removing a few screws in the wheel well and peeling back the fender liner, which is much faster and easier.
Will an aftermarket bezel fit as well as an OEM one?
Fitment can be a concern with aftermarket parts. While significantly cheaper, they may use more brittle plastic and the mounting tabs may not be as precise as a genuine GM part. For a cosmetic piece like this where flush fitment is important, a used OEM part is often a safer bet for quality and fit than a new, cheap aftermarket one.
Can I install a fog light bezel with an opening on my base model SRX and add fog lights?
While you can physically install the bezel, adding fog lights is more complex. You would need the fog lights themselves, the correct wiring harness, and potentially a new headlight switch. The vehicle's computer (BCM) may also need to be reprogrammed to recognize the new hardware. It is not a simple plug-and-play upgrade.
My chrome bezel is peeling. Can I just repair it?
Repairing peeling chrome on plastic is very difficult and the results are rarely satisfactory. The best and most permanent solution is to replace the bezel.
Helpful Videos
Technical Specifications
OEM Part Numbers: 22867259 25778386 25778388 25778389
Material: Plastic (ABS/Polyolefin Alloy). Attachment Type: Snap-in clips.
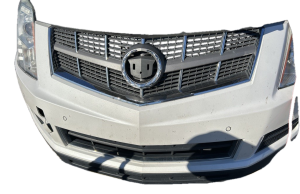
We Have This Part in Stock



The information in this article is provided for general reference and educational purposes only. Vehicle specifications, procedures, and part compatibility can vary by production date, trim level, and region. Always consult your vehicle's factory service manual and verify part numbers before purchasing or performing repairs. Safety-critical components such as airbags, seat belts, and braking systems should be installed by a qualified professional.
- Cadillac SRX: