

2019-2020 Kia Optima Fog Light Guide: Fitment, Problems, and Replacement
This guide covers the critical fitment details for the 2019-2020 Kia Optima's halogen projector fog lights, including the crucial US-built vehicle requirement.
- This part ONLY fits US-built Optimas with a VIN starting in '5'; it will not fit Korean-built models (VIN starting with 'K').
- It is designed for models with halogen main headlights and LED DRLs; it is not compatible with full LED or HID headlight systems.
- The most common failures are moisture intrusion from a bad seal and burned-out bulbs. Minor condensation can be normal.
- Replacement is a straightforward DIY job, accessed by removing the lower splash shield, not from the front of the bumper.
Key Variant & Compatibility Warnings
Successfully replacing the fog light assembly on a 2019-2020 Kia Optima requires careful attention to three critical compatibility factors. Ordering the wrong part is a common and frustrating mistake.
Fitment Trap: This specific halogen projector fog light assembly ONLY fits US-built models, which have a Vehicle Identification Number (VIN) that starts with '5'. It will not fit models built in Korea, which have a VIN starting with 'K'. The mounting points and wiring can differ between factories.
Halogen vs. LED Headlight Systems
This fog light assembly is designed for Optima models equipped with Halogen main headlights and LED Daytime Running Lights (DRLs). This was a common configuration on the 'S' trim level. These fog lights are NOT interchangeable with the assemblies found on higher trims (like EX or SX) that came with full LED or HID/Xenon headlight systems. The wiring connectors and mounting brackets are different.
Part Numbers and Sides
Always verify the part number for the specific side you need. They are not interchangeable.
- Driver Side (LH): 92201-D5600
- Passenger Side (RH): 92202-D5600
Symptoms of a Failing Fog Light Assembly
Failure can manifest in several ways, ranging from simple bulb issues to problems with the entire housing.
- Dim or No Light Output: The most obvious symptom is a fog light that doesn't turn on. This could be a burned-out bulb, a bad fuse, a faulty relay, or a wiring issue.
- Moisture or Condensation Inside the Lens: Light fogging that appears and disappears with temperature changes can be normal for vented headlight and fog light assemblies. However, if you see large water droplets or pooling water at the bottom of the housing, it indicates a failed seal. This moisture can cause bulbs to burn out prematurely and will damage the reflective chrome finish inside the housing over time.
- Cracked or Damaged Lens: Road debris can easily crack the plastic lens, which will allow moisture to enter and will fail safety inspections.
- Flickering Light: This often points to a poor electrical connection at the bulb socket or a failing relay. In some cases, the socket itself can melt from the heat of the bulb, causing an intermittent connection.
- Cornering Light Function Inoperative: If the fog light works when manually switched on but doesn't illuminate during turns, the issue may lie within the vehicle's body control module (BCM) or steering angle sensor system, rather than the fog light assembly itself.
Pro Tip: A common issue with Kia lighting is condensation. A Kia Technical Service Bulletin (TSB) notes that minor fogging that clears after running the lights for a few minutes is considered normal. Replacement is only recommended if water is visibly pooling inside the unit.
Buying a Used Fog Light Assembly: What to Inspect
A used OEM fog light can be an excellent value, often providing better quality and fit than a cheap aftermarket part. Here’s what to look for:
- Check All Mounting Tabs: Carefully inspect every mounting tab and bracket on the housing. These are often thin plastic and can easily break during a collision or even during removal at the salvage yard. A broken tab will result in a loose fit and vibration.
- Inspect the Lens for Damage: Look for cracks, deep scratches, and "crazing" (a network of fine cracks from UV damage). Minor hazing can often be polished out, but a cracked lens means the assembly is no good.
- Look for Signs of Water Intrusion: Hold the assembly up to the light and look for a "water line" or mineral deposits on the inside of the lens or on the chrome reflector. This is a clear sign the seal has failed and the unit will continue to leak.
- Verify the Connector: Compare the electrical connector on the used part with your original. Ensure the pin configuration and connector shape are identical. This is especially important given the US-built vs. Korean-built variations.
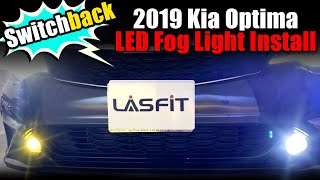
- Ask About the Bulb: While the bulb is a simple replacement, ask if it's included. The correct bulb type for the halogen projector fog light is a 9006. 🎬 Watch: How to install switchback LED bulbs in your fog lights
Known Issues, TSBs, and Recalls
As of mid-2024, there are no specific NHTSA recalls for the 2019-2020 Kia Optima fog light assemblies. However, there are related items of note:
- TSB on Headlamp Condensation: Kia has issued general service bulletin BOD 055 (Rev 1) regarding moisture in lamp assemblies. It states that light fogging is normal due to atmospheric changes and the vented nature of the housings. It advises drying the lamp by running it before considering replacement.
- FCA System Recall: Recall SC179 was issued for some 2019 Optimas for a software issue with the Forward Collision-Avoidance Assist (FCA) system, but this is unrelated to the lighting hardware.
- Forum Complaints: Owners on forums frequently discuss condensation in both headlights and fog lights, with dealers often classifying it as a normal condition. Some owners have had success getting heavily fogged units replaced under warranty, while others have been told it is not a warrantable defect.
Cost of Replacement
The cost to replace a fog light assembly can vary significantly based on the type of part used and whether you perform the labor yourself.
| Part Type | Estimated Cost (Per Side) |
|---|---|
| New OEM | $210 - $440 |
| New Aftermarket (CAPA Certified) | $100 - $155 |
| Used OEM | $75 - $150 |
| Shop Labor | $54 - $116 |
Step-by-Step Replacement Guide
Replacing the fog light assembly is a manageable DIY job for those with basic tools. The estimated time is about 30-60 minutes per side.
- Access the Assembly: You cannot access the fog light from the front. You must go through the bottom of the bumper.
- Remove Lower Splash Shield: Turn the steering wheel to one side for better access to the wheel well. Remove the plastic clips and 10mm bolts holding the front portion of the underbody splash shield and fender liner.
- Peel Back the Liner: Gently pull the plastic liner back to expose the rear of the fog light assembly.
- Disconnect the Wiring: Locate the electrical connector on the back of the bulb. Press the release tab and pull the connector straight off. This can be tight and may require some wiggling.
- Unbolt the Assembly: The fog light housing is typically held in place by several bolts (usually 10mm). Remove these bolts while supporting the assembly to prevent it from falling.
- Install the New Assembly: Position the new assembly and hand-tighten the bolts. Once aligned, tighten them securely. Do not overtighten, as this can crack the plastic mounting tabs.
- Reconnect and Test: Plug the wiring harness into the new bulb. Before reassembling the splash shield, turn on the fog lights to ensure the new unit works correctly.
- Aim the New Fog Light: With the new light installed, it's crucial to aim it properly. See the aiming section below.
- Reassemble: Secure the fender liner and splash shield with all clips and bolts.
Aiming the Fog Lights
Proper aiming is essential to ensure the lights are effective and do not blind oncoming drivers.
- Park the car on a level surface, 25 feet away from a flat wall.
- Measure the height from the ground to the center of your fog light. Make a mark on the wall at this same height.
- Turn on the fog lights. The top of the beam's brightest cutoff point should be aimed approximately 4 inches below your mark on the wall.
- Use a Phillips head screwdriver to turn the adjustment screw on the back of the fog light assembly to raise or lower the beam as needed.
Frequently Asked Questions
Can I upgrade the halogen fog light bulb to an LED?
Yes, you can replace the stock 9006 halogen bulb with an LED equivalent. This is a popular modification. However, be aware that the quality of LED bulbs varies greatly. A poorly designed LED bulb in a projector housing can create glare and an improper beam pattern. Choose a reputable brand and ensure the LED diodes are positioned to mimic the filament of a halogen bulb.
Why does this part only fit US-built Kia Optimas?
Kia operates manufacturing plants in both South Korea (VIN starting with 'K') and the United States (VIN starting with '5'). While the cars look identical, there are often subtle differences in parts supplied by local vendors, including wiring harnesses, connectors, and mounting brackets. For this reason, many parts are not interchangeable between the two versions.
How can I fix moisture inside my fog light?
If it's minor fogging, it may clear on its own by running the lights. For persistent moisture or water pooling, the seal has failed. The best long-term solution is to replace the assembly. A temporary fix involves removing the assembly, carefully drying the inside with a hairdryer on a low setting, and applying a bead of clear silicone sealant around the seam where the lens meets the housing. This is not a guaranteed fix.
Is a broken fog light a safety inspection failure?
This depends on your state's regulations. In many states, all factory-installed lighting must be functional to pass a safety inspection. A cracked lens or a non-working fog light will likely result in a failure. Even if it's not a failure, it reduces your visibility in hazardous weather.
Helpful Videos
Technical Specifications
OEM Part Numbers: 92201-D5600 (Driver Side, LH) 92202-D5600 (Passenger Side, RH)
Technology: Halogen Projector Bulb Type: 9006 / HB4
We Have This Part in Stock


The information in this article is provided for general reference and educational purposes only. Vehicle specifications, procedures, and part compatibility can vary by production date, trim level, and region. Always consult your vehicle's factory service manual and verify part numbers before purchasing or performing repairs. Safety-critical components such as airbags, seat belts, and braking systems should be installed by a qualified professional.
- Kia Optima:
- 🎬 Helpful Videos
- 🛍️ Shop This Part
- Key Variant & Compatibility Warnings
- Halogen vs. LED Headlight Systems
- Part Numbers and Sides
- Symptoms of a Failing Fog Light Assembly
- Buying a Used Fog Light Assembly: What to Inspect
- Known Issues, TSBs, and Recalls
- Cost of Replacement
- Step-by-Step Replacement Guide
- Aiming the Fog Lights
- Frequently Asked Questions
- 🎟️ Get 5% Off