

2017-2019 Genesis G90 Floor Console Air Duct: Diagnosis & Replacement
This guide covers the symptoms, inspection, and replacement of the floor console air duct, helping you determine if the duct is truly the cause of your rear HVAC problems.
- Failure of this duct is rare and almost always due to physical damage; there are no common design flaws, recalls, or TSBs.
- Before blaming the duct for no rear airflow, always check climate control settings and replace the cabin air filter first.
- Replacement requires the complete removal of the center console, a moderately difficult job that requires patience to avoid damaging trim.
- A used OEM duct is a cost-effective and reliable option, provided you inspect it for cracks and broken mounting tabs before purchase.
Symptoms of a Failing Floor Console Air Duct
Failures of the floor console air duct are uncommon and almost always due to physical damage rather than wear and tear. If you suspect an issue with this part, look for these specific symptoms:
- Rattling or Buzzing from the Center Console: If the duct has been broken or its mounting tabs have snapped, it can vibrate against the inside of the center console, creating noise that changes with engine RPM or vehicle speed.
- No Airflow from Rear Console Vents Only: A complete lack of air from the rear console vents, while all front vents work perfectly, could indicate the duct has become disconnected or completely crushed.
Is the Air Duct Really the Problem?
More often than not, a lack of rear airflow is caused by something other than the duct itself. Before you disassemble the center console, check these more common culprits:
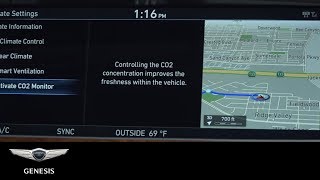
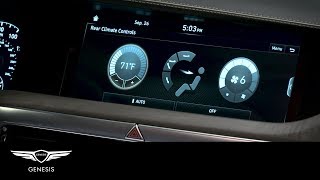
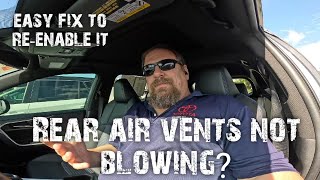
- Climate Control Settings: The G90 has complex climate controls. Ensure the rear climate system is not turned off or locked out from the main infotainment screen. 🎬 Watch: How to re-enable rear air flow Also, check that the airflow mode is not set exclusively to the windshield defrost or floor vents, which can limit air to the center vents.
- Clogged Cabin Air Filter: A dirty cabin air filter is a very common cause of reduced airflow throughout the entire vehicle. Replacing it is simple and should be the first step in diagnosing any airflow issue. 🎬 See: Common causes of weak vent airflow
- Failed Blower Motor: If you have no airflow from any vents (front or rear), the blower motor or its fuse may have failed. 🎬 Watch: Why no air is coming out of your vents
- Blend Door Actuator Failure: The HVAC system uses small motors called actuators to direct air to different zones. If a rear-specific blend door or actuator fails, it can block air from reaching the console duct. This is a more complex issue to diagnose.
Pro Tip: Before assuming the duct is bad, turn the fan to its highest setting and use the controls to cycle air to all zones (face, floor, defrost). Check for airflow at every vent in the car. If the only dead spot is the rear of the center console, the duct becomes a more likely suspect.
Known Issues, TSBs, and Recalls
As of mid-2024, there are no specific recalls or Technical Service Bulletins (TSBs) from Genesis or the NHTSA related to the floor console air duct for the 2017-2019 G90. While the G90 has recalls for other components like the starter solenoid and turbocharger oil feed pipe, the HVAC ductwork has proven to be a reliable part. The absence of common complaints or service actions indicates that failures are rare and typically isolated incidents of physical damage.
Buying a Used Floor Console Air Duct
Since this is a simple, non-mechanical part, a used OEM duct is an excellent way to save money. Aftermarket versions are generally not available. When buying a recycled part, careful inspection is key.
- Check for Cracks: Meticulously inspect the entire duct body, especially around seams and corners. Even a small crack can create whistling noises or reduce air pressure.
- Verify Mounting Points: Ensure all mounting tabs, screw holes, and clip retainers are intact and free of stress marks. A broken tab is the most common reason for a duct to come loose and rattle.
- Look for Obstructions: Check inside the duct to ensure there is no debris or foreign material lodged inside.
- Confirm the Part Number: The verified OEM part number for this component is D2A6GBCAA01. Double-check this against the part you are purchasing to guarantee fitment.
Replacement Procedure
Replacing the floor console air duct requires removing the entire center console assembly. While not mechanically difficult, it involves many steps and requires care to avoid damaging the luxurious interior trim.
Estimated Difficulty: 3/5 (Moderate - requires patience and attention to detail)
Estimated Time: 1.5 - 2.5 hours
Tools Needed:
- Plastic trim removal tool kit
- 10mm socket and ratchet
- Phillips head screwdriver
- Flathead screwdriver (for specific clips)
Step-by-Step Overview:
This is a summary of the process shown in various repair videos. Always proceed carefully and keep track of all screws and clips.
- Disconnect the Battery: Before working on any interior components with electrical connections, disconnect the negative battery terminal.
- Remove Rear Console Trim: Start by removing trim pieces at the rear of the center console to expose the first set of screws or bolts.
- Remove Side Panels: Carefully pry off the long side panels of the center console. These are typically held by clips and a few screws located in the driver and passenger footwells.
- Remove Screws: There are several 10mm screws securing the console. Two are often found inside the console storage compartment under a small lid. Others are located on the sides and front.
- Lift the Console: Once all fasteners are removed, gently lift the console from the rear and pull it back slightly to dislodge it from the dashboard.
- Disconnect Electronics: Do not pull the console away completely. Carefully tilt it to access and disconnect the numerous electrical connectors for the infotainment controller, switches, and power outlets underneath.
- Access and Replace the Duct: With the console removed, the air duct will be visible and attached to the floor tunnel. Unfasten it, install the replacement duct, and ensure it is securely connected to the front HVAC outlet.
- Reassembly: Reassemble in the reverse order of removal. Be sure to reconnect all electrical connectors before fully seating the console. Test all electronic functions before finishing the installation.
Warning: The Genesis G90 interior features high-end materials. Use only plastic trim removal tools to avoid scratching leather, wood, and plastic surfaces. Keep all screws organized to ensure proper reassembly.
Cost Comparison
The main value in buying a used duct is the significant cost savings over a new OEM part. Aftermarket options are not produced for this component.
| Part Type | Estimated Price Range |
|---|---|
| New OEM | $150 - $200 |
| Used OEM | $50 - $90 |
| Shop Labor Cost | $200 - $350 |
Frequently Asked Questions (FAQ)
Why is no air coming from my rear vents, but the front vents work?
First, check your climate control settings on the infotainment screen to ensure the rear system is on and unlocked. Second, replace your cabin air filter, as a severe clog can affect airflow distribution. If those steps don't work, the issue could be a failed blend door actuator or, less commonly, a disconnected or damaged floor console air duct.
Can I repair a cracked air duct instead of replacing it?
For small cracks, it is sometimes possible to use high-quality plastic epoxy or specialized automotive adhesive tape as a temporary fix. However, for a permanent and rattle-free solution, replacement is recommended. The temperature changes and vibrations within the console can cause most repairs to fail over time.
Is this part the same for all 2017-2019 G90 trims (3.3T and 5.0)?
Yes, the floor console air duct (D2A6GBCAA01) is the same for all trim levels of the 2017-2019 Genesis G90, as the center console and basic interior structure are shared.
Do I need any special programming after replacing this part?
No. The floor console air duct is a non-electronic, passive component. No programming or calibration is required after installation.
Helpful Videos
Technical Specifications
OEM Part Numbers: D2A6GBCAA01
Molded plastic construction
We Have This Part in Stock


The information in this article is provided for general reference and educational purposes only. Vehicle specifications, procedures, and part compatibility can vary by production date, trim level, and region. Always consult your vehicle's factory service manual and verify part numbers before purchasing or performing repairs. Safety-critical components such as airbags, seat belts, and braking systems should be installed by a qualified professional.
- Genesis G90: