

2020-2026 Tesla Model Y Fender Molding: Why It Comes Loose and How to Replace It
Your guide to diagnosing loose or damaged Model Y wheel arch trim, inspecting a used part, and performing a simple DIY replacement.
- The most common failure is broken mounting clips, causing the molding to become loose, rattle, or fall off completely.
- When buying a used molding, the most critical inspection is of the clip mounting slots on the back of the part; cracks or breaks here make the part unusable.
- Replacement is a very easy DIY job, taking less than 30 minutes with a simple plastic trim removal tool.
- There are no official recalls for this issue, but it is a widely reported problem among owners, often triggered by rain or car washes.
Symptoms of a Failing Fender Molding

Failure of a Model Y fender molding is almost always a visual or audible issue. Because it is not a mechanical or electrical part, it will not trigger any warning lights on the dashboard. Common symptoms include:
- Loose or Rattling Trim: The most frequent symptom is the molding becoming loose. You may hear it rattling or vibrating against the bodywork while driving, especially at higher speeds. You will also be able to physically wiggle the part with your hand.
- Visible Gaps: A failing molding may start to pull away from the fender, creating a noticeable gap between the trim and the painted body panel.
- Detached or Missing Molding: In more severe cases, often after driving through deep water or snow, the entire molding can detach and fall off the vehicle. This is usually caused by multiple broken clips.
Known Issues, TSBs, and Recalls

While there are no official recalls or widespread Technical Service Bulletins (TSBs) from Tesla for this specific part, owner forums reveal a common complaint: the fender moldings can become loose or detach unexpectedly. This is typically due to the failure of the plastic mounting clips that hold the trim to the body. These clips can become brittle over time or break from minor impacts or even the force of water from large puddles. In some instances, owners have reported the trim coming loose without any apparent cause, suggesting a potential weakness in the original clips.
Pro Tip: If your fender molding is slightly loose, you may be able to simply push it back into place, re-engaging the clips. A firm rap with the palm of your hand can often snap it back in. However, if it continues to come loose, one or more clips are likely broken and the part will need to be replaced.
Warning: A loose fender molding can detach at high speed, becoming a road hazard for other drivers. If a molding is missing, the exposed fender edge is more susceptible to paint chips.
Buying a Used Fender Molding: What to Check

A used OEM fender molding is an excellent, cost-effective replacement, but a thorough inspection is key. Since failure is about physical integrity, not wear and tear, a good used part is just as reliable as a new one.
1. Inspect All Mounting Points (Most Important!)
Flip the fender molding over and carefully examine the back side. You will see a series of rectangular slots where the mounting clips attach. This is the most critical inspection point.
- Look for Cracks: Check the plastic around each slot for hairline cracks or stress marks (whitish lines). A broken mounting slot means the molding cannot be securely attached to the vehicle.
- Confirm All Slots are Intact: Compare the used part to photos of a new one to ensure no mounting locations have been completely broken off. Even one broken tab can cause a loose fit.
2. Check for Scuffs, Fading, and Damage
- Surface Condition: Look for deep gouges or heavy scuffing that has worn away the textured finish. Minor scratches are cosmetic, but deep damage may be a sign of a significant impact that could have also damaged the mounting points.
- Color and Fading: Ensure the color is a consistent black. A part that appears gray or faded has likely had significant sun exposure. While functional, it may not match the other trim on your vehicle.
3. Verify the Part Number
Tesla uses different part numbers for each of the four fender moldings. Ensure you are buying the correct part for the specific corner of the vehicle you need. Revisions are common, so a different suffix (e.g., -00-B vs -00-C) is usually acceptable and indicates a newer version of the same part.
Cost Comparison
| Part Type | Estimated Cost |
|---|---|
| New OEM | $50 - $75 |
| New Aftermarket | $40 - $100 |
| Used OEM | $40 - $75 |
| Shop Labor | $50 - $150 |
DIY Replacement Guide (Difficulty: 1/5)

Replacing a Model Y fender molding is a simple DIY task that requires only basic tools and can be completed in under 30 minutes.
Tools Needed:
- Plastic Trim Removal Tool Kit
- Small Flathead Screwdriver (for push-pin clip, if applicable)
Step-by-Step Replacement
- Remove Push-Pins (If Applicable): Some moldings are secured by one or two plastic push-pins in the wheel well. Use a small screwdriver or clip removal tool to pop the center pin out, then pull the entire clip assembly out. Be sure to save these as the new part may not include them.
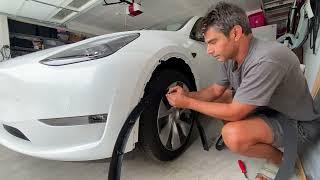
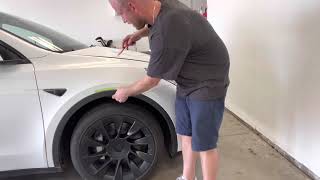
- Pry the Old Molding Off: Starting from the center of the arch, gently work a plastic pry tool between the fender molding and the painted bodywork. Carefully pop the clips loose one by one. Work your way around the arch until the entire piece is detached. 🎬 See: How to remove Model Y fender flares Pull it straight off.
- Clean the Surface: Before installing the new part, clean the fender area with a cloth to remove any dirt or debris. This ensures the new part sits flush.
- Install the New Molding: Align the new fender molding, ensuring the guide pins and clips line up with the holes in the body. For rear moldings, position the alignment tabs in the rocker panel and rear diffuser first. For front moldings, align the rear tab into the rocker panel first. 🎬 Watch: Front fender garnish replacement walkthrough Starting at one end, firmly press the molding into place. You should hear audible clicks as the clips engage.
- Secure Push-Pins: Re-install any push-pins you removed in the first step.
Frequently Asked Questions
Can I just glue my loose fender molding back on?
This is not recommended. The molding is designed to be held in place by clips, which allow for slight movement and expansion. Using glue can create a rigid bond that may damage the paint or the molding itself if it's ever snagged. It also makes future removal much more difficult. The proper fix is to replace the molding or its broken clips.
🎬 Watch: Step-by-step Tesla Model Y fender install guideWhy did my fender molding fall off in the rain or at a car wash?
This is a common scenario. If one or more clips are already broken or weak, the force of high-pressure water from a car wash or driving through a deep puddle can be enough to dislodge the molding and pop the remaining clips loose.
Is there a difference between the left and right side moldings?
Yes, the moldings are specific to each corner of the vehicle (Front Left, Front Right, Rear Left, Rear Right). They are not interchangeable. You must order the part that corresponds to the correct position on the car.
Do I need to remove the wheel to replace the fender molding?
No, it is not necessary to remove the wheel. The molding can be accessed and replaced with the wheel on. Turning the front wheels can provide better access to the front moldings.
Helpful Videos

Technical Specifications
OEM Part Numbers: 1494163-00-B 1494187-00-B 1494187-00-C 1494187-98-C 1494185-00-C 1494186-00-C 1494188-00-C
Material: Textured black plastic. Attachment Method: Clip-on, with approximately 11-12 clips per molding.

The information in this article is provided for general reference and educational purposes only. Vehicle specifications, procedures, and part compatibility can vary by production date, trim level, and region. Always consult your vehicle's factory service manual and verify part numbers before purchasing or performing repairs. Safety-critical components such as airbags, seat belts, and braking systems should be installed by a qualified professional.
- TESLA MODEL Y:
- 🎬 Helpful Videos
- Symptoms of a Failing Fender Molding
- Known Issues, TSBs, and Recalls
- Buying a Used Fender Molding: What to Check
- 1. Inspect All Mounting Points (Most Important!)
- 2. Check for Scuffs, Fading, and Damage
- 3. Verify the Part Number
- Cost Comparison
- DIY Replacement Guide (Difficulty: 1/5)
- Tools Needed:
- Step-by-Step Replacement
- Frequently Asked Questions
- 🎟️ Get 5% Off