

MINI Cooper & Clubman Fender Guide (2007-2024): R-Series vs. F-Series Differences
This guide clarifies the critical differences between Second Generation (R-Series) and Third Generation (F-Series) MINI fenders to ensure you get the right part for your car.
- The single most important factor is identifying your car's generation: Gen 2 (R-Series, ~2007-2015) or Gen 3 (F-Series, ~2014-2024). Fenders are NOT interchangeable between them.
- A used OEM fender is often a better choice than a cheap aftermarket part due to superior fitment, but you must inspect it carefully for hidden damage, rust, and broken mounting tabs.
- Replacement is a feasible DIY job with a difficulty of 2/5, but proper panel alignment requires patience. Hidden bolts under the A-pillar trim are the main challenge.
- Common issues are cosmetic: R-Series models can suffer from rust-proofing drips staining the plastic trim, while F-Series models are prone to sun-faded black plastic trim.
Critical: Identify Your MINI Generation First

Before buying a fender, you must know if your car is a 2nd Generation (R-Series) or 3rd Generation (F-Series) MINI. These parts are not interchangeable. Using the wrong generation fender will result in misaligned panels, incorrect mounting points, and a poor fit.
| Generation | Chassis Codes | Models & Years Covered in this Guide |
|---|---|---|
| Gen 2 (R-Series) | R55, R56, R57, R58, R59 |
|
| Gen 3 (F-Series) | F55, F56, F57 |
|
Part 1: 2nd Generation (R-Series) MINI Fender (2007-2015)

Fenders for the R-Series MINIs, including the 2007-2013 MINI Cooper Hatchback (R56) and 2008-2014 MINI Cooper Clubman (R55), are largely interchangeable across the different models of this generation (Hatchback, Clubman, Convertible, Coupe, and Roadster). However, you must pay attention to variations for specific trim levels.
Known Issues & What to Look For
- Rust: While MINI used galvanized steel and offers a 12-year rust warranty, real-world conditions can still lead to corrosion. Inspect carefully around the side scuttle/turn signal opening and along the bottom edge where it meets the rocker panel and bumper.
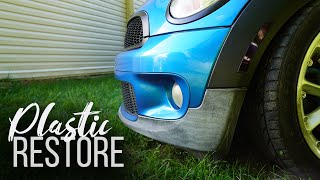
- Cosmoline Drips: A common issue on R56 models is a waxy, rust-proofing substance called Cosmoline leaking from inside the hood (bonnet) in hot weather. This can drip onto the black plastic fender arch trim, causing a permanent stain. 🎬 Watch: How to restore R56 plastic wheel arches Check the trim for these drip marks and wipe the inside of the hood to prevent future drips.
- Trim Variations: Base, Cooper S, and John Cooper Works (JCW) models may have different side scuttles or surrounding trim pieces. While the main fender panel is often the same, ensure the replacement has the correct holes for your car's specific trim.
OEM Part Numbers (R-Series)
Common part numbers for this generation include, but are not limited to: 41352752332, 41352754725, 41352751322.
Part 2: 3rd Generation (F-Series) MINI Fender (2014-2024)

Fenders for the F-Series, which includes the 2014-2024 MINI Cooper Hardtop (F55/F56) and Convertible (F57), are larger and have different body lines than the previous generation. They are not compatible with any R-Series models.
Known Issues & What to Look For
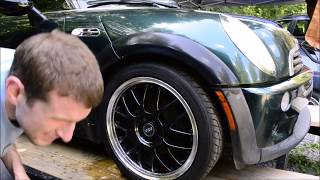
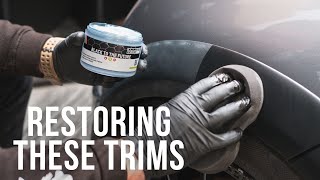
- Faded Plastic Trim: A very common cosmetic issue on F-Series MINIs is the unpainted black plastic wheel arch trim fading from a deep black to a light gray due to sun exposure. 🎬 See how to restore faded F-Series plastic trim While this doesn't affect the fender itself, it's a key point to inspect when assessing the overall condition of a used part.
- Paint Rub from Door Seals: Some F56 models have an issue where the door seal can rub against the paint on the door jamb area, adjacent to the rear of the fender. When inspecting a fender, check this area for any signs of paint wear as it indicates a potential alignment or seal issue.
- Side Marker Variations: Ensure the fender has the correct opening for your vehicle's side marker light, as there can be subtle differences between model years or trims.
OEM Part Numbers (F-Series)
Common part numbers for this generation include, but are not limited to: 41-00-7-374-521, 41-00-7-374-522, 41007330312, 41007333642.
Symptoms of a Failing or Damaged Fender

Unlike mechanical parts, fender failure is almost always due to physical damage or corrosion.
- Visible Damage: Dents, dings, deep scratches, and cracks from collisions or impacts are the most obvious symptoms.
- Rust or Paint Bubbling: Bubbling paint is a sign of underlying corrosion. Check along wheel arches, seams, and mounting points.
- Poor Alignment or Uneven Gaps: If the gap between the fender, door, hood, and bumper is uneven, the fender or its mounting points may be bent. This can also cause the door to catch on the fender when opening.
- Noises: A loose or damaged fender or fender liner can flap or rub against the tire, especially at high speeds or when turning.
Warning: A tire rubbing on a damaged fender or liner can cause a blowout. If you hear rubbing noises, inspect the area immediately before driving further.
Buying a Used Fender: What to Check
A used OEM fender is often a better choice than a new aftermarket one due to superior fit and finish. However, careful inspection is key.
- Confirm the Generation: First and foremost, verify if you need an R-Series or F-Series fender. They are not interchangeable.
- Inspect for Hidden Damage: Look at the back side of the fender. Check for signs of previous repairs like Bondo (body filler), which can be detected with a small magnet (it won't stick to filler). Look for ripples or inconsistent texture in the paint.
- Check All Mounting Points: Carefully examine every mounting tab and bolt hole. Ensure none are cracked, broken, or elongated from stress. A fender with damaged mounting points will never align correctly.
- Look for Rust: Check the front and back, especially along the lower edges and any seams where moisture can collect. Surface rust can be treated, but deep or perforated rust means the panel should be rejected.
- Verify Holes and Cutouts: Make sure the fender has the correct holes for your side marker lights and wheel arch trim. JCW models may have different requirements.
- Color Match: Finding a used fender in the same color can save you hundreds of dollars in paint costs. Use your vehicle's paint code to find a match, but be aware that sun fading can cause slight variations.
Replacement Overview
Replacing a MINI Cooper fender is a manageable DIY project for those with basic tools and patience.
- Difficulty: 2 out of 5. The process is mostly unbolting and re-bolting parts.
- Tools Required: Socket set (8mm, 10mm), Torx bits, trim removal tools, jack, and jack stands.
- General Steps:
- Safely jack up the car and remove the front wheel.
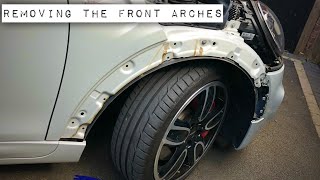
- Remove the plastic fender liner from the wheel well 🎬 Watch: How to remove F56 front wheel arches by removing its plastic push-pins and screws.
- Disconnect the side marker light electrical connector.
- Remove the bolts securing the fender to the front bumper, the frame inside the wheel well, and along the top edge in the engine bay.
- On R-Series models, there are hidden bolts under the A-pillar trim that must be accessed by carefully removing the trim piece. F-Series models have a similar bolt behind the door seal area.
- Once all bolts are removed, the fender can be carefully taken off the car.
- Installation is the reverse of removal. Loosely attach all bolts first to allow for alignment adjustments before final tightening.
Pro Tip: Panel alignment is the trickiest part. Use painter's tape to mark the position of the old fender around the bolts before removal. When installing the new one, aim for consistent gaps between the fender, hood, and door. Gently close the door and hood multiple times to check for interference before slamming them shut.
Cost Comparison
| Part Source | Estimated Cost (Part Only) | Notes |
|---|---|---|
| New OEM | $215 - $350 | Primed, requires painting. Perfect fitment guaranteed. |
| Used OEM | $100 - $250 | Best value if you can find a color-matched, damage-free part. |
| New Aftermarket | $75 - $200 | Fitment can be inconsistent and may require modification. Often made of thinner metal. |
| Shop Labor (Installation) | $150 - $300 | Does not include paint work. |
| Shop Labor (Paint) | $300 - $600+ | Cost to paint a new primed fender and blend it with adjacent panels. |
Frequently Asked Questions (FAQ)
Will a Cooper S fender fit on a base model Cooper?
Yes, for models within the same generation (e.g., an R56 Cooper S fender on an R56 base Cooper), the main fender panel is typically identical. The primary differences are in the plastic trim pieces like the side scuttles, which can be swapped over from your old fender.
Do I need to paint a used fender if it's the same color?
Not necessarily. If you find a used fender with the same paint code and it's in excellent condition, you can often bolt it on directly. However, be aware that years of sun exposure can cause slight fading, so the match may not be 100% perfect. For a show-quality finish, a body shop will need to blend the paint into the adjacent door and hood.
Is fender replacement difficult?
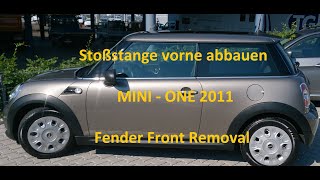
For a DIYer with some experience, it is not considered a difficult job. It requires basic tools and the patience to properly align the new panel. The most challenging part is often removing trim pieces without breaking clips and accessing the bolts hidden behind the A-pillar or door opening.
Are there any recalls for MINI Cooper fenders?
No, there are no recalls issued by the NHTSA specifically for the external fender panels on these MINI Cooper models. Recalls for this vehicle range typically involve safety systems like airbags or side-impact protection structures located behind the body panels.
Helpful Videos
Technical Specifications
OEM Part Numbers: 41-00-7-330-312 41-00-7-330-318 41-00-7-333-642 41-00-7-374-521 41-00-7-374-522 41007330310 41007330312 41007330315 41007330318 41007333535 41007333642 41007374521 41007374522 41352752332 41352754725
Material: Stamped Steel or Aluminum, depending on model and part. Finish: Primed (New OEM/Aftermarket) or Painted (Used OEM).
We Have This Part in Stock



The information in this article is provided for general reference and educational purposes only. Vehicle specifications, procedures, and part compatibility can vary by production date, trim level, and region. Always consult your vehicle's factory service manual and verify part numbers before purchasing or performing repairs. Safety-critical components such as airbags, seat belts, and braking systems should be installed by a qualified professional.
- MINI Cooper:
- MINI Cooper Clubman:
- 🎬 Helpful Videos
- 🛍️ Shop This Part
- Critical: Identify Your MINI Generation First
- Part 1: 2nd Generation (R-Series) MINI Fender (2007-2015)
- Known Issues & What to Look For
- OEM Part Numbers (R-Series)
- Part 2: 3rd Generation (F-Series) MINI Fender (2014-2024)
- Known Issues & What to Look For
- OEM Part Numbers (F-Series)
- Symptoms of a Failing or Damaged Fender
- Buying a Used Fender: What to Check
- Replacement Overview
- Cost Comparison
- Frequently Asked Questions (FAQ)
- 🎟️ Get 5% Off