

2016-2025 Tesla Model X Fender Flares & Rocker Panels: A Guide to the 2021 Refresh and Loose Trim
This guide covers the critical design change in 2021, why these trim pieces come loose, and how to inspect a used part for a successful repair.
- A major design change for the 2021 'Palladium' refresh means pre- and post-2021 flares and rocker panels are not interchangeable.
- Failure is almost always due to brittle plastic mounting clips breaking, leading to looseness, gaps, or complete detachment.
- When buying a used part, the integrity of the mounting tabs on the back is more important than cosmetic scuffs.
- Replacement is a straightforward DIY job, but you must have a set of new mounting clips on hand before starting, as the old ones will break.
Critical Compatibility Warning: Pre-Refresh (2016-2021) vs. Post-Refresh (2021-2025)

Warning: The single most important factor when purchasing a fender flare or rocker panel for a Tesla Model X is the model year. Tesla performed a major vehicle update, often called the 'Palladium' or 'Refresh' update, which began production in 2021. Body panels and trim pieces from pre-refresh models (generally 2016-2020 and some early 2021) are NOT interchangeable with post-refresh models (late 2021-2025). The design, dimensions, and mounting points are different. Always verify the part's specified year range before purchasing.
The pre-refresh models featured chrome trim around the windows and other areas, which was eliminated in the refresh for a blacked-out look. This design change extended to the lower body cladding, resulting in different shapes and attachment methods. For example, the front fender garnish on refresh models integrates the ultrasonic parking sensor differently and uses a revised clipping system.
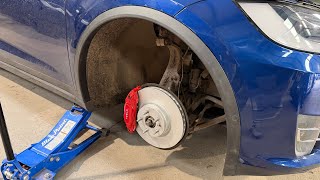
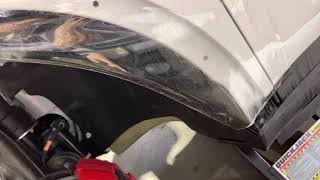
🎬 Watch: How to remove the refresh model's front wheel arch moldingCommon Symptoms of Failure

Failure of these trim pieces is always physical or cosmetic. The most common issue is looseness caused by broken plastic mounting clips. You will not see any dashboard warning lights or receive any error codes for this part.
- Looseness or Rattling: This is the most frequent symptom. You may hear a flapping or buzzing sound at highway speeds or notice a section of the trim is no longer flush with the body. This is caused by weakened or broken plastic mounting clips behind the panel.
- Visible Gaps: An uneven gap between the flare and the painted body panels is a clear sign of a problem. This can happen from a minor impact, but also occurs if the trim was previously removed and reinstalled without all clips properly engaging.
- Complete Detachment: In some cases, a loose flare or rocker panel can detach from the vehicle entirely, especially when driving at high speeds or after hitting a large puddle. This creates a significant road hazard for other drivers.
- Physical Damage: Cracks, deep gouges, or scuffs from impacts with curbs, road debris, or automatic car washes are common signs that the part may need replacement.
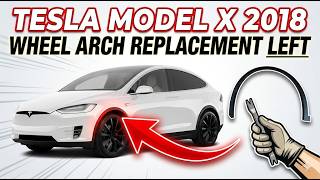
Pro Tip: The plastic clips that hold the flare to the body are brittle and often break during removal. Tesla's own service manuals state to replace any broken clips. 🎬 See this step-by-step pre-refresh wheel arch trim replacement It is highly recommended to purchase a new set of replacement clips before starting any repair.
Buying a Used Fender Flare or Rocker Panel

A used OEM part is an excellent choice, as it guarantees the correct material quality and fitment, which can be a problem with some aftermarket alternatives. When inspecting a used part, focus on its structural integrity rather than minor cosmetic flaws.
- Verify the Year Range: First and foremost, confirm the part is from the correct generation of Model X for your vehicle (pre-refresh 2016-2021 or post-refresh 2021-2025). Check the part number if possible.
- Inspect the Backside: This is the most critical step. Flip the panel over and carefully inspect all the mounting tabs and slots where the plastic clips attach. If these are cracked, broken, or missing, the panel will not mount securely to the vehicle. A part with perfect paint but broken tabs is useless.
- Check for Cracks: Look for hairline cracks, especially around the mounting points and edges. While scuffs and light scratches are purely cosmetic, a crack can spread and lead to the panel breaking apart.
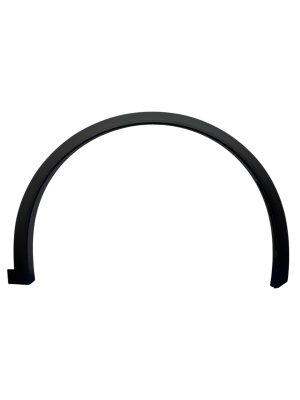
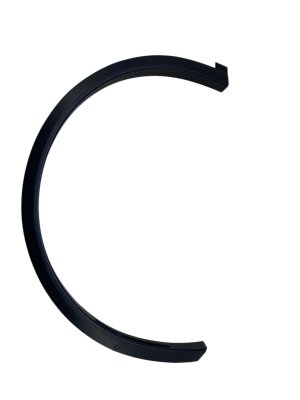
- Confirm Part Name: Be sure you are buying the correct piece. The system includes front wheel arch flares, rear wheel arch flares (which are part of the rear door cladding on the Model X), and the long rocker panels that run under the doors.
Known Issues, Recalls, and Service Bulletins
As of early 2026, there are no official recalls or Technical Service Bulletins (TSBs) from the National Highway Traffic Safety Administration (NHTSA) specifically for the fender flares or rocker panels on the 2016-2025 Tesla Model X.
However, owner forums are filled with reports of these trim pieces becoming loose or detaching, indicating it is a common real-world problem. Additionally, Tesla has issued recalls for other adhered exterior trim pieces on early Model X vehicles, such as roof appliques that could detach due to improper primer application during manufacturing. This suggests a historical pattern of trim adhesion and security issues on earlier models, though the flares and rockers are primarily secured by clips rather than just adhesive.
Replacement Cost Breakdown
Prices can vary based on location, the specific trim piece, and its condition. The front and rear flares and rocker panels are all priced differently.
| Part Type | Estimated Cost |
|---|---|
| New OEM (from Tesla) | $90 - $250 per piece |
| New Aftermarket | $50 - $120 per piece |
| Used OEM | $75 - $200 per piece |
| Shop Labor Cost | $130 - $500 per piece |
Installation Guide & Difficulty

- Difficulty: 2 out of 5 (Easy to Moderate)
- Estimated Time: 0.5 - 1.0 hours per flare/panel.
- Tools Needed: Trim removal tool, 10mm socket, T25/T30 Torx driver (model dependent), new mounting clips.
Replacing a fender flare or rocker panel is a manageable DIY task. The general process involves:
- Partially removing the wheel well liner to gain access to screws and clips.
- Removing several 10mm bolts and/or Torx screws that secure the ends of the trim piece.
- Carefully prying the flare away from the body using a plastic trim removal tool. This will release the main clips, and many will likely break in the process.
- For front flares, the parking sensor must be disconnected and carefully transferred from the old flare to the new one.
- Clean the mounting surface on the vehicle body.
- Snap the new panel into place using new clips, ensuring each one engages with a click.
- Reinstall the bolts and wheel liner screws.
Frequently Asked Questions (FAQ)
Will a fender flare from a 2020 Model X fit my 2023 Model X?
No. Due to the major vehicle refresh in 2021, trim pieces are not interchangeable between the early (2016-2020) and later (2021-2025) models. You must buy a part specifically for the post-refresh vehicles.
My flare is just a little loose. Can I just glue it back on?
This is not recommended. The looseness is almost certainly caused by broken clips, not a failure of adhesion. Glue is a temporary fix that will make a proper future repair much more difficult and could damage the vehicle's paint. The correct solution is to remove the flare and replace the broken clips.
Do I need to buy new clips when replacing the flare?
Yes, absolutely. The original clips are made of brittle plastic and are considered a single-use item. They almost always break during removal. Attempting to reuse old clips will result in a loose-fitting panel that will likely detach again.
Is the "fender flare" the same as the "rocker panel"?
They are different parts of the same exterior trim system. The "fender flare" or "wheel arch molding" is the trim that goes around the wheel opening. The "rocker panel" is the long trim piece that runs along the bottom of the vehicle, between the front and rear wheels. 🎬 Watch: Understanding Tesla rocker panel repair and replacement Be sure to order the specific piece you need.
Helpful Videos



Technical Specifications
OEM Part Numbers: 1035290-00-G 103529000G 1078207-00-F 1078209-00-F 1608089-00-B 160808900B 1608095-00-A 1608095-00-C 1608095-00-F 1035290-00-D 1035290-00-E 1035290-00-H
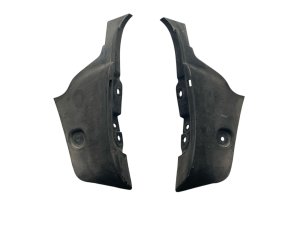
Material: Textured black plastic. Attachment Method: Plastic clips, 10mm bolts, Torx screws.
We Have This Part in Stock

The information in this article is provided for general reference and educational purposes only. Vehicle specifications, procedures, and part compatibility can vary by production date, trim level, and region. Always consult your vehicle's factory service manual and verify part numbers before purchasing or performing repairs. Safety-critical components such as airbags, seat belts, and braking systems should be installed by a qualified professional.
- Tesla X:
- 🎬 Helpful Videos
- 🛍️ Shop This Part
- Critical Compatibility Warning: Pre-Refresh (2016-2021) vs. Post-Refresh (2021-2025)
- Common Symptoms of Failure
- Buying a Used Fender Flare or Rocker Panel
- Known Issues, Recalls, and Service Bulletins
- Replacement Cost Breakdown
- Installation Guide & Difficulty
- Frequently Asked Questions (FAQ)
- 🎟️ Get 5% Off