

2017-2025 Mazda CX-5 Fender Flares: A Guide to the 2022 Redesign and Replacement
This guide explains the critical differences between pre- and post-refresh CX-5 fender flares, how to choose the right part, and what to inspect on a used one.
- The 2022 model year refresh means 2017-2021 and 2022-2025 fender flares are NOT interchangeable.
- When buying a used flare, the most critical inspection is of the mounting tabs on the back; if they are broken, the part is unusable.
- Always budget for a new set of mounting clips for installation, as the old ones will break during removal.
- Verify whether your trim level requires a textured black or a body-colored painted flare before purchasing.
The 2022 Model Year Refresh: A Critical Compatibility Divide

The most important factor when replacing a fender flare on a 2017-2025 Mazda CX-5 is the model year. In 2022, Mazda gave the CX-5 a significant exterior refresh which included updated front and rear bumpers, new headlight and taillight designs, and redesigned fender flares.
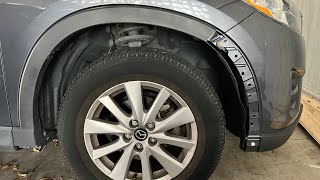
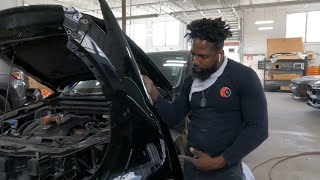
🎬 Watch this walkthrough of the 2022 model year exterior refresh.Warning: Fender flares from 2017-2021 models will NOT fit 2022-2025 models, and vice-versa. The shapes and mounting points are different. You must purchase a flare that matches your vehicle's specific year range.
- 2017-2021 Models: These vehicles use the original body style flares. Part numbers for this range often begin with a 'KB' prefix (e.g., KB7W-51-W50F).
- 2022-2025 Models: These vehicles require the newer, redesigned flares. Part numbers for this range often begin with a 'KP' prefix (e.g., KPF1-51-W30).
Always verify the part's year range before purchasing. Some seller listings can be confusing, occasionally showing a range like '2017-2022', but the parts are not interchangeable across the 2021/2022 divide.
Symptoms of a Damaged or Failing Fender Flare

Failure of a fender flare is almost always visible or audible. Common symptoms include:
- Visible Damage: Cracks, deep scuffs, or holes from an impact with a curb, shopping cart, or road debris.
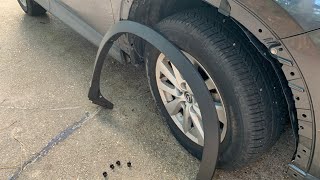
- Loose or Rattling: A buzzing or rattling sound from a corner of the vehicle, especially at higher speeds. 🎬 See how to clear debris trapped behind your wheel arch. This is typically caused by broken or missing mounting clips.
- Poor Fit or Gaps: The flare may pull away from the body, creating a noticeable gap. This indicates failed clips or, more seriously, broken mounting tabs on the flare itself.
- Fading or Discoloration: On unpainted textured black flares, the plastic can fade to a chalky gray due to prolonged UV exposure.
- Paint Failure: On painted flares, the paint can chip, peel, or bubble, just like any other painted body panel.
Pro Tip: Sometimes a flare can come loose or break off without any obvious impact. Forum users have reported clips weakening over time, causing the flare to detach while driving at highway speeds.
Buying a Used Fender Flare: What to Check

A used OEM fender flare can be an excellent value, offering factory fit and finish for much less than a new part. However, a thorough inspection is critical.
- Confirm the Year Range: This is the first and most crucial step. Ensure the donor vehicle is in the same generation as yours (2017-2021 or 2022-2025).
- Inspect the Mounting Tabs: Flip the flare over and carefully inspect the backside. Look at the slots and channels where the plastic mounting clips slide in. These tabs are molded into the flare itself. If they are cracked, broken, or missing, the flare cannot be securely attached to the vehicle. A forum user noted that loose flares are often caused by broken tabs on the flare, not just the clips. A flare with broken tabs is essentially junk.
- Check for Painted vs. Unpainted: Determine if your CX-5 has textured black or body-colored flares. This is determined by the vehicle's trim level. Higher trims like the Grand Touring and Signature typically have painted flares, while lower trims have textured black. For painted flares, you must match your vehicle's paint code, which can be found on the sticker in the driver's side door jamb.
- Examine for Physical Damage: Look for deep gouges, stress marks (white lines in the plastic), or cracks. Minor scuffs can often be polished out or are acceptable for a daily driver, but significant damage compromises the part.
- Budget for New Clips: The small plastic clips that hold the flare to the fender are designed for one-time use and almost always break during removal. Plan on purchasing a new set of clips for installation. They are inexpensive and essential for a secure fit.
Known Issues, Recalls, and Service Bulletins
As of early 2026, there are no specific recalls or Technical Service Bulletins (TSBs) from Mazda or the NHTSA related to the fender flares on the 2017-2025 CX-5. While some owners have experienced flares becoming loose or detaching, this has not led to a widespread safety campaign. Recalls for this model year range have focused on other issues, such as an accessory trailer hitch wiring harness.
Cost Comparison
Prices can vary by location, condition, and whether the part is painted. This table provides a general estimate.
| Part Type | Estimated Cost (per flare) |
|---|---|
| New OEM (2017-2021) | $75 - $110 |
| New OEM (2022-2025) | $120 - $180 |
| New Aftermarket | $35 - $90 |
| Used OEM | $50 - $120 |
| Shop Labor for Installation | $55 - $120 |
Installation Overview

Replacing a fender flare is a straightforward job suitable for a DIYer with basic tools.
- Difficulty: 2 out of 5
- Estimated Time: 30-60 minutes per flare
The general process involves:
- Turning the front wheels for better access if working on a front flare.
- Removing several plastic push-pins and/or screws from inside the wheel well that attach the flare and wheel liner to the vehicle.
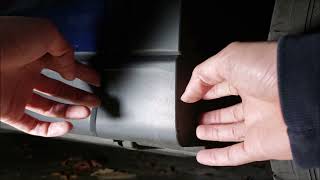
- Carefully pulling the flare directly away from the body. The clips will make popping sounds as they release. Use a plastic trim removal tool to gently pry the flare to avoid scratching the paint. 🎬 Watch a mechanic demonstrate how to safely remove the flare.
- Once the old flare is off, remove any broken clip pieces that remain in the holes on the fender.
- Slide new clips onto the mounting tabs of the new or used replacement flare.
- Align the new flare's clips with the holes in the fender and press firmly to snap it into place.
- Reinstall the screws and push-pins in the wheel well.
Frequently Asked Questions (FAQ)
Will a fender flare from a 2020 CX-5 fit my 2023 CX-5?
No. The body style changed in 2022, and parts are not interchangeable across that model year refresh. You need a flare specifically for the 2022-2025 year range.
Do I have to buy new clips to install a replacement flare?
Yes, it is highly recommended. The original clips are brittle and designed to break upon removal. Attempting to reuse them will likely result in a loose-fitting flare. A new set of clips is inexpensive and ensures a secure, factory-tight installation.
Can I paint the standard textured black fender flares to match my car?
While it is possible, it is not recommended for a simple DIY project. Painting textured plastic requires extensive preparation, including cleaning, sanding, and applying a special adhesion promoter to ensure the paint doesn't flake off. It is often more cost-effective to purchase a used, factory-painted flare in the correct color.
How do I know if my CX-5 has painted or textured flares?
Look closely at the flare. A textured flare will have a slightly rough, matte black plastic finish. A painted flare will be smooth and glossy, matching the color and finish of the rest of the car's body. Generally, higher-end trims like the Grand Touring, Turbo, and Signature have painted or body-colored flares.
Helpful Videos
Technical Specifications
OEM Part Numbers: KB7W-51-W50A KB7W-51-W50C KB7W-51-W50D KB7W-51-W50E KB7W-51-W50F KB7W-51-W50F-8N KB7W-51-W60F KB7W-51-W60F-8N KBST-51-W80 KPF1-51-W30 KPF1-51-W80 KPF151W21 KPF151W31 KPG1-51-W30 KPG2-51-W30-51
Material: Automotive-grade ABS plastic. Finish: Textured matte black or factory-painted smooth finish.
We Have This Part in Stock



The information in this article is provided for general reference and educational purposes only. Vehicle specifications, procedures, and part compatibility can vary by production date, trim level, and region. Always consult your vehicle's factory service manual and verify part numbers before purchasing or performing repairs. Safety-critical components such as airbags, seat belts, and braking systems should be installed by a qualified professional.
- Mazda CX-5:
- 🎬 Helpful Videos
- 🛍️ Shop This Part
- The 2022 Model Year Refresh: A Critical Compatibility Divide
- Symptoms of a Damaged or Failing Fender Flare
- Buying a Used Fender Flare: What to Check
- Known Issues, Recalls, and Service Bulletins
- Cost Comparison
- Installation Overview
- Frequently Asked Questions (FAQ)
- 🎟️ Get 5% Off