

2019-2022 BMW X7 Entry Step Trim Panel: A Guide to the Illuminated Sill
This guide covers common failure points of the illuminated door sill, how to inspect a used panel, and the straightforward replacement process.
- The most common failure is the integrated LED light, which can stop working or flicker. The LED is not replaceable; the entire panel must be changed.
- When buying a used panel, prioritize inspecting for cracks in the plastic and damage to the electrical connector.
- Replacement is a very simple DIY job, requiring only a plastic trim tool and about 15 minutes.
- Ensure you buy the correct panel for your specific door (e.g., front left) and that the part number matches to ensure the finish is correct for your vehicle's trim level.
Symptoms of Failure
Failures with the X7 entry step trim are typically related to either the integrated light or physical damage. Since the panel has no moving parts, mechanical failure is not a concern, but its location makes it prone to wear and electrical issues.
1. Illuminated Light is Inoperative or Flickering
The most common failure is related to the built-in LED light. You may notice the light does not turn on at all when the door is opened, or it may flicker intermittently. This is almost always due to a failure of the internal LED element or its wiring, as the LEDs themselves are not serviceable. In rare cases, a poor connection at the electrical plug on the underside of the panel could be the cause.
2. Physical Scratches, Dents, or Cracks
As a scuff plate, this panel is designed to take abuse. Over time, it's common to see an accumulation of scratches from shoes. Heavy impacts, such as from dropping a heavy object on the sill, can cause dents in the metal inlay or cracks in the plastic housing. While cosmetic, severe damage can be unsightly and may have sharp edges.
Known Issues, TSBs, and Recalls
As of this writing, there are no recalls or widespread Technical Service Bulletins (TSBs) specifically targeting the entry step trim panel on the 2019-2022 BMW X7. Most issues are isolated incidents of component failure or cosmetic damage. The vehicle has had recalls for other interior components, such as third-row seat springs and software for the roof control unit, but none affect the door sills.
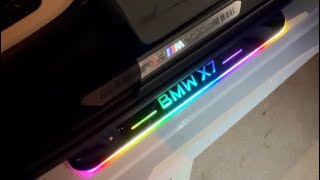
Pro Tip: Some aftermarket illuminated sills are battery-powered and use a magnetic switch. The factory BMW X7 sills are hardwired into the vehicle's electrical system and do not use batteries or magnets. 🎬 Watch: How wireless aftermarket LED sills are installed Be aware of this difference when searching for replacements.
Buying a Used 2019-2022 X7 Entry Step Trim Panel
A used OEM panel is an excellent way to save money, as you get the exact same fit, finish, and light quality as a new part. However, there are a few key things to check before buying.
- Inspect for Cracks: Carefully examine the entire plastic housing, especially around the mounting clip locations on the back. Stress cracks can form here, which may prevent the panel from seating securely.
- Check the Metal Inlay: Look for deep gouges or dents in the metal portion of the sill. Minor scuffs are normal and expected on a used part, but significant damage cannot be easily repaired.
- Examine the Electrical Connector: Look at the small electrical plug on the underside. Ensure the pins are straight and free of any corrosion. A damaged connector is a major red flag.
- Verify Part Numbers: BMW may use different part numbers for panels with different finishes (e.g., standard vs. "M" sport). It's always best to match the part number from your old panel to the used replacement to guarantee a perfect match. A common part number for the front left illuminated sill is 5143191848.
- Test the Light (If Possible): If you are buying in person, ask the seller if they can briefly apply 12V power to the connector to confirm the LED illuminates. If buying online, purchase from a reputable seller with a warranty or return policy.
Replacement Overview
Replacing the entry step trim panel is a very simple DIY task that requires no special tools.
- Difficulty: 1 out of 5
- Time: 10-15 minutes
- Tools: Plastic trim removal tool
Steps:
- Using a plastic trim removal tool, carefully pry up one end of the old trim panel.
- Work your way along the length of the panel, releasing the plastic clips that hold it in place.
- Lift the panel up and locate the electrical connector on the underside.
- Depress the tab on the connector and unplug the wiring harness.
- Plug the harness into the new trim panel. It's a good idea to open the door at this point to confirm the new light works before snapping the panel into place.
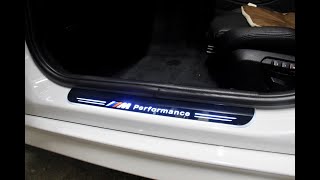
- Align the clips on the new panel with the holes in the body and press down firmly until it snaps securely into place. 🎬 See this step-by-step BMW LED sill installation
Warning: While some guides for electrical work suggest disconnecting the battery, it is generally not necessary for this simple plug-and-play replacement. However, if you are not comfortable working with live electrical connectors, you can disconnect the negative battery terminal as a precaution.
Cost Comparison
| Part Type | Estimated Cost |
|---|---|
| New OEM | $180 - $260 |
| New Aftermarket | Not commonly available |
| Used OEM | $60 - $120 |
| Shop Labor | $50 - $100 (typically the shop's minimum 0.5-hour charge) |
Frequently Asked Questions (FAQ)
Can I just replace the light bulb in the trim panel?
No, the light source is an integrated LED module that is permanently built into the trim panel. It is not designed to be serviced or replaced separately. If the light fails, the entire trim panel must be replaced.
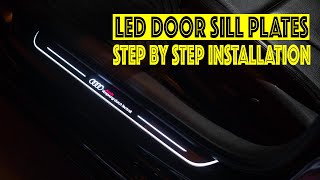
🎬 Watch: In-depth guide to installing LED door sillsWill a trim panel from a BMW X5 fit my X7?
No. While they may look similar, the parts have different part numbers and are shaped specifically for each vehicle model. You must use a panel designed for the G07 X7 to ensure proper fitment.
My panel is just scratched. Can it be repaired?
Minor scuffs on the plastic portion can sometimes be polished or reduced with a plastic restorer. However, deep scratches or dents in the metal inlay are generally not repairable. For significant cosmetic damage, replacement is the only option.
Are the front and rear door sill panels the same?
No, the front and rear panels are different lengths and shapes. You must order the specific panel for the correct door (e.g., front left, rear right). A full set from a recycler may include all four panels.
Helpful Videos
Technical Specifications
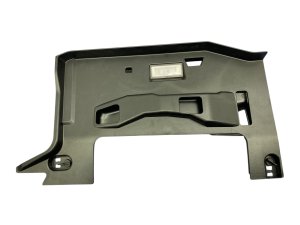
OEM Part Numbers: 5143191848 51479448339 51477479935
Integrated LED illumination, hardwired to vehicle's 12V system. Attaches with plastic clips.
We Have This Part in Stock

The information in this article is provided for general reference and educational purposes only. Vehicle specifications, procedures, and part compatibility can vary by production date, trim level, and region. Always consult your vehicle's factory service manual and verify part numbers before purchasing or performing repairs. Safety-critical components such as airbags, seat belts, and braking systems should be installed by a qualified professional.
- BMW X7:
- 🎬 Helpful Videos
- 🛍️ Shop This Part
- Symptoms of Failure
- 1. Illuminated Light is Inoperative or Flickering
- 2. Physical Scratches, Dents, or Cracks
- Known Issues, TSBs, and Recalls
- Buying a Used 2019-2022 X7 Entry Step Trim Panel
- Replacement Overview
- Cost Comparison
- Frequently Asked Questions (FAQ)
- 🎟️ Get 5% Off