

1999-2001 Ford Windstar 3.8L Intake Manifold: Solving P0171 & P0174 Lean Codes
This guide details the common failure of the intake manifold gaskets and isolator bolts that causes the check engine light and lean running conditions on the 3.8L V6 engine.
- The most common failure is a vacuum leak from degraded gaskets and 'isolator bolts', not a cracked manifold.
- Symptoms are almost always a Check Engine Light with lean codes P0171 and P0174.
- The correct fix is to replace the intake plenum gaskets and use the updated, oil-resistant GREEN isolator bolt assemblies, as detailed in Ford TSB 03-16-1.
- A used OEM manifold is a good option, but it MUST be installed with a new set of gaskets and updated isolator bolts.
Symptoms of a Failing Intake Manifold or Gaskets
The most common failure on the 1999-2001 Ford Windstar 3.8L intake system is not a crack in the manifold itself, but a vacuum leak from deteriorated gaskets and seals. When these seals fail, unmetered air enters the engine, creating a 'lean' condition where there is too much air and not enough fuel.
- Check Engine Light: This is the most frequent symptom. The light will be accompanied by diagnostic trouble codes (DTCs) P0171 (System Too Lean Bank 1) and P0174 (System Too Lean Bank 2). Often, both codes will appear together.
- Rough or High Idle: The engine may idle erratically, higher than normal, or feel like it's stumbling.
- Hesitation on Acceleration: You might notice a stumble or lack of power when you press the gas pedal.
- Poor Fuel Economy: The engine's computer tries to compensate for the extra air by adding more fuel, which can lead to reduced MPG.
- Hissing Noises: In some cases, a distinct hissing sound can be heard coming from the top of the engine as air is sucked through the failed gaskets.
Known Issues: The Real Culprit - Isolator Bolts and Gaskets
Ford issued a Technical Service Bulletin (TSB 03-16-1) for this exact problem on 1999-2003 Windstars. The root cause is oil vapor from the PCV (Positive Crankcase Ventilation) system being drawn into the intake manifold. This oil contaminates and softens the original black rubber grommets on the 'isolator bolts' that hold the upper and lower intake sections together.
As these grommets degrade, they lose their ability to maintain clamping force, allowing a vacuum leak to develop at the port gaskets between the two manifold halves. The official Ford repair involves replacing the original black isolator bolt assemblies with an updated, oil-resistant green version, along with new port gaskets. In some cases, the TSB also recommended replacing the valve cover with a revised design to reduce the amount of oil entering the PCV system.
Pro Tip: Before assuming the intake gaskets have failed, always check for simpler vacuum leaks first. Inspect the PCV valve and its rubber grommet in the valve cover, as well as all vacuum hoses connected to the intake manifold, for cracks or loose connections.
🎬 Watch this quick test to diagnose lean vacuum leaksRelated Failure: Intake Manifold Runner Control (IMRC) Bushings
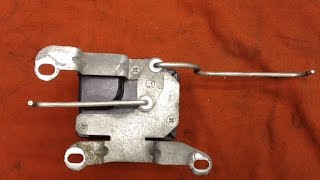
While you are working on the intake manifold, it is wise to inspect the IMRC system. This system uses butterfly valves inside the intake to change the length of the intake runners, optimizing performance at different RPMs. The actuator rods for this system are connected with small plastic bushings that become brittle with age and heat.
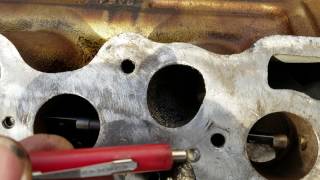
When these bushings break, the rod can fall off, causing the runner to be stuck open or closed. This can cause a rough idle, pinging (pre-ignition), loss of power, and may set codes like P1537 or P1538. 🎬 Watch how to fix a Windstar intake runner vacuum leak These bushings are inexpensive and easy to replace once the area is accessible. The Dorman 47099 is a common aftermarket part number for a replacement kit.
🎬 See how to replace broken IMRC bushings step by stepBuying a Used 1999-2001 Windstar Intake Manifold
A used OEM upper intake manifold is an excellent, cost-effective option, as the plastic plenum itself is quite durable. The fitment of a used factory part is guaranteed to be better than a cheap aftermarket alternative. However, the value is in the plastic manifold, not the seals it comes with.
- Mandatory Gasket Replacement: Never install a used intake manifold with its old gaskets. Always purchase a new, high-quality intake plenum gasket set. This should include the six port seals and the main clamshell gasket. More importantly, you MUST buy a new set of isolator bolts, ensuring they are the updated green design.
- Physical Inspection: Before buying, carefully inspect the plastic manifold. Check for any hairline cracks, especially around the bolt holes and the EGR port area, which is subjected to high heat.
- Check for Warping: Lay the manifold's mating surface on a known flat table or workbench. It should sit perfectly flat with no rocking. Any warping will prevent it from sealing properly, even with new gaskets.
- Mounting Points: Ensure all bolt holes and threaded inserts are intact and free of damage. Check that any plastic vacuum nipples are not broken off.
Cost Comparison for Intake Manifold Repair
The most common repair is replacing the gaskets and isolator bolts, not the entire manifold. Prices can vary based on location and supplier.
| Part/Service | Estimated Cost | Notes |
|---|---|---|
| New OEM Manifold (2F2Z-9424-AA) | $350 - $500+ | May be discontinued or have limited availability. |
| New Aftermarket Manifold (e.g., Dorman 615-175) | $215 - $260 | Includes the upper plastic manifold assembly. |
| Used OEM Manifold | $50 - $100 | Plastic manifold only. Requires new gaskets. |
| Gasket & Isolator Bolt Kit | $45 - $80 | The most common and recommended repair. Includes all necessary seals. |
| Shop Labor | $250 - $400 | Typically 2.5 to 4 hours of labor. |
Installation Tips and Difficulty
- Difficulty: 3 out of 5. This is feasible for an experienced DIY mechanic but may be challenging for a novice.
- Time: 2.5 to 4 hours.
- Wiper Cowl Removal: Most guides recommend removing the upper wiper cowl panel for much-improved access to the back of the intake manifold. While some mechanics have found ways to work around this, removing it makes the job significantly easier.
- Torque Sequence: The intake manifold bolts must be tightened in a specific sequence and to a specific torque value (89 in-lbs) to ensure the gasket seals evenly. Look up the correct diagram for your model year before starting.
- Clean Surfaces: Thoroughly clean the mating surfaces on both the upper and lower intake manifolds before installing the new gaskets. Any old gasket material or dirt will cause a leak.
Warning: If you remove the lower intake manifold for any reason, coolant will likely spill into the engine's valley and can seep into the crankcase. It is absolutely critical to drain the engine oil and replace the oil filter *after* the repair is complete and *before* starting the engine to prevent severe engine damage.
Frequently Asked Questions (FAQ)
Can I just replace the gaskets instead of the whole intake manifold?
Yes, absolutely. In fact, this is the recommended and most common repair. The plastic manifold itself rarely fails; the problem is almost always the gaskets and isolator bolt grommets that create a vacuum leak.
What are the 'isolator bolts' and why are they so important?
The isolator bolts are assemblies that clamp the upper plastic plenum to the lower aluminum manifold. They consist of a bolt, a metal sleeve, and a rubber grommet. The original black rubber grommets were not resistant to oil from the PCV system and would soften and degrade, causing a loss of clamping force and a vacuum leak. The updated green grommets are made of an oil-resistant material (like urethane) and are essential for a long-lasting repair.
What happens if I ignore the P0171 and P0174 lean codes?
While the van may seem to run fine, a long-term lean condition forces the engine to run hotter. This can lead to premature failure of the catalytic converters, which is a much more expensive repair. It can also cause poor performance and reduced fuel economy.
Is a cracked plastic intake manifold repairable?
Generally, no. While some high-temperature epoxies exist, they are not a reliable or permanent solution for a pressurized and vibrating component like an intake manifold. If the plastic manifold itself is cracked, it should be replaced with a new or a good-condition used part.
Helpful Videos
Technical Specifications
OEM Part Numbers: 1F2Z-9424-AA 2F2Z-9424-AA XF2E-9424-CC XF2Z-9424-CA
Fits 1999-2001 Ford Windstar with 3.8L V6 engine (8th VIN digit '4'). This is the upper plastic intake manifold plenum.
We Have This Part in Stock


The information in this article is provided for general reference and educational purposes only. Vehicle specifications, procedures, and part compatibility can vary by production date, trim level, and region. Always consult your vehicle's factory service manual and verify part numbers before purchasing or performing repairs. Safety-critical components such as airbags, seat belts, and braking systems should be installed by a qualified professional.
- Ford Windstar:
- 🎬 Helpful Videos
- 🛍️ Shop This Part
- Symptoms of a Failing Intake Manifold or Gaskets
- Known Issues: The Real Culprit - Isolator Bolts and Gaskets
- Related Failure: Intake Manifold Runner Control (IMRC) Bushings
- Buying a Used 1999-2001 Windstar Intake Manifold
- Cost Comparison for Intake Manifold Repair
- Installation Tips and Difficulty
- Frequently Asked Questions (FAQ)
- 🎟️ Get 5% Off