

2011-2017 Honda Odyssey Coolant Reservoir: Cracks, Leaks, and Replacement Guide
This guide covers the common failure points, symptoms, and replacement costs for the engine coolant reservoir on the 2011-2017 Honda Odyssey.
- The most common failure is the plastic becoming brittle and cracking from age and heat cycles.
- There are no specific recalls or TSBs for this part; failures are due to normal wear and tear.
- Replacement is a very easy DIY job that takes less than 30 minutes with basic tools.
- When buying used, carefully inspect for cracks and yellowing. A good used OEM part is often superior to a cheap new aftermarket one.
Symptoms of a Failing Coolant Reservoir

Failure of the coolant reservoir on the 2011-2017 Honda Odyssey is almost always due to the plastic becoming brittle from years of heat cycles. This leads to cracks and leaks. Here’s what to look for:
- Visible Cracks and Stains: The most obvious sign is hairline cracks in the plastic body of the reservoir. You may also see white or colored crusty stains on the outside of the tank, which is dried coolant residue.
- Low Coolant Level: You may find yourself needing to top off the coolant more frequently. A constantly dropping level in the reservoir, without any other visible leaks from hoses or the radiator, points directly to a crack in the tank itself.
- Coolant Puddles: Small puddles of blue or greenish fluid under the front passenger side of the vehicle after it has been parked are a tell-tale sign. While this can also indicate a radiator or hose leak, the reservoir is a common culprit.
- Sweet Smell: Burning or evaporating coolant has a distinct sweet, syrupy odor. If you notice this smell around your van, especially when the engine is hot, it's a strong indicator of a coolant leak somewhere in the system.
- Engine Overheating: In advanced stages, a leaking reservoir can lead to a significant loss of coolant, introducing air into the system and causing the engine to run hot or overheat. This is a serious condition that can lead to severe engine damage if not addressed.
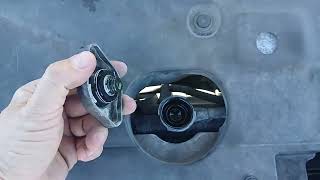
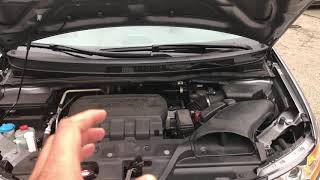
Pro Tip: The plastic reservoir is located on the passenger side of the engine bay. Use a flashlight to carefully inspect the entire bottle, especially the seams and the areas 🎬 Watch: How to find the coolant reservoir location around the hose connections, for any signs of cracking or weeping.
Buying a Used 2011-2017 Odyssey Coolant Reservoir

For a simple plastic part like this, a used OEM reservoir can be an excellent value. The original Honda plastic is often of higher quality and more durable than cheap aftermarket alternatives. However, since age and heat are the primary enemies of this part, careful inspection is key.
What to Check Before You Buy:
- No Cracks: This is non-negotiable. Inspect the entire surface in good light. Pay special attention to the mounting points and the hose nipples, as these are high-stress areas. Flex the part slightly in your hands; a good part will feel sturdy, while a brittle one may crack under pressure.
- Color and Clarity: A good used reservoir will still be somewhat translucent. If the plastic is heavily yellowed, opaque, or cloudy, it's a sign it has become brittle from excessive heat and age and should be avoided.
- Hose Nipples: Check that the inlet and overflow nipples are fully intact, with no cracks or chips. These are common failure points on cheap aftermarket tanks.
- Cap and Hose: Many used reservoirs will come with the original cap and overflow hose. Ensure the cap's gasket is still pliable and not cracked. While you can reuse your old cap, getting a good one with the used part is a bonus.
Warning: Avoid parts that feel chalky or have plastic flaking off. This is a clear sign the plastic has degraded and will not last long once installed in your vehicle.
Known Issues, TSBs, and Recalls
Searches of the National Highway Traffic Safety Administration (NHTSA) database and Technical Service Bulletins (TSBs) show no specific recalls or widespread defect campaigns for the engine coolant reservoir on the 2011-2017 Honda Odyssey. Failures are typically isolated incidents related to the age and mileage of the vehicle, rather than a specific manufacturing flaw. While other TSBs exist for this generation of Odyssey, including for engine misfires (P0301-P0304), none point to the coolant reservoir as a related cause.
Cost Comparison

The cost to replace the coolant reservoir is relatively low, especially if you do the work yourself. The part itself is inexpensive, and the labor involved is minimal.
| Part Type | Estimated Cost |
|---|---|
| New OEM (Dealer) | $34 - $48 |
| New Aftermarket | $11 - $30 |
| Used OEM | $20 - $40 |
| Shop Labor Cost | $40 - $80 |
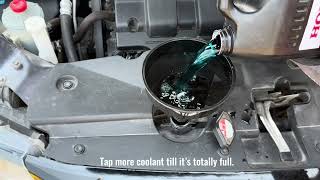
Note: Some online estimators show a total replacement cost of over $300, which is exceptionally high for this specific job and may include a full cooling system flush or other unrelated services. The actual labor should be 0.5 to 1.0 hours. 🎬 Watch: Full coolant drain and fill walkthrough
Replacement Difficulty & Walkthrough
Installation Difficulty: 1 out of 5
This is one of the easiest repairs you can perform on your Odyssey. It requires basic hand tools and can typically be completed in under 30 minutes.
Required Tools:
- Pliers (for hose clamps)
- 10mm socket with ratchet and extension
- Drain pan or container
- Shop towels or rags
Step-by-Step Replacement:
- Ensure Engine is Cool: Never work on the cooling system when the engine is hot. Let the vehicle sit for several hours.
- Locate Reservoir: Open the hood. The coolant reservoir is the clear/white plastic tank on the passenger side, near the front.
- Drain Old Fluid (Optional): If there is fluid in the tank, you can use a fluid transfer pump or turkey baster to remove it to minimize spills. Alternatively, place a drain pan under the reservoir.
- Disconnect Hoses: Use pliers to squeeze the clamp on the small rubber hose connected to the top of the reservoir neck and slide it down. Pull the hose off the nipple. Have a rag ready to catch any drips.
- Remove Mounting Bolts: There are typically two 10mm bolts holding the reservoir to the vehicle's frame. Remove these bolts.
- Remove Old Reservoir: Lift the old reservoir straight up and out of the engine bay. Be careful not to spill any remaining coolant.
- Install New Reservoir: Place the new or used reservoir into position and secure it with the two 10mm mounting bolts.
- Reconnect Hose: Push the rubber hose back onto the reservoir's nipple and use pliers to reposition the clamp.
- Refill Coolant: Fill the reservoir to the 'MAX' line with Honda Type 2 (blue) coolant. 🎬 See this quick guide on adding coolant correctly Do not overfill.
- Check for Leaks: Start the engine and let it run for a few minutes, keeping an eye on the reservoir and hose connection for any leaks. Top off the coolant if the level drops as air works its way out.
Frequently Asked Questions
Can I drive with a cracked coolant reservoir?
It is not recommended. A small leak can quickly become a large one, leading to rapid coolant loss and engine overheating, which can cause catastrophic engine damage. It's best to replace it as soon as the problem is identified.
Do I need to use special Honda coolant?
Yes. It is highly recommended to use genuine Honda Long Life Antifreeze/Coolant Type 2. This is a blue-colored coolant specifically formulated for Honda aluminum engines and cooling system components. Using generic green or orange coolant can lead to corrosion and damage to the water pump and seals.
Is a used OEM reservoir better than a new aftermarket one?
Often, yes. A high-quality used OEM part that passes inspection is typically made from better materials than the cheapest new aftermarket options. Cheap aftermarket plastics can become brittle and fail much sooner. If buying new, consider a reputable brand like Dorman over no-name online sellers.
My reservoir is empty but the van isn't overheating. Is it still a problem?
Yes. The reservoir's job is to handle coolant expansion and contraction. If it's empty, the radiator cannot draw coolant back in as it cools, which will eventually lead to air pockets forming in the system. This will compromise cooling efficiency and eventually lead to overheating. Find and fix the leak.
Helpful Videos
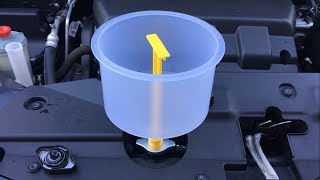
Technical Specifications
OEM Part Numbers: 19101RV0A00
Material: Plastic. Color: White/Translucent. Includes connections for radiator overflow hose.
We Have This Part in Stock


The information in this article is provided for general reference and educational purposes only. Vehicle specifications, procedures, and part compatibility can vary by production date, trim level, and region. Always consult your vehicle's factory service manual and verify part numbers before purchasing or performing repairs. Safety-critical components such as airbags, seat belts, and braking systems should be installed by a qualified professional.
- Honda Odyssey:
- 🎬 Helpful Videos
- 🛍️ Shop This Part
- Symptoms of a Failing Coolant Reservoir
- Buying a Used 2011-2017 Odyssey Coolant Reservoir
- What to Check Before You Buy:
- Known Issues, TSBs, and Recalls
- Cost Comparison
- Replacement Difficulty & Walkthrough
- Required Tools:
- Step-by-Step Replacement:
- Frequently Asked Questions
- 🎟️ Get 5% Off