

1994-1996 Expo, Summit & Vista 2.4L ECM: Solving Stalls & No-Starts from Capacitor Failure
This guide covers the common failure points, symptoms, and replacement of the Engine Control Module (ECM) for the 1994-1995 Eagle Summit, 1994 Eagle Vista, and 1994-1996 Mitsubishi Expo with the 2.4L engine.
- The most common cause of failure is leaking internal capacitors; visually inspect the circuit board for damage.
- This ECM is plug-and-play and does NOT require dealer programming, making replacement easy for DIYers.
- You MUST match the OEM part number MD302440 exactly to ensure compatibility.
- Symptoms range from a no-start condition and stalling to a simple Check Engine Light.
Is Programming Required? No, This is a Plug-and-Play Module
One of the most important things to know when replacing the Engine Control Module (ECM) in a 1994-1995 Eagle Summit, 1994 Eagle Vista, or 1994-1996 Mitsubishi Expo is that it does not require any special programming or flashing. As long as you have the correct part number for your vehicle, the replacement unit is plug-and-play. There is no anti-theft system linked to the ECM that would require a visit to a dealership, making this a straightforward replacement for a DIY mechanic or independent shop.
Known Issues: The Inevitable Capacitor Plague
The single most common reason for ECM failure in these vehicles is leaking electrolytic capacitors. Like many Japanese vehicles from the 1990s, the original capacitors used on the ECM's circuit board are prone to leaking their internal fluid (electrolyte) over time. This fluid is corrosive and can eat away at the copper traces and components on the board, leading to a host of electrical gremlins. Often, the damage starts small but gets progressively worse, causing intermittent problems that eventually lead to a total failure.
Pro Tip: If you are experiencing strange electrical issues, it is highly recommended to physically remove and open the ECM for a visual inspection. Leaking capacitors are often easy to spot. Look for bulging tops, dark fluid stains on the circuit board around the base of the capacitors, or a distinct fishy or rotten seafood smell.
Symptoms of a Failing ECM
Because the ECM controls so many functions, a failure can manifest in many different ways. Due to the common capacitor issue, symptoms often start intermittently and worsen over time.
- Engine Stalling or Hesitation: The engine may stall unexpectedly at idle or while driving, or hesitate and backfire during acceleration.
- No-Start or Hard-Start Condition: The engine may crank but refuse to start. This can be caused by the ECM failing to send a signal for spark or fuel injection.
- Rough Idle or Misfires: The engine may run poorly, idle erratically, or you may feel random misfires.
- No Spark or No Injector Pulse: A dead ECM can result in a complete loss of spark from the ignition coil or a loss of the signal that tells the fuel injectors to fire.
- Check Engine Light with Various Codes: You may see a Check Engine Light. On 1994-1995 models (OBD-I), you might get codes for various sensors like the oxygen sensor (Code 11), airflow sensor (Code 12), or crank angle sensor (Code 22). On 1996 models (OBD-II), you might see a flood of unrelated sensor codes or specific internal module codes like P0601 or P0605 (Internal Control Module Memory Error).
- Erratic Automatic Transmission Shifting: The ECM communicates with the transmission controller, and bad data can cause poor shifting performance.
How to Diagnose a Faulty ECM
Diagnosing an ECM can be tricky, as its symptoms often mimic other failed parts like sensors or ignition components. The best approach is a process of elimination combined with a physical inspection.
- Visual Inspection (The Most Important Step): Remove the ECM from behind the passenger-side kick panel. Open the metal case (usually held by four screws) and carefully inspect the circuit board. Look for the tell-tale signs of capacitor failure: bulging or leaking capacitors, brown or black crust around the capacitor legs, and any green or black corrosion on the board itself. If you see this, the ECM is bad and is the source of your problems.
- Check for Diagnostic Codes:
- 1994-1995 (OBD-I): Use an analog voltmeter on the 12-pin diagnostic port under the driver's dash to read the codes. Connect the positive lead to pin 1 and the negative lead to pin 12 (ground). Turn the key to 'ON' and count the needle sweeps to get the two-digit codes.
- 1996 (OBD-II): Use a standard OBD-II scanner. Codes in the P0600-P0606 range strongly indicate an internal ECM failure.
- Check for Power and Ground: If you have a wiring diagram (pinout) for the 4G64 engine, you can use a multimeter to verify that the ECM is receiving proper power and has a solid ground connection at the harness connectors. A loss of power or ground can make a good ECM appear dead.
- Rule Out Other Components: If the ECM looks clean inside and you have codes for specific sensors (e.g., TPS, Crank Sensor), it's wise to test those sensors and their wiring first before condemning the ECM. However, if multiple, unrelated codes appear at once, the ECM is the more likely culprit.
Buying a Used Engine Control Module (ECM)
Since new OEM modules are no longer available, a quality used OEM unit is the best and most cost-effective solution. Aftermarket options are rare and remanufactured units can be expensive. Here’s what to look for:
- Match the Part Number Exactly: The most critical step is to match the part number from your original ECM. The primary part number for these vehicles is MD302440. Do not install a module with a different part number, even if it looks identical.
- Inspect the Connectors: Ensure the pins in the electrical connectors are straight, clean, and free of any green or white corrosion.
- Check for an Opened Case: Look for scratches on the screws or pry marks on the case. This indicates someone has been inside it before. While this could mean it was professionally repaired, it could also mean it was tampered with. Ask the seller if they know the history.
- Ask About Capacitor Service: Some sellers on enthusiast forums or eBay may specifically sell ECMs that have had the capacitors professionally replaced. These are often a great value as the primary failure point has already been addressed.
Warning: Federal vs. California Emissions: The initial vehicle data specifies this ECM is for 2.4L AWD models with Federal emissions. However, some parts databases show MD302440 being used on California emissions models as well. Because of this conflicting information, it is absolutely essential to match the part number from your original module to ensure compatibility.
Replacement Steps
Replacing the ECM is a simple job that can be done with basic hand tools.
- Disconnect the Battery: Disconnect the negative terminal from your vehicle's battery to prevent any electrical shorts.
- Locate the ECM: The ECM is located in the passenger footwell, behind the plastic kick panel on the right side, near the door hinges.
- Remove the Kick Panel: Remove any screws or plastic clips holding the kick panel in place and gently pull it away.
- Unbolt the ECM: The ECM is a metal box held in a bracket by a few 10mm bolts or nuts. Remove them.
- Disconnect Wiring Harnesses: Carefully press the release tabs on the electrical connectors and pull them straight out from the ECM. There are typically three yellow connectors.
- Install the New ECM: Connect the wiring harnesses to the new module, bolt it into place, reinstall the kick panel, and reconnect the battery. The vehicle should now start and run.
Cost of Replacing the ECM
Here is an estimated breakdown of what you can expect to pay for an ECM replacement. Since new parts are unavailable, the comparison focuses on used, remanufactured, and labor costs.
| Part Type | Estimated Cost |
|---|---|
| New OEM | Discontinued (Last known MSRP was over $1,100) |
| New Aftermarket | Not Generally Available |
| Remanufactured OEM | $250 - $450 (often requires a core deposit) |
| Used OEM | $50 - $125 |
| Shop Labor | $100 - $200 (Typically 1.0-1.5 hours of labor) |
Frequently Asked Questions
Can I repair my old ECM by replacing the capacitors myself?
Yes, if you are experienced with soldering on electronic circuit boards, this is a very common repair in the DSM (Diamond-Star Motors) community. You will need to purchase three specific capacitors (typically 100µF, 47µF, and 22µF) and carefully de-solder the old ones and solder in the new ones, paying close attention to polarity. If the old capacitors have leaked badly and damaged the board, the repair may be more complex and require fixing broken traces.
Will the car start immediately after I plug in the replacement ECM?
Yes. This ECM does not require programming, so the vehicle should start and run as soon as it is installed and the battery is reconnected. The engine may idle slightly unusually for the first few minutes as the computer relearns idle trim values, but this is normal.
What happens if I use an ECM with the wrong part number?
Using the wrong part number can lead to a no-start condition, poor engine performance, incorrect transmission shifting (on automatic models), or features not working correctly. The internal software and hardware are calibrated for specific engine, transmission, and emissions configurations (Federal vs. California, AWD vs. FWD). Always match the part number exactly.
Is there a recall for this ECM?
No, there are no specific recalls or Technical Service Bulletins (TSBs) from Chrysler or Mitsubishi for a faulty ECM on these models. There was a recall for the transfer case on some AWD models, but it is unrelated to the Engine Control Module.
Technical Specifications
OEM Part Numbers: MD302440 MD758276
Location: Behind passenger side (RH) kick panel. Connectors: 3 yellow multi-pin connectors. Common Failure: Internal electrolytic capacitor leakage.
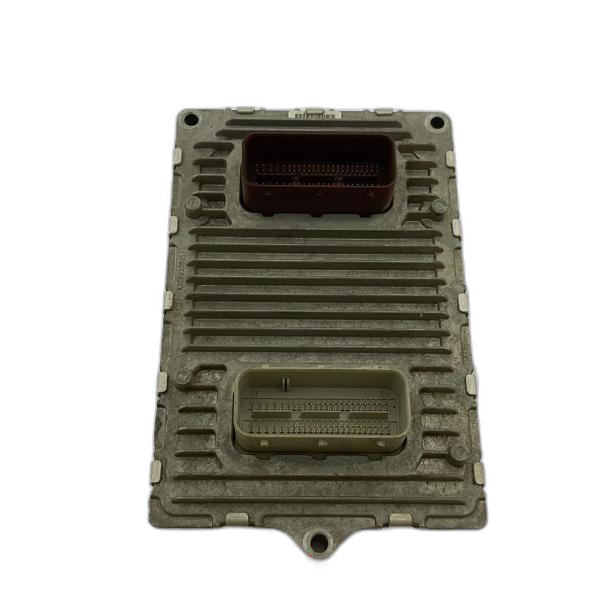
We Have This Part in Stock

The information in this article is provided for general reference and educational purposes only. Vehicle specifications, procedures, and part compatibility can vary by production date, trim level, and region. Always consult your vehicle's factory service manual and verify part numbers before purchasing or performing repairs. Safety-critical components such as airbags, seat belts, and braking systems should be installed by a qualified professional.
- Eagle Summit:
- Eagle Vista:
- Mitsubishi Expo:
- 🛍️ Shop This Part
- Is Programming Required? No, This is a Plug-and-Play Module
- Known Issues: The Inevitable Capacitor Plague
- Symptoms of a Failing ECM
- How to Diagnose a Faulty ECM
- Buying a Used Engine Control Module (ECM)
- Replacement Steps
- Cost of Replacing the ECM
- Frequently Asked Questions
- 🎟️ Get 5% Off