

1989 Toyota 4Runner ECU: Your Guide to Leaking Capacitors, Part Numbers, and Replacement
This definitive guide helps you diagnose, find the correct replacement, and understand the common failures of the engine control unit in your 1989 4Runner.
- The most common cause of ECU failure in a 1989 4Runner is leaking internal capacitors, which corrode the circuit board.
- You MUST match the OEM part number on your ECU exactly. Compatibility depends on engine, transmission, and emissions.
- These ECUs are plug-and-play. No programming, flashing, or dealer visit is required for a replacement with a matching part number.
- You can diagnose a bad ECU by visually inspecting the internal circuit board for leaks or by reading OBD-I trouble codes using a paperclip.
Symptoms of a Failing 1989 4Runner ECU

When the ECU begins to fail, it can cause a wide range of confusing and intermittent problems. Because the failure is often gradual, especially when caused by leaking capacitors, symptoms may come and go with changes in temperature or humidity.
- No-Start or Intermittent Starting: The engine may crank but refuse to start, or it may start unreliably. This can happen because the ECU is not properly firing the fuel injectors or ignition coil.
- Rough Idle and Stalling: The engine may idle erratically, hunt for a stable RPM, or stall unexpectedly at stops.
- Poor Engine Performance: You might experience a noticeable loss of power, hesitation during acceleration, or poor fuel economy as the ECU fails to deliver the correct fuel and timing adjustments.
- Check Engine Light (CEL): A faulty ECU can trigger the Check Engine Light. On a 1989 4Runner, you must retrieve these codes manually.
- Erratic Automatic Transmission Shifting: In some models, the ECU also influences automatic transmission behavior. A failing unit can lead to harsh or incorrect shifting.
Pro Tip: Before condemning the ECU, always check and clean your battery terminals and engine ground connections. Poor grounds can mimic ECU failure symptoms.
The #1 Cause of Failure: Leaking Capacitors

The most common reason for ECU failure in 1980s and 1990s Toyotas is not a catastrophic electronic event, but a slow death from leaking electrolytic capacitors. Over decades, the rubber seals on these small, can-shaped components degrade, allowing the corrosive electrolytic fluid inside to seep out onto the circuit board.
This fluid eats away at the delicate copper traces on the board, causing short circuits or open circuits. The damage often looks like a small, brownish or greenish stain around the base of the capacitors. Because the damage is progressive, the symptoms it causes are often intermittent and difficult to diagnose at first.
How to Diagnose the ECU

Step 1: Read the Trouble Codes (The Paperclip Test)
Your 1989 4Runner uses an older diagnostic system called OBD-I. You don't need a modern scanner to read the codes; you just need a paperclip.
- Locate the diagnostic port in the engine bay. It's a small grey or black box, often labeled "DIAGNOSIS," usually near the fuse box or on one of the fender wells.
- Open the lid. Inside the lid is a diagram showing the pin layout.
- Use a paperclip or a small jumper wire to connect the terminals labeled TE1 and E1.
- Turn the ignition key to the 'ON' position (do not start the engine).
- Watch the Check Engine Light on your dashboard. It will begin to flash in a sequence. For example, four flashes, a pause, then two flashes indicates Code 42. The system will flash a code, pause, and then flash the next code if more than one is stored.
- Look up the codes online for your specific engine (22RE or 3VZE) to see what system is reporting a fault.
Step 2: Visually Inspect the Circuit Board
If you suspect the ECU, a visual inspection is the definitive test. This is a simple process.
- Disconnect the negative battery terminal.
- The ECU is located behind the passenger side kick panel, near the floor. Remove any plastic trim necessary to access it.
- Unbolt the ECU (typically a few 10mm bolts) and carefully unplug the wiring harnesses. The plugs are keyed and different sizes, so you cannot mix them up.
- Once removed, open the metal case of the ECU by removing the screws on the top and bottom covers.
- Carefully inspect the circuit board, paying close attention to the area around the capacitors (the small cylinders). Look for any dark, sticky residue, rust-colored stains, or corrosion on the board or the legs of the components. Any sign of leakage confirms the ECU is bad or failing.
Warning: Even if you don't see visible leaks, the capacitors can still be bad. However, if you do see leaks, the ECU needs to be replaced or repaired.
Buying a Used 1989 4Runner ECU: A Buyer's Guide

Finding the right ECU is critical. Due to multiple variations, you cannot simply install any ECU from a 1989 4Runner. Compatibility is key.
The Golden Rule: Match the Part Number EXACTLY
The single most important factor is the OEM part number printed on the label of your original ECU. Variations in engine, transmission, and emissions systems mean that an ECU with a different part number will not work correctly, even if it plugs in. When buying a used unit, provide the seller with your original part number to ensure a perfect match.
| Engine | Transmission | Emissions | Known OEM Part Number |
|---|---|---|---|
| 2.4L 22RE | Manual | Federal / Canada | 89661-35260 |
| 2.4L 22RE | Manual | California | 89661-35270 |
| 3.0L V6 3VZE | Manual | 4WD Models | 89661-35281 |
Note: This table lists common variants based on known data. Always verify the part number on your specific unit, as other variations exist.
What to Inspect on a Used ECU
- No Physical Damage: Ensure the case is not dented or crushed and that all connector pins are straight and free of corrosion.
- Signs of Water Intrusion: Look for any rust or chalky white residue on the case or connectors, which indicates water damage.
- Unopened Case: Ideally, find a unit that has not been opened before. Look for intact screws and an undisturbed seal between the case halves. If it has been opened, ask if it was professionally repaired.
Programming and Installation
No programming is required for a 1989 Toyota 4Runner ECU. Unlike modern vehicles, these ECUs do not have an immobilizer system and are not coded to a specific VIN. As long as you install a replacement unit with the exact same OEM part number, the installation is plug-and-play.
To install, simply bolt the new ECU in place, plug in the harnesses, reconnect the negative battery terminal, and start the vehicle.
Cost Breakdown
The cost for a replacement ECU can vary significantly depending on the source.
| Part Source | Estimated Cost | Notes |
|---|---|---|
| New OEM | $650 - $1,100+ | Extremely rare and likely discontinued for most part numbers. |
| Remanufactured | $200 - $400 | A good option. Often comes with a warranty and has had common failure points (like capacitors) addressed. |
| Used OEM | $150 - $350 | The most common and cost-effective option. Price depends on part number rarity and condition. |
| Shop Labor | $100 - $200 | Replacement is a simple job, typically taking less than one hour of labor. |
Known Issues, TSBs, and Recalls
As of this writing, there are no specific recalls or Technical Service Bulletins (TSBs) from the National Highway Traffic Safety Administration (NHTSA) related to the Engine Control Module for the 1989 Toyota 4Runner. The primary known issue is the high rate of failure due to leaking internal capacitors, as documented extensively in owner forums and repair videos.
Frequently Asked Questions (FAQ)
Does a replacement ECU for a 1989 4Runner need to be programmed?
No. As long as the part number on the replacement ECU is an exact match to your original, it is a plug-and-play part and does not require any programming or dealer visit.
Where is the ECU located on a 1989 Toyota 4Runner?
The ECU is located behind the passenger side kick panel, in the footwell area. You will need to remove a plastic trim panel to access it.
Can I repair my own ECU by replacing the capacitors?
Yes, if you have experience with soldering on electronic circuit boards. It involves carefully de-soldering the old capacitors and soldering in new ones with the correct voltage and microfarad (µF) rating, paying close attention to polarity. For those without soldering experience, it is better to send it to a repair service or buy a remanufactured unit.
Can I use an ECU from a 4Runner with a different engine or transmission?
No. The ECU is specifically calibrated for the vehicle's original configuration, including engine size (2.4L or 3.0L), transmission type (manual or automatic), and emissions equipment (Federal or California). Using the wrong one will result in poor performance or a no-start condition.
Technical Specifications
OEM Part Numbers: 89661-35260 89661-35260-84 89661-35270 89661-35270-84 89661-35281 89661-35281-84 175000-2230 175000-2320
Location: Behind passenger side kick panel. Diagnostic System: OBD-I.
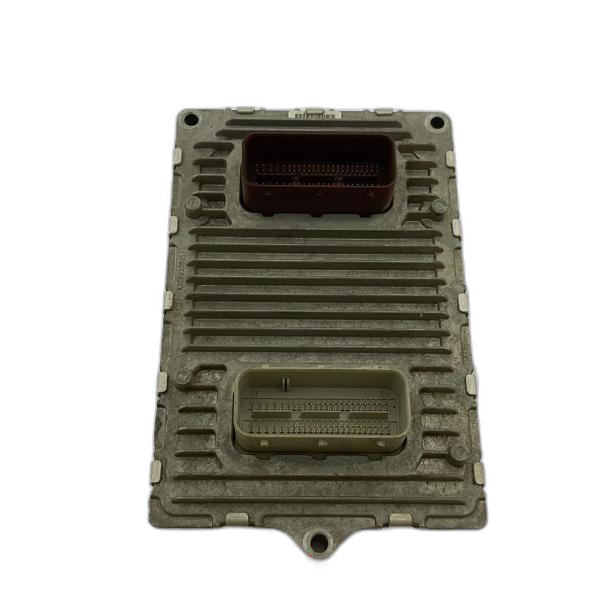
We Have This Part in Stock

The information in this article is provided for general reference and educational purposes only. Vehicle specifications, procedures, and part compatibility can vary by production date, trim level, and region. Always consult your vehicle's factory service manual and verify part numbers before purchasing or performing repairs. Safety-critical components such as airbags, seat belts, and braking systems should be installed by a qualified professional.
- Toyota 4Runner:
- 🛍️ Shop This Part
- Symptoms of a Failing 1989 4Runner ECU
- The #1 Cause of Failure: Leaking Capacitors
- How to Diagnose the ECU
- Step 1: Read the Trouble Codes (The Paperclip Test)
- Step 2: Visually Inspect the Circuit Board
- Buying a Used 1989 4Runner ECU: A Buyer's Guide
- The Golden Rule: Match the Part Number EXACTLY
- What to Inspect on a Used ECU
- Programming and Installation
- Cost Breakdown
- Known Issues, TSBs, and Recalls
- Frequently Asked Questions (FAQ)
- 🎟️ Get 5% Off