

2024-2026 Tesla Model 3 'Highland' Door Panel: Damage, Issues, and Replacement Guide
An in-depth look at the common failure points, costs, and replacement procedure for the redesigned interior door trim panels on the Tesla Model 3 'Highland'.
- This panel fits ONLY the 2024+ Tesla Model 3 'Highland' and is not backward compatible.
- When buying used, the integrity of the mounting clips on the back is more important than minor cosmetic flaws on the front.
- The surface material is very sensitive to chemicals; avoid harsh cleaners or unapproved solutions used by third parties like tint shops.
- After installation, a software routine may be needed to properly calibrate the ambient RGB lighting.
Symptoms of a Failing or Damaged Door Interior Trim Panel


Failure of the Model 3 'Highland' door panel is almost always related to physical or cosmetic damage rather than mechanical breakdown. Because the panel is a large, single assembly, even minor damage to one area can sometimes require the replacement of the entire unit.
Most Common Symptoms:
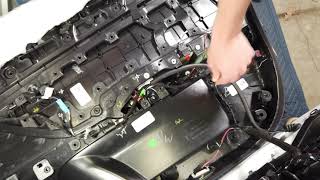
- Rattles, Buzzes, or Creaks: While the 'Highland' model has seen improvements in build quality, rattles can still occur. These noises are often caused by a loose wire harness hitting the plastic panel, or more commonly, a broken or improperly seated mounting clip. The sound may be more noticeable when driving over rough surfaces or when the audio system is playing music with heavy bass. 🎬 Watch: How to find and fix common door rattles.
- Visible Scratches, Scuffs, or Tears: The surface of the door panel, whether it's the standard fabric or the upgraded Alcantara, can be scratched by jewelry, bags, or accidental impacts. The lower portion is particularly susceptible to scuffs from shoes when entering or exiting the vehicle.
- Stains or Discoloration from Chemicals: The synthetic materials used on the 'Highland' door panels are sensitive to certain chemicals. There are documented cases of permanent staining and texture damage caused by cleaning agents or soap-based 'slip solutions' used by window tint installers. This damage is irreversible and requires panel replacement.
- Ambient Light Strip Malfunctions: A known issue on some 'Highland' models involves the integrated RGB ambient light strip. This can manifest as a section of the light appearing dim, off-color, or completely dark. In other cases, the light strip on the door may not align properly with the corresponding strip on the dashboard, creating a visual break.
- Loose or Warped Fit: In some cases, the panel may not sit flush against the door frame. This can be due to broken mounting clips, improper installation, or potential factory fitment issues. You may notice an uneven gap between the door panel and the dashboard when the door is closed.
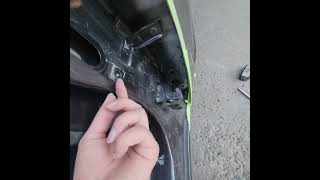
Compatibility Warning: This door interior trim panel is for the 2024-2026 Tesla Model 3 'Highland' refresh ONLY. It is not compatible with any pre-2024 Model 3. The design, mounting points, and integrated components are completely different. 🎬 See this step-by-step removal guide for the Highland model. Verify your vehicle is a 2024 or newer model before purchasing.
Buying a Used Door Interior Trim Panel
Purchasing a used OEM (Original Equipment Manufacturer) door panel is an excellent way to save money, especially since new panels from Tesla can be costly. However, careful inspection is critical to ensure you get a quality part.
What to Check Before You Buy:
- Inspect All Mounting Clips and Tabs: This is the most critical check. Flip the panel over and inspect every single plastic clip and mounting tab. These are designed to be brittle and often break during removal, even by professionals. A panel with broken clips will not sit securely and will almost certainly cause rattles. Ensure all the clip receptacles are intact and not cracked.
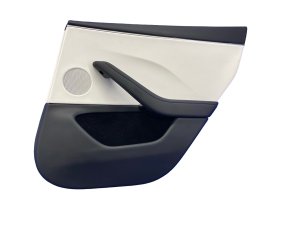
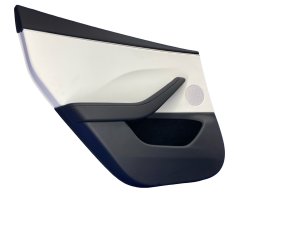
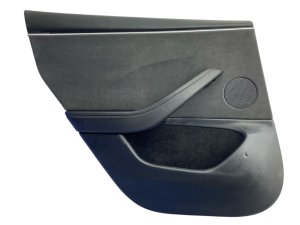
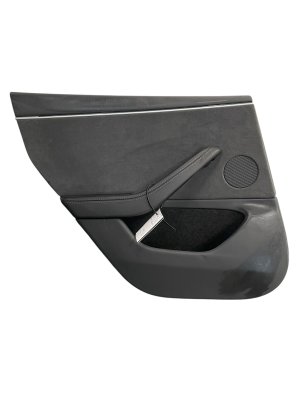
- Verify the Material and Color: The 'Highland' comes with different interior trims. The base models use a specific fabric material on the doors, while other trims may use Alcantara. Ensure the panel you are buying exactly matches your existing interior. Pay close attention to the color (e.g., black vs. white interior schemes).
- Check the Surface for Damage: Carefully examine the entire surface under good lighting. Look for subtle stains, discoloration from cleaning products, and scratches. Pay special attention to the armrest area and the lower section, which are high-wear zones.
- Examine the Ambient Light Strip: Inspect the clear plastic light strip for any cracks, deep scratches, or signs of delamination. While you can't test it, you can check for obvious physical damage that could cause the lighting issues reported by other owners.
- Confirm Part Numbers: If possible, match the part number on the back of the panel to the one you are replacing. Known part numbers include 1983171-20-C for the front left panel. A used panel with part number 1983171-28-B has also been seen on the market.
Pro Tip: When buying online, demand clear, high-resolution photos of the back of the panel showing all the clips. If a seller is unwilling to provide these, it's a major red flag. It's better to buy a panel with minor cosmetic scuffs and all intact clips than a pristine-looking one with broken tabs.
Known Issues, TSBs, and Recalls
As of early 2026, there are no specific recalls or Technical Service Bulletins (TSBs) issued by Tesla or the NHTSA that directly address the interior door trim panel of the 2024-2026 Model 3. The recalls issued for this vehicle concern other systems like airbags, seat belt reminders, and software.
However, owner forums and communities have highlighted several recurring, non-safety-critical issues:
- Ambient Light Misalignment: Owners have reported the ambient light strip on the door panel not lining up with the dashboard strip. In some cases, Tesla Service Centers have been able to adjust the door or dashboard to improve alignment.
- Defective Ambient Light Strips: Some panels have been delivered with or developed faults in the light strip, causing sections to be dim or discolored. This typically requires a full panel replacement under warranty.
- Sensitivity to Chemicals: The surface material is easily damaged by harsh chemicals, including some soap solutions used by third-party installers for services like window tinting.
Cost Comparison
Prices can vary based on condition, location, and whether components like speakers or switches are included. Aftermarket options are generally limited to cosmetic overlays or wraps, not complete panel assemblies.
| Part Type | Estimated Cost |
|---|---|
| New OEM (from Tesla) | $400 - $600 |
| New Aftermarket | Not widely available (only cosmetic overlays) |
| Used OEM | $200 - $450 |
| Shop Labor for Installation | $100 - $200 |
Note: Used OEM prices are based on eBay listings and can fluctuate significantly. New OEM pricing is based on owner reports, as Tesla does not publicly list all part prices. Labor is estimated at 1-1.5 hours at a typical independent shop rate of $100-$150/hr.
Installation Guide (Difficulty: 2/5)
Replacing the door panel is a straightforward task suitable for a DIYer with basic tools. The primary risk is breaking the plastic clips, so work slowly and carefully. The estimated time is about 30-60 minutes per door.
Required Tools:
- Torx T30 Socket/Screwdriver
- Plastic Trim Removal Tool Kit
- Small Pick Tool (optional, for releasing clips)
Step-by-Step Replacement Walkthrough:
- Prepare the Area: Fully lower the door window. This provides better access and leverage.
- Remove Screws: There are three Torx T30 bolts holding the panel. One is behind a small reflector on the rear edge of the panel (pry this off with a trim tool). The other two are located under the armrest and inside the door pull handle area.
- Release the Clips: Starting from the bottom of the door, insert a plastic trim tool and gently pry outwards to release the first clip. You will hear a loud pop, which is normal. Work your way around the perimeter of the door, releasing all the clips.
- Lift the Panel Off: Once all clips are free, lift the panel straight up a few inches to unhook it from the top window channel. Do not pull it away from the door yet.
- Disconnect Cables and Connectors: Carefully tilt the top of the panel towards you. You will need to disconnect the main electrical harness, the speaker connector, the ambient light connector, and the puddle light. You must also disconnect the mechanical emergency door release cable. This involves releasing it from a bracket and unhooking the barrel end from the lever. 🎬 Watch: A detailed walkthrough of the front door panel removal.
- Installation is the Reverse: Before installing the new panel, check the metal door frame for any clips that may have stayed behind. Pry them out and install them on the new door panel. Connect all electrical harnesses and the mechanical release cable. Hook the top of the new panel over the window sill, align the clips with their holes, and firmly press the panel into place, starting from the top and working your way around. Reinstall the three Torx bolts and the reflector.
Post-Installation Calibration: After replacing the panel, the ambient RGB lighting may need to be re-addressed by the vehicle's computer. Tesla's official procedure requires putting the vehicle in 'Service Mode' and running an 'Address RGB Lights' routine. While the light may function without this step, its color and dimming may not sync correctly with the rest of the car.
Frequently Asked Questions (FAQ)
Can I replace just the fabric or Alcantara part of the door panel?
No, the fabric or Alcantara insert is permanently bonded to the main door panel structure. If this material is damaged, the entire door panel assembly must be replaced.
Why is my ambient light a different color on the door than the dash?
This could be due to a faulty LED light pipe in the door panel or a software issue. The first step is to try a soft reset of the vehicle's touchscreen. If that fails, the panel may need replacement, and the lighting system may need a calibration routine run by a service center.
Do I need to disconnect the 12V battery to replace the door panel?
While it is not strictly required by the service manual and many DIY videos do not show it, disconnecting the 12V battery is always a safe precaution when working with any vehicle electronics to prevent accidental shorts.
A clip broke during installation. What should I do?
It is highly recommended to replace any broken clips. A missing clip will likely lead to annoying rattles and a poor fit. These clips are standard parts and can often be purchased from Tesla service or found online. It's a good idea to have a few spares on hand before you start the job.
Helpful Videos
Technical Specifications
OEM Part Numbers: 1776478 1983171-20-C 198317120C P1776478 P1983171-20-C 1983171-28-B 1983176-20-C
Integrates window switch, electronic door release, manual door release cable, speaker, puddle light, and RGB ambient light strip.
We Have This Part in Stock

The information in this article is provided for general reference and educational purposes only. Vehicle specifications, procedures, and part compatibility can vary by production date, trim level, and region. Always consult your vehicle's factory service manual and verify part numbers before purchasing or performing repairs. Safety-critical components such as airbags, seat belts, and braking systems should be installed by a qualified professional.
- Tesla Model 3:
- 🎬 Helpful Videos
- 🛍️ Shop This Part
- Symptoms of a Failing or Damaged Door Interior Trim Panel
- Most Common Symptoms:
- Buying a Used Door Interior Trim Panel
- What to Check Before You Buy:
- Known Issues, TSBs, and Recalls
- Cost Comparison
- Installation Guide (Difficulty: 2/5)
- Required Tools:
- Step-by-Step Replacement Walkthrough:
- Frequently Asked Questions (FAQ)
- 🎟️ Get 5% Off