

2022-2026 Lucid Air Door Panel: A Guide to Rattles, Trim Themes & Replacement
This guide covers the complex variations, common issues like rattles, and step-by-step inspection for a used interior door trim panel on your 2022-2026 Lucid Air.
- Compatibility is extremely complex; you must match the panel to your car's specific interior theme (e.g., Mojave, Santa Cruz, Tahoe) and door location.
- When buying a used panel, the most critical inspection is checking the back for broken or cracked plastic mounting clips, as these are essential for a rattle-free fit.
- Rattles are the most common symptom and can often be fixed without full replacement by removing the panel and adding foam or felt tape to contact points.
- Replacement is a DIY-friendly job for those with patience, requiring a plastic trim tool set and Torx drivers to avoid damaging the delicate trim.
Key Variants of the Lucid Air Door Panel
Before purchasing a replacement door panel for your Lucid Air, it is critical to identify the exact version your vehicle requires. Compatibility depends on several factors, and an incorrect panel will not match your interior. The primary variations are based on interior theme, location, and the vehicle's roof type.
Interior Themes
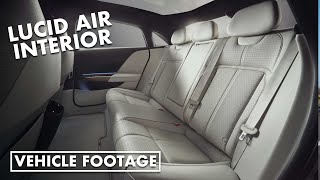
Lucid offers several distinct interior themes, each named after a California location. These themes use different colors, materials, and wood accents on the door panels. You must match your theme exactly.
- Mojave: Available in a standard version with Nappa leather and a "PurLuxe" leather-alternative version.
- Santa Cruz: Features a two-tone black and ceramic Nappa leather with North American Walnut wood trim.
- Tahoe: Uses Lucid black and graphite Nappa leather with carbon oak trim.
- Santa Monica: Exclusive to the launch "Dream Edition," this theme uses graphite gray and ceramic colors.
Warning: The single most important factor when replacing this panel is matching it to your vehicle's specific interior theme and trim level. A panel from a different interior will not match cosmetically and may have different features.
Location and Roof Type
- Position: Panels are specific to each of the four doors: Front Left (Driver), Front Right (Passenger), Rear Left (Driver's Side), and Rear Right (Passenger's Side). They are not interchangeable.
- Roof Type: Fitment for the upper part of the door panel may differ between vehicles equipped with the standard aluminum roof and those with the optional panoramic Glass Canopy. Always compare your old part to photos of the replacement part to ensure a match.
Common Symptoms of a Damaged Door Panel
Failure of a door panel is typically related to physical damage or loose components rather than mechanical wear. Here’s what to look and listen for:
Rattles, Buzzes, or Squeaks
This is the most common complaint. Noises that occur when driving over bumps or when playing music are often caused by loose or broken mounting clips on the back of the panel. Some owners of early-build Lucid Airs have reported various interior rattles that are often fixable without full replacement. In many cases, these noises can be resolved by removing the panel and adding felt tape or foam to contact points.
🎬 Watch: How to fix annoying door panel rattlesLoose Fit or Visible Gaps
The panel may feel loose, sag, or have visible gaps between it and the door's metal frame. This is almost always a sign of broken or improperly seated mounting clips, often as a result of a previous repair where the panel was not reinstalled correctly.
Malfunctioning Switches or Lights
If the window switch, door lock, or ambient lighting stops working, the issue could be a loose electrical connector behind the panel. These connectors can sometimes be dislodged by vibrations or if the panel is loose.
Cosmetic Damage
Scratches, scuffs, and tears from everyday use are common. On a luxury vehicle, premium materials like leather or Alcantara can also delaminate or bubble due to adhesive failure, which can be accelerated by heat and sun exposure.
Buying a Used 2022-2026 Lucid Air Door Panel: A Buyer's Checklist
Given the high cost of new OEM parts, a used door panel is an excellent value. However, careful inspection is crucial to ensure you receive a quality, compatible part.
Step 1: Verify Compatibility by Theme and Part Number
First, confirm your car's interior theme (e.g., Santa Cruz, Mojave). The most reliable method to guarantee a perfect match is to compare the part number from your original panel to the one you intend to purchase. The part number is located on a sticker on the back of the panel. While many part numbers exist, some examples include P11-NAB0BD-04 and P11-NCN2DL-02.
Step 2: Inspect All Mounting Clips and Tabs
This is the most critical inspection. Turn the panel over and examine every single plastic mounting clip and tab. Look for white stress marks, cracks, or completely broken-off tabs. A panel with even a few broken clips will not sit flush against the door and will almost certainly cause rattles.
Pro Tip: If a panel is in otherwise perfect condition but has one or two broken clips, you may be able to transfer clips from your old panel. However, if multiple mounting points are cracked or broken, you should pass on the part.
Step 3: Check for Structural Cracks and Water Damage
Inspect the entire plastic backing of the panel for any cracks, especially around the speaker openings and armrest structure. Also, look for any signs of water staining or discoloration, which could indicate the donor vehicle had leaking window seals. Water damage can lead to delamination of materials and electrical issues down the line.
Step 4: Examine Cosmetic Surfaces and Integrated Components
Under bright light, closely inspect the front of the panel. Check the wood or metal trim for deep scratches or cracks. Run your hand over the leather or textile surfaces to feel for any bubbling or peeling. Ensure speaker grilles are not dented and that the bezels for handles and switches are intact.
Known Issues, Recalls, and Service Bulletins
As of early 2026, there are no specific NHTSA recalls or Technical Service Bulletins (TSBs) for the interior door panels on the 2022-2026 Lucid Air. Most owner complaints are related to minor squeaks and rattles, which are often addressed by service centers under warranty by adding insulation or adjusting clips. While there are no recalls for the panel itself, other recalls related to door components (like wiring harnesses or latches) would require the removal and reinstallation of the door panel to perform the repair.
Replacement Overview
Replacing the door panel is a moderately difficult job that a skilled DIYer can perform. The main challenges are carefully releasing the plastic clips without breaking them and disconnecting the various electrical connectors.
- Difficulty: 3/5
- Estimated Time: 1-1.5 hours
- Tools Required: Plastic trim removal tool set, Torx drivers (T25, T30), small pick or flathead screwdriver.
General Step-by-Step Guide
- Disconnect the 12V Battery: This is a crucial safety step to prevent electrical shorts.
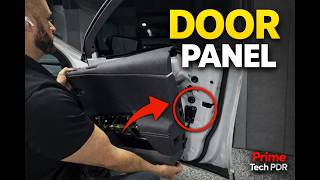
- Remove Trim and Screws: Use a plastic pry tool to carefully remove small trim pieces around the door handle and armrest to expose hidden Torx screws. There are typically two T30 screws in the armrest area 🎬 See this step-by-step door panel removal guide and one T25 screw elsewhere.
- Release Panel Clips: Starting from the bottom, use a trim removal tool to slide between the metal door and the panel and pop the clips loose. Work your way around the perimeter of the door.
- Lift and Disconnect: Once all clips are free, lift the panel upwards to unhook it from the top of the door near the window. Do not pull it away yet. Support the panel while you disconnect the main electrical harness and the mechanical door release cable. The release cable is often held in a small white plastic housing that needs to be unclipped. 🎬 Watch: Rear door disassembly walkthrough
- Transfer Components (If Necessary): If your replacement panel did not come with switches or other small parts, you will need to transfer them from your old panel.
- Installation: Installation is the reverse of removal. Reconnect all electrical and mechanical links, hook the top of the panel onto the door frame, and then firmly press the clips back into place until they snap.
Cost Comparison
Due to the Lucid Air's premium positioning and newness, parts are expensive. A used OEM panel provides the best value.
| Part Type | Estimated Cost |
|---|---|
| New OEM | $1,000 - $2,000+ (Dealer estimate) |
| New Aftermarket | Not Available |
| Used OEM | $400 - $900 |
| Shop Labor | $150 - $300 |
OEM Part Numbers
The Lucid Air uses a vast array of part numbers for its door panels due to the many interior combinations. The numbers provided here are a sample and should be used for reference only. Always verify the exact part number on your specific panel before ordering.
Known part numbers include: P11-E75200-01, P11-E75700-03, P11-E75PR2-07, P11-NAB0BD-04, P11-NAB0BG-04, P11-NAB0CG-04, P11-NAC0BH, P11-NAC0CG, P11-NAE0BD-02, P11-NAE0CG, P11-NAH0AR, P11-NCN1BL-03, P11-NCN2BL, P11-NCN2DL-02, P11-NCN5BL, P11-NT05GN-06, P11-NCN5DL-02.
Frequently Asked Questions (FAQ)
My door panel is just rattling. Does it need to be replaced?
Probably not. If the panel is cosmetically fine, the rattle is likely from a loose or broken clip, or a lack of insulation between contact points. This can often be fixed by removing the panel, replacing any broken clips, and applying felt or foam tape to problem areas.
Will a door panel from a Lucid Air Pure fit my Grand Touring?
While it might physically bolt on, it is not recommended. The interior themes, materials (Nappa leather vs. PurLuxe), and wood trims are different across trim levels. A panel from a different trim will not match your car's interior aesthetic.
Do I need to reprogram the car after replacing a door panel?
No. The door panel itself does not require any programming. It simply houses plug-and-play components like switches and speakers, which should function immediately upon being connected.
How do I know which interior theme my Lucid Air has?
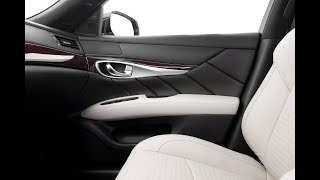
You can typically find this information on your vehicle's original window sticker or purchase agreement. Alternatively, you can compare your interior's colors and wood trim to photos of the known themes: Santa Cruz (two-tone black/ceramic with walnut), Tahoe (black/graphite with carbon oak), and Mojave (often featuring black with different textures).
Helpful Videos

Technical Specifications
OEM Part Numbers: P11-E75200-01 P11-E75700-03 P11-E75PR2-07 P11-NAB0BD-04 P11-NAB0BG-04 P11-NAB0CG-04 P11-NAC0BH P11-NAC0CG P11-NAE0BD-02 P11-NAE0CG P11-NAH0AR P11-NCN1BL-03 P11-NCN2BL P11-NCN2DL-02 P11-NCN5BL P11-NT05GN-06 P11-NCN5DL-02
Varies by vehicle trim. Materials can include Nappa leather, PurLuxe synthetic leather, Alcantara, North American Walnut wood, Carbon Oak wood, and various textiles. Integrated components include window switches, speaker grilles, and ambient lighting.
We Have This Part in Stock



The information in this article is provided for general reference and educational purposes only. Vehicle specifications, procedures, and part compatibility can vary by production date, trim level, and region. Always consult your vehicle's factory service manual and verify part numbers before purchasing or performing repairs. Safety-critical components such as airbags, seat belts, and braking systems should be installed by a qualified professional.
- LUCID AIR:
- 🎬 Helpful Videos
- 🛍️ Shop This Part
- Key Variants of the Lucid Air Door Panel
- Interior Themes
- Location and Roof Type
- Common Symptoms of a Damaged Door Panel
- Rattles, Buzzes, or Squeaks
- Loose Fit or Visible Gaps
- Malfunctioning Switches or Lights
- Cosmetic Damage
- Buying a Used 2022-2026 Lucid Air Door Panel: A Buyer's Checklist
- Step 1: Verify Compatibility by Theme and Part Number
- Step 2: Inspect All Mounting Clips and Tabs
- Step 3: Check for Structural Cracks and Water Damage
- Step 4: Examine Cosmetic Surfaces and Integrated Components
- Known Issues, Recalls, and Service Bulletins
- Replacement Overview
- General Step-by-Step Guide
- Cost Comparison
- OEM Part Numbers
- Frequently Asked Questions (FAQ)
- 🎟️ Get 5% Off