

1999-2004 Land Rover Discovery Door Panel: Fixing Sagging Inserts and Broken Clips
This guide covers the most common issues with the Discovery II interior door panels, including sagging fabric, broken clips, and how to buy a good used replacement.
- Sagging fabric inserts are the #1 problem but can be fixed with spray adhesive; don't discard an otherwise good panel because of it.
- Compatibility is critical: you must match both the color and the material (cloth, leather, suede) to your vehicle's interior.
- When buying used, always inspect the back of the panel for cracked plastic mounting points; this is more important than sagging fabric.
- Always buy a new set of door clips (part #EYC101430) before starting a replacement; the old ones are guaranteed to break.
Symptoms of a Failing Door Interior Trim Panel
Problems with the Discovery II door panels are common and usually easy to spot. While not critical to the vehicle's operation, they can be a major source of annoyance.
Sagging or Detached Fabric Inserts
The most notorious issue with these door panels is the failure of the adhesive that holds the cloth, suede, or leather inserts. Over time, heat and humidity cause the foam backing on the fabric to disintegrate, leading to the material bubbling, sagging, or peeling away from the panel. This is a purely cosmetic issue but is extremely common across all trim levels.
Rattles and Buzzing Noises
Annoying rattles from the door are often caused by broken or loose plastic retaining clips. These clips hold the panel securely to the metal door frame. They become brittle with age and can break from vibration or during removal for other repairs, causing the panel to fit loosely and vibrate against the door.
Broken or Loose Components
The plastic structures of the door panel itself can fail. This includes the door pull handle, the armrest, or the mounting points on the back of the panel where the clips attach. A cracked door pull can make it difficult to close the door, while broken mounting points will prevent the panel from ever fitting securely.
Malfunctioning Switches
In some cases, a very loose door panel can cause issues with the window or mirror switch connectors. If the panel is hanging off, it can pull on the wiring harness, leading to intermittent or complete failure of the switches.
Buying a Used Door Interior Trim Panel
Since new OEM panels are largely discontinued and no full aftermarket replacements exist, buying a used OEM panel is the most common solution. Careful inspection is key to getting a good part.
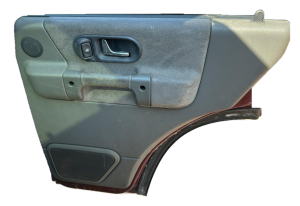
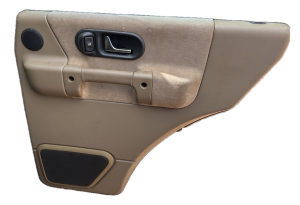
Compatibility Warning: This door panel fits all 1999-2004 Land Rover Discovery II models. However, interior trim materials and colors (such as cloth, suede, or leather inserts) varied between trim levels. Please carefully compare the photos to your existing door panel to ensure an exact match for your vehicle's interior.
What to Check Before You Buy
- Check the Backside First: This is the most important inspection. Flip the panel over and check the plastic mounting bosses where the clips attach. Look for cracks or breaks. A panel with broken mounting points is difficult to repair and will never fit tightly.
- Inspect the Door Pull Area: Check the area around the interior door pull handle for stress cracks. This is a high-stress area that can break, especially on the driver's door.
- Assess the Fabric Insert: Assume any used panel will have sagging fabric or will sag soon. This is an easy fix, so don't let it be a deal-breaker if the panel is otherwise in good shape. Focus on the condition of the fabric itself—look for rips, stains, or cigarette burns.
- Look for Water Damage: Check the bottom of the panel's fiberboard backing for signs of water stains or swelling. This indicates a past issue with a window seal or door vapor barrier and can lead to mold or deterioration of the panel itself.
- Verify Color and Material: Land Rover offered several interior colors like 'Bahama Beige' (Alpaca) and 'Smokestone Grey'. There were also different materials like cloth, partial leather, and full leather (HSE models). Get a photo of the actual part you are buying to match it to your vehicle's interior.
Known Issues, Recalls, and TSBs
There have been no manufacturer recalls or Technical Service Bulletins (TSBs) issued specifically for the interior door trim panels on the 1999-2004 Land Rover Discovery. The common issues, such as sagging fabric and broken clips, are considered cosmetic wear and tear by the manufacturer.
However, several recalls for other components, like the ABS modulator (NHTSA #04V-005), required the removal of interior panels to access wiring, which may have resulted in broken clips if not done carefully by the technician.
Cost Comparison
| Part Type | Price Range |
|---|---|
| New OEM | $500+ (Largely discontinued) |
| New Aftermarket | Not Available |
| Used OEM | $75 - $250 |
| Shop Labor to Replace | $70 - $150 |
Repair and Replacement
Replacing the door panel is a straightforward DIY job. The main challenge is removing the panel without breaking the old, brittle clips.
Pro Tip: Before you begin, purchase a bag of new door panel clips (part number EYC101430 or similar). It is almost guaranteed that several of the original clips will break during removal. Replacing them with new clips is essential for a tight, rattle-free fit.
Step-by-Step Replacement Guide
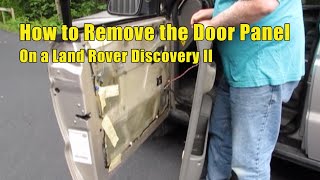
🎬 Watch: This video shows you how to remove the panel safely.- Remove Screws: There are several Phillips head screws holding the panel. Look for them in the door pull cup, under the armrest, and sometimes near the speaker grille.
- Pry the Panel: Using a plastic trim removal tool, carefully pry the panel away from the door frame, starting from the bottom. You will hear the clips pop as they release.
- Lift and Disconnect: Once all clips are disengaged, lift the panel upwards to unhook it from the top of the window channel.
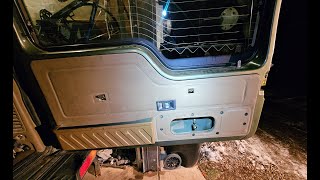
- Disconnect Components: Before fully removing the panel, reach behind it and disconnect the electrical connectors for the window/mirror switch, speaker, and courtesy light. Also, unhook the cable for the interior door handle. 🎬 Check out this walkthrough for removing the rear cargo door panel.
- Install New Panel: Installation is the reverse of removal. Reconnect all electrical and mechanical components, hook the top of the panel onto the window channel, and then firmly press the panel into the door to engage the new clips.
Fixing Sagging Inserts
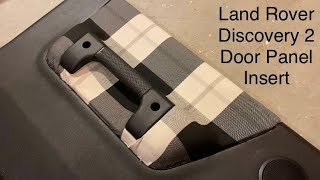
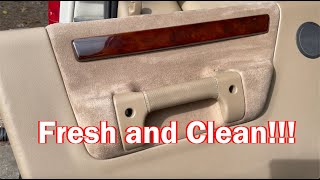
If your panel is structurally sound but the fabric is sagging, you can repair it without replacing the whole panel. This involves removing the panel, carefully peeling off the old fabric, scraping off the deteriorated foam from both the fabric and the panel insert, and re-applying the fabric using a high-temperature spray adhesive (like 3M Headliner & Fabric Adhesive). 🎬 See this full guide on reupholstering your sagging door inserts. This is a popular and well-documented DIY fix in the Land Rover community.
Frequently Asked Questions
Q: Can I swap a leather door panel onto my model that came with cloth?
A: Yes, the physical panels are interchangeable between trim levels. You can upgrade from cloth to leather, but for a consistent look, you will likely want to replace all four door panels as a set.
Q: My door panel is rattling. Do I need to replace it?
A: Not necessarily. The most common cause of rattling is broken retaining clips. You can often fix the rattle by simply removing the panel, replacing all the broken clips (Part #EYC101430), and ensuring it is securely reinstalled.
Q: Where are all the screws to remove the door panel?
A: On a Discovery II, there are typically screws located inside the door handle recess, in the speaker grille area, and on the bottom edge of the panel. The exact number and location can vary slightly.
Q: The fabric insert on my used panel is also sagging. How do I fix it?
A: You can re-glue the existing fabric using a high-temperature spray adhesive. The process involves removing the panel, separating the insert, cleaning off the old crumbling foam, and then applying new adhesive. Many owner forums and videos show this process in detail.
Helpful Videos
Technical Specifications
OEM Part Numbers: EJB000700LPW ELB000540LPW ELB000550LPW
Door Panel Retaining Clip: EYC101430
We Have This Part in Stock

The information in this article is provided for general reference and educational purposes only. Vehicle specifications, procedures, and part compatibility can vary by production date, trim level, and region. Always consult your vehicle's factory service manual and verify part numbers before purchasing or performing repairs. Safety-critical components such as airbags, seat belts, and braking systems should be installed by a qualified professional.
- Land Rover Discovery:
- Land Rover Discovery:
- 🎬 Helpful Videos
- 🛍️ Shop This Part
- Symptoms of a Failing Door Interior Trim Panel
- Sagging or Detached Fabric Inserts
- Rattles and Buzzing Noises
- Broken or Loose Components
- Malfunctioning Switches
- Buying a Used Door Interior Trim Panel
- What to Check Before You Buy
- Known Issues, Recalls, and TSBs
- Cost Comparison
- Repair and Replacement
- Step-by-Step Replacement Guide
- Fixing Sagging Inserts
- 🎟️ Get 5% Off