

1996-2004 Land Rover Discovery Doors: Decoding the D1/D2 Split and Fighting Rust
This guide covers the critical differences between Discovery 1 and Discovery 2 doors, how to spot a good used assembly, and how to diagnose common failures like rust, bad locks, and window regulators.
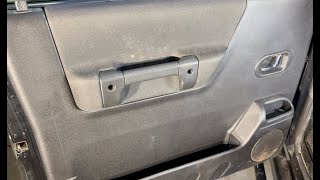
- The single most critical step is identifying your vehicle as a Discovery 1 (1996-1999) or Discovery 2 (1999-2004) as the doors are not interchangeable. Check the door handles: D1 is flush, D2 is pull-out style.
- Rust is the primary enemy. Thoroughly inspect the bottom seam of any used door for paint bubbling or corrosion before buying.
- Failures of the door lock actuator and window regulator are extremely common. Expect to eventually replace these components.
- New door shells are essentially unavailable, making a rust-free used OEM door the best and often only replacement option.
The Critical 1999 Model Year Split: Discovery 1 vs. Discovery 2
Before buying a door for a 1996-2004 Land Rover Discovery, you must first identify which generation you have. The doors for a Discovery 1 (D1) and a Discovery Series II (D2) are not interchangeable. The 1999 model year is a split year where both generations were sold, creating a common point of confusion.
Warning: A door from a Discovery 1 (1996-1999) will not fit a Discovery 2 (1999-2004), and vice-versa. The body shells are different. Always verify your specific model before purchasing.
Here’s how to tell them apart:
- Door Handles: This is the easiest way to tell. Discovery 1 models have flush, flap-style door handles. Discovery 2 models have larger, pull-out style handles.
- Body Size: The Discovery 2 is slightly longer and wider than the Discovery 1. This change is most noticeable in the rear overhang, which affects the shape and size of the rear doors.
- Tail Lights: On a Discovery 1, the rear tail lights are located lower in the body, below the horizontal body line. On a Discovery 2, the tail lights are taller and sit higher up, integrated into the rear corner pillars.
Symptoms of Failure
Problems with Discovery doors usually fall into three categories: mechanical/electrical failures inside the door, rust, or sealing issues.
1. Door Lock Actuator Failure
This is an extremely common issue. The door lock actuator is a small electric motor that locks and unlocks the door latch. When it fails, you'll notice one door not responding to the key fob or central locking button. You might hear a faint click or buzz from the door, or no sound at all. The internal motor can seize or small plastic gears can break.
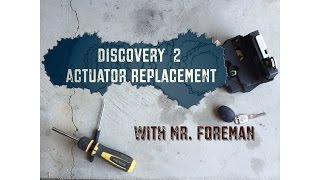
🎬 Watch: Step-by-step Discovery 2 door actuator replacement guide2. Window Regulator or Motor Failure
Another frequent problem is a failed window regulator. The regulator is the mechanism with cables and pulleys that lifts and lowers the window glass. Symptoms include:
- A loud grinding or crunching noise when you press the window switch.
- The window dropping suddenly into the door.
- The window moving very slowly, crookedly, or getting stuck.
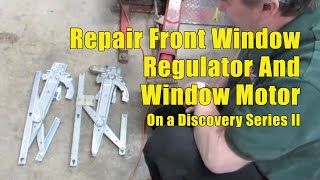
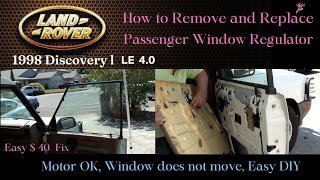
- Hearing the motor whir, but the window doesn't move. This is a classic sign of a snapped regulator cable. 🎬 See how to replace a Discovery II front window regulator
3. Rust and Corrosion
Rust is the biggest enemy of Discovery doors. The design uses a steel frame with an aluminum outer skin. Where these two different metals meet, especially along the bottom seam, galvanic corrosion can occur. This causes the aluminum to bubble and the steel frame to rust from the inside out. Always check the bottom edge and lower inside of the door shell.
4. Wind Noise and Water Leaks
If you hear excessive wind noise or find water inside the cabin, it's often due to degraded door seals or misalignment. Over time, the rubber seals compress and lose their effectiveness. On Discovery 2 models, the felt window run channel at the top of the door is known to slide down, creating a gap that lets in air and noise.
Buying a Used Door Assembly: What to Check
Since new OEM door shells are generally no longer available, the used market is your primary option. A thorough inspection is key to getting a good part.
1. Verify the Generation (D1 vs. D2)
First and foremost, confirm you are buying for the correct generation using the handle and body style cues mentioned above. Ask the seller for photos of the door handles if you are unsure.
2. The Rust Inspection
This is the most important check. A little surface rust can be treated, but structural rust is a deal-breaker.
- Check the Bottom Seam: Carefully inspect the entire bottom edge of the door where the aluminum skin folds over the steel frame. Look for bubbling paint, white powdery corrosion, or any signs of swelling.
- Look Inside: If possible, look inside the bottom of the door through the drain holes. This is where moisture collects and rust begins.
- Bring a Magnet: Run a small magnet along the lower portion of the door. If it doesn't stick in some areas, it could indicate the presence of thick body filler (Bondo) hiding previous rust or damage repair.
3. Inspect for Dents and Previous Repairs
Look down the length of the door from an angle to spot waves, ripples, or dents. Check for paint overspray on the window seals or trim, which indicates it has been repainted. Mismatched paint color is another red flag.
4. Clarify What's Included
A used "door assembly" can mean different things. Most are sold as a bare shell. Verify if the price includes:
- Door Glass
- Window Regulator and Motor
- Door Lock Actuator and Latch
- Exterior Handle and Interior Trim Panel
- Wiring Harness
Assume nothing is included unless specified by the seller. Swapping your original components into the new shell is often required.
Known Issues, TSBs, and Recalls
While most recalls for these vehicles are for other systems, there is one notable door-related recall for the Discovery 1.
- NHTSA Recall (Canada Transport #1997035): Issued for some 1995-1996 Land Rover Discovery models, this recall addresses an issue where the right front door may not fully latch. This could cause the door to open while driving. The fix involved installing a longer latch mounting fastener.
While no specific door recalls exist for the Discovery 2 within this year range, later model Discoverys have been recalled for water entering door latches and causing corrosion, a theme consistent with the known failure points on these older models.
Replacement Overview & Difficulty
Replacing a complete door assembly is a moderately difficult job best suited for a DIYer with some experience.
- Difficulty: 3 out of 5
- Time: 2-4 hours
- Tools: Socket set, Torx bits, trim removal tools, a floor jack with a padded block to support the door.
- Alignment is Key: The most challenging part of the job is aligning the new door. This is done by loosening the hinge bolts and adjusting the door's position until the body lines match and the gaps are even. It's often recommended to do this before the door seal is installed. The door striker on the body pillar can also be adjusted to ensure the door latches securely. Getting to the hinge bolts can be difficult and may require patience and specialized tools.
Pro Tip: Have a helper. A second person makes lifting the heavy door off and on the hinges much safer and easier. Before removing the old door, trace the outline of the hinges on the door frame with a marker. This will give you a starting point for aligning the new door.
| Part/Service | Estimated Cost (USD) | Notes |
|---|---|---|
| New OEM Door Shell | N/A | Generally considered No Longer Available (NLA). |
| New Aftermarket Door Shell | N/A | Not commonly manufactured or sold. The market focuses on components. |
| Used OEM Door Assembly | $250 - $600 | Price varies widely based on condition, included components, and shipping cost. |
| Shop Labor (Door Swap) | $250 - $500 | Based on 2-3 hours of labor plus potential paint/blending work. |
| Shop Labor (Actuator/Regulator) | $150 - $250 | Typically 1.5-2.5 hours of labor per door. |
Frequently Asked Questions
How do I know for sure if I have a Discovery 1 or Discovery 2 in the 1999 model year?
The most reliable method is to look at the door handles. If they are the flush, flap-style, you have a Discovery 1. If they are the larger, pull-out style, you have a Discovery 2. You can also check your VIN; the D2 was a significant redesign and will have a different series of characters than a D1.
Can I just replace the rusty bottom part of the door?
Repair sections for the steel inner frame are available from specialty suppliers. However, this requires cutting out the rusted metal, welding in the new piece, and properly treating and sealing the area. It is a job for an experienced bodywork professional. For most people, replacing the entire door with a rust-free used unit is more practical.
Why does only one of my doors not lock with the key fob?
This is the classic symptom of a failed door lock actuator in that specific door. The central locking system is sending the signal, but the actuator's motor is unable to move the latch. The actuator needs to be repaired or, more commonly, replaced.
Is it difficult to align a replacement door?
Yes, it can be challenging and requires patience. Alignment involves adjusting the door at the hinges and the striker on the body to achieve even gaps and a flush fit with the surrounding panels. If misaligned, the door may be hard to close, leak water, or create wind noise. Many DIYers find this to be the hardest part of the job.
Helpful Videos

Technical Specifications
OEM Part Numbers: ALR9591 (Discovery 1, Rear Right) ALR9640 (Discovery 1, Rear Left) BTR8831 (Discovery 1, Front Right) BTR8844 (Discovery 1, Front Left) CGE100690 (Discovery 2, Rear Left) CAB101100 (Discovery 2, Front)
Construction: Steel inner frame with an aluminum outer skin.
We Have This Part in Stock



The information in this article is provided for general reference and educational purposes only. Vehicle specifications, procedures, and part compatibility can vary by production date, trim level, and region. Always consult your vehicle's factory service manual and verify part numbers before purchasing or performing repairs. Safety-critical components such as airbags, seat belts, and braking systems should be installed by a qualified professional.
- Land Rover Discovery:
- 🎬 Helpful Videos
- 🛍️ Shop This Part
- The Critical 1999 Model Year Split: Discovery 1 vs. Discovery 2
- Symptoms of Failure
- 1. Door Lock Actuator Failure
- 2. Window Regulator or Motor Failure
- 3. Rust and Corrosion
- 4. Wind Noise and Water Leaks
- Buying a Used Door Assembly: What to Check
- 1. Verify the Generation (D1 vs. D2)
- 2. The Rust Inspection
- 3. Inspect for Dents and Previous Repairs
- 4. Clarify What's Included
- Known Issues, TSBs, and Recalls
- Replacement Overview & Difficulty
- Frequently Asked Questions
- 🎟️ Get 5% Off