

2018-2024 Buick Enclave Dashboard Vent: Fixing Broken Louvers and Matching Interior Trim
A complete guide to diagnosing, replacing, and sourcing a used center or side dashboard air vent for the second-generation Buick Enclave.
- The most common failures are physical damage like broken louvers or adjuster tabs, not electrical or airflow issues.
- Matching the exact interior color and trim (e.g., Shale, Dark Galvanized) is critical when buying a replacement, especially a used one.
- Replacement of the center vent is an easy DIY job, requiring only plastic trim tools to pry off the surrounding panel.
- No specific recalls or TSBs exist for this part; failures are considered normal wear and tear.
Symptoms of a Failing Dashboard Air Vent
Diagnosing a problem with a dashboard air vent is usually straightforward. However, it's important to distinguish between a physically broken vent and a problem with the HVAC system itself.
Physical Vent Damage
These are the most common issues you'll encounter with the vent assembly itself. Failures are almost always due to physical wear, sun exposure making the plastic brittle, or accidental damage from cleaning or inserting an air freshener.
- Broken or Stuck Louvers: The individual horizontal or vertical slats (louvers) may break, detach, or become stuck in one position. This prevents you from directing airflow.
- Damaged Adjuster Tab: The small tab used to move the louvers is often the first point of failure. It can snap off, making it difficult to adjust the vent.
- Rattling Noises: A loose or broken louver can vibrate and rattle inside the dashboard, especially when driving on rough roads or when the fan is on high.
- Peeling or Damaged Trim: The chrome or painted finish on the vent's trim ring can bubble, peel, or crack over time, detracting from the interior's appearance.
Airflow Problems (Not a Vent Issue)
If you experience weak or no airflow from a vent, the problem is likely not the vent itself but another part of the HVAC system. Before replacing a vent for an airflow issue, check these common culprits:
- Clogged Cabin Air Filter: A dirty filter is the most common cause of reduced airflow throughout the system.
- Failed Blower Motor or Resistor: The blower motor pushes air through the vents. If it fails or the resistor that controls its speed goes bad, you'll get weak or no airflow.
- Stuck Blend Door Actuator: These small motors direct air to different zones (floor, dash, defrost). If an actuator fails, air may be permanently stuck blowing somewhere other than the dash vents.
Known Issues, TSBs, and Recalls
As of mid-2024, there are no specific recalls or widespread Technical Service Bulletins (TSBs) from General Motors related to the physical failure of the dashboard air vents for the 2018-2024 Buick Enclave. Problems like broken louvers or tabs are generally considered normal wear and tear rather than a manufacturing defect.
Pro Tip: The absence of a recall or TSB means that repair costs will not be covered by the manufacturer unless the vehicle is still under its original bumper-to-bumper warranty and the failure is deemed a defect, which is unlikely for physical damage.
Buying a Used 2018-2024 Enclave Dashboard Vent
Since direct-fit aftermarket vents are not widely available for this model, a quality used OEM part is often the best alternative to an expensive new one. Here’s what to look for when buying a recycled vent.
1. Verify the Exact Color and Trim
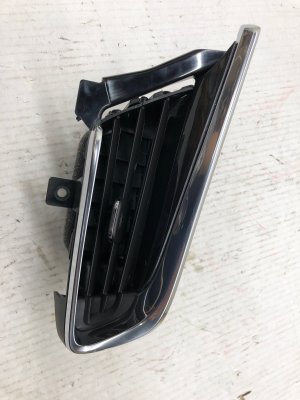
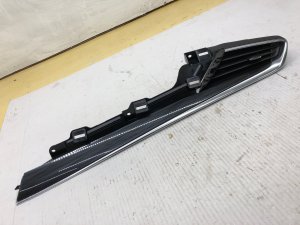
The 2018-2024 Enclave was offered with several interior color schemes, such as Shale, Dark Galvanized, and Brandy. The vent surrounds and louvers may have different finishes (e.g., satin chrome, gloss black, standard plastic).
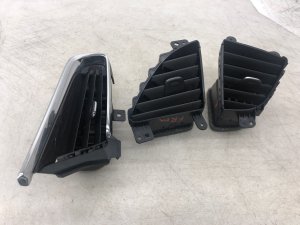
- Match the Trim: Carefully compare the photos of the used part with the existing vents in your vehicle. Pay close attention to the sheen and color of the trim ring.
- Check the Part Number: If possible, have the seller verify the OEM part number. However, visual matching is often more reliable for color and finish.
2. Inspect for Damage
- Louver Integrity: Ensure all louvers are present and move together smoothly when one is moved. Check that the small vertical connecting rod that links them is intact.
- Adjuster Tab: The adjuster tab must be present and securely attached.
- Mounting Points: Check the back of the vent assembly for any cracked or broken plastic clips or screw holes. A vent with damaged mounting points will not sit securely in the dashboard and may rattle.
- Trim Condition: Look for any signs of peeling chrome, deep scratches, or discoloration on the visible surfaces.
Cost Comparison
| Part Type | Estimated Cost | Notes |
|---|---|---|
| New OEM | $45 - $90 | Price varies by position (left, right, center) and trim. Purchased from a GM dealership or online OEM parts retailer. |
| Used OEM | $25 - $60 | Sourced from a recycled parts marketplace or salvage yard. Price depends heavily on condition. |
| New Aftermarket | Not Widely Available | Direct-fit replacements for this specific model are not common in the aftermarket. |
| Shop Labor | $75 - $150 | A professional shop would likely charge for 0.5 to 1.0 hour of labor for this replacement. |
Dashboard Vent Replacement Guide (Center Vents)
Replacing the center dashboard air vent assembly is a straightforward DIY task that requires basic tools. The difficulty is low, and it can typically be completed in under 30 minutes.
Difficulty: 1 out of 5
Tools Needed:
- Plastic trim removal tool kit
- Small flathead screwdriver or pick (for electrical connectors)
- Painter's tape (optional, to protect dash surfaces)
Step-by-Step Instructions
- Protect the Dash: Apply painter's tape to the dashboard areas around the vent trim to prevent scratches.
- Pry the Trim: The center vent is part of a larger trim piece that also surrounds the radio and hazard light button. Using a plastic trim tool, carefully begin prying this panel away from the dashboard. It is held in by clips. A good starting point is often the bottom edge.
- Work Around the Panel: Continue to gently pry around the edges of the trim panel until all the clips have been released. Do not use excessive force; the clips should pop out.
- Disconnect Wiring: Before fully removing the panel, reach behind it and disconnect the electrical connector for the hazard light switch and any other connected components. There is typically a small tab on the connector that you must press to release it.
- Remove the Vent: With the trim panel removed from the car, flip it over. The vent assembly is usually held to the panel with screws or plastic clips. Unfasten it from the old panel.
- Install the New Vent: Secure the replacement vent assembly to the trim panel.
- Re-connect and Re-install: Re-connect the hazard switch wiring. Align the trim panel with the openings in the dashboard and press it firmly back into place, ensuring all clips engage with a click.
- Test Operation: Turn the vehicle's HVAC fan on and test the function of the new vent's louvers and adjuster tab.
Warning: The side vents (driver and passenger) are more integrated into the main dashboard structure. While they can also be pried out, their removal may require loosening adjacent dashboard panels for easier access.
OEM Part Numbers & Technical Specifications
Several OEM part numbers exist for the dashboard vents on the 2018-2024 Buick Enclave, corresponding to different positions and interior trim packages. The numbers provided below are a starting point, but you must verify the correct part for your specific vehicle by its VIN.
- 84315344: Confirmed as the Driver Side (Left) Outer Air Outlet.
- 84270976: Likely corresponds to the center or passenger side vent assembly.
- 84270977: Likely corresponds to the center or passenger side vent assembly.
Always confirm the part number with a dealership or a trusted OEM parts supplier using your VIN before ordering to ensure a perfect match for color, trim, and fitment.
Frequently Asked Questions (FAQ)
My vent's adjuster tab broke off. Can I just replace the tab?
Unfortunately, no. The adjuster tab is an integrated part of the louver assembly. Repairing it is not practical, as even if glued, it will likely break again quickly. The entire vent assembly must be replaced.
No air is coming out of my vent. Is the vent broken?
Probably not. A physical vent is just a passive director of air. If there is no airflow, the problem lies elsewhere in the HVAC system. The most common causes are a clogged cabin air filter, a failed blower motor, or a stuck blend door actuator that is directing air to other vents (like the floor or defroster).
How do I make sure I buy a used vent that matches my interior?
The best way is to identify your vehicle's interior trim name (e.g., Shale, Dark Galvanized with Ebony Accents) from your original window sticker or a VIN decoder. When buying online, carefully compare high-quality photos of the used part to your existing vents in good lighting. Pay special attention to the color of the plastic and the finish of any chrome or silver trim.
Is replacing the center vent a difficult DIY job?
No, it is considered an easy DIY job. The entire trim piece containing the vents is held in by clips and can be removed with simple plastic trim tools in under 30 minutes. No complex disassembly of the dashboard is required for the center vents.
Technical Specifications
OEM Part Numbers: 84270976 84270977 84315344
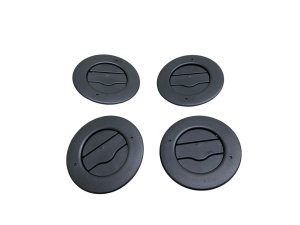
Vents are specific to position (Driver Outer, Passenger Outer, Center) and interior trim color/finish. Made of molded plastic, often with a painted or chrome-plated decorative ring.
We Have This Part in Stock


The information in this article is provided for general reference and educational purposes only. Vehicle specifications, procedures, and part compatibility can vary by production date, trim level, and region. Always consult your vehicle's factory service manual and verify part numbers before purchasing or performing repairs. Safety-critical components such as airbags, seat belts, and braking systems should be installed by a qualified professional.
- Buick Enclave:
- 🛍️ Shop This Part
- Symptoms of a Failing Dashboard Air Vent
- Physical Vent Damage
- Airflow Problems (Not a Vent Issue)
- Known Issues, TSBs, and Recalls
- Buying a Used 2018-2024 Enclave Dashboard Vent
- 1. Verify the Exact Color and Trim
- 2. Inspect for Damage
- Cost Comparison
- Dashboard Vent Replacement Guide (Center Vents)
- Step-by-Step Instructions
- OEM Part Numbers & Technical Specifications
- Frequently Asked Questions (FAQ)
- 🎟️ Get 5% Off