

2004-2014 Lamborghini Gallardo Dash Bezel: A Guide to Sticky Finishes and Carbon Fiber
This definitive guide covers the causes of and solutions for the infamous sticky interior plastics, and how to choose the right used dash bezel for your Gallardo.
- The most common failure is the soft-touch finish becoming a sticky, gummy mess; this is a cosmetic issue that can be fixed by professional refinishing.
- When buying a used bezel, you must verify the finish (standard vs. carbon fiber) and inspect all mounting tabs on the back to ensure a secure, rattle-free fit.
- Part numbers are critical for compatibility. Suffixes on the base number (400857053) indicate different finishes and model year updates.
- Be aware of important safety recalls for 2004-2014 Gallardos related to power steering fire risk and faulty ECU warning light software, even though they don't directly involve the bezel.
Primary Known Issue: The "Sticky Plastic" Plague
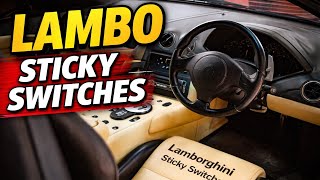
The most widespread and well-documented issue affecting the interior of the 2004-2014 Lamborghini Gallardo is not a mechanical failure, but the chemical breakdown of its soft-touch interior coatings. Over time, exposure to heat, humidity, and natural oils from skin contact causes the rubberized finish on the dash bezel and other interior plastics to degrade into a tacky, gooey mess. This problem is common in many high-end Italian sports cars from this era. While it doesn't affect the car's mechanical operation, it makes the interior feel unpleasant and look unkempt, attracting fingerprints, dust, and lint.
Common Symptoms of Dash Bezel Failure
Since the dash bezel is a cosmetic part, its failures are related to its appearance and physical condition rather than electronic faults.
Sticky or Gummy Surface
This is the most common symptom. The surface of the bezel becomes tacky to the touch. In early stages, it may just feel slightly rubbery; in advanced stages, it can be as sticky as fresh tape, leaving residue on your hands.
Peeling, Cracking, or Fading
The degraded soft-touch coating may begin to peel or flake away, revealing the shiny base plastic underneath. On carbon fiber versions, the top clear coat can yellow, become cloudy, or develop small cracks from UV exposure and heat cycles.
Broken Mounting Tabs
The bezel is held in place by several plastic tabs and a few screws. These tabs can become brittle with age and may break during removal for service or due to vibration. A bezel with broken tabs will not sit flush and can cause annoying rattles and squeaks in the cabin.
Pro Tip: The sticky residue can often be professionally removed and the part refinished to a durable, like-new condition that is often more resilient than the original factory coating. Services like Sticky No More specialize in this process.
🎬 Watch: How to fix sticky Lamborghini interior partsBuyer's Guide: Inspecting a Used Gallardo Dash Bezel
Buying a used dash bezel can save a significant amount of money over a new OEM part, but careful inspection is critical. A high-quality used part can be indistinguishable from new, while a poor one will be a constant annoyance.
Step 1: Verify the Finish and Part Number
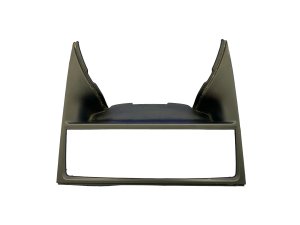
The Gallardo was offered with different interior trims. The two main bezel types are the standard finish (often a silver or black painted plastic) and the optional genuine carbon fiber. Ensure the part you are buying matches your car's existing trim. The best way to do this is by matching the OEM part number. Suffixes are important, as they often denote the finish or model year update.
- Carbon Fiber: Part numbers like 400857053F are explicitly for the carbon fiber version.
- Standard Finish: Part numbers like 400857053D (Black/Silver) are for standard models.
- Model Year Splits: Part numbers like 400857053K are for earlier 2003-2007 models.
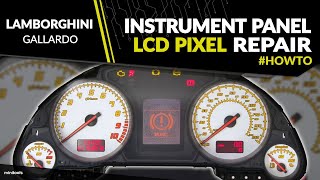
Warning: Do not confuse the dash bezel (part numbers starting with 400857) with the instrument cluster itself 🎬 Watch: How to repair a Gallardo instrument cluster screen (part numbers starting with 400820). They are separate components.
Step 2: Check for Stickiness and Scratches
Ask the seller for high-resolution photos taken in bright, direct light. Look for shiny, tacky-looking areas, fingerprints, or embedded lint, which are all signs of a sticky finish. A part that has been professionally refinished is often a better choice than an original-finish part that may become sticky in the future. Check for deep scratches or gouges that cannot be polished out.
Step 3: Inspect All Mounting Tabs
This is the most important physical check. Ask for clear pictures of the back of the bezel. All mounting tabs and screw holes must be intact and free of cracks. A single broken tab can prevent the bezel from fitting securely, leading to poor alignment and rattles.
Step 4: Examine Carbon Fiber for Delamination
If buying a carbon fiber bezel, look closely at the edges and around any curves. Check for signs of the clear coat lifting or separating from the carbon weave (delamination). Also, look for a yellow or cloudy appearance, which indicates UV damage and breakdown of the epoxy resin.
Important Recalls and Service Bulletins
While there are no recalls specifically for the dash bezel, several critical recalls for the Gallardo involve systems located in or around the dashboard. Any owner or potential buyer should be aware of these.
- NHTSA Recall 12V430000: Affects 2004-2006 Gallardo models. High-pressure power steering hoses could leak flammable fluid, creating a significant fire risk. Dealers were instructed to update the power steering system.
- NHTSA Recall 18V833000: Affects 2011-2014 Gallardo models. The Engine Control Unit (ECU) software could erase stored trouble codes when the ignition was turned off. This would prevent the check engine light or other warning lamps in the instrument cluster from illuminating on the next startup, potentially masking a serious problem. The fix is a simple ECU software reflash performed by a dealer.
Replacement Overview & Difficulty
Replacing the dash bezel is a moderately difficult job that a patient DIYer can accomplish. The main risk is breaking brittle plastic tabs on the bezel or surrounding trim pieces.
- Difficulty Rating: 3 out of 5
- Estimated Time: 1.5 hours
- Tools Required: T-25 Torx driver, 8mm socket with extension, plastic trim removal tools.
General Steps (based on instrument cluster removal):
- Disconnect the vehicle's battery as a precaution.
- Use plastic trim tools to carefully pry off any adjacent trim pieces, such as the panel to the side of the steering column.
- Remove the two T-25 Torx screws located under the top of the bezel/cluster hood.
- Remove the two 8mm bolts that secure the cluster assembly from the sides (accessed from behind adjacent trim).
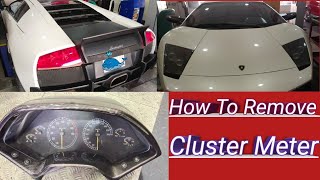
- Carefully wiggle the entire instrument cluster and bezel assembly out of the dashboard. It is a tight fit. Have patience to avoid scratching the leather dash or breaking tabs.
- Once the assembly is out, the bezel can be separated from the instrument cluster by removing its retaining screws.
- Installation is the reverse of removal. 🎬 See this step-by-step instrument cluster removal video When reinstalling, ensure all panel gaps are even before fully tightening the fasteners.
Cost Comparison: New vs. Used Gallardo Dash Bezels
The cost of a replacement dash bezel varies widely based on condition, material, and source.
| Part Type | Estimated Cost | Notes |
|---|---|---|
| New OEM | $350 - $1,200+ | Price varies significantly by part number and finish. Carbon fiber is at the high end of this range. |
| New Aftermarket | $400 - $900+ | Primarily carbon fiber replacements or overlays. Quality can vary. |
| Used OEM | $200 - $700 | A common choice. Price depends on condition and finish (carbon vs. standard). A professionally refinished used part is often the best value. |
| Professional Refinishing | $150 - $400 | Cost to refinish your existing part to remove stickiness. This provides a durable, long-lasting finish. |
| Shop Labor | $200 - $400 | Typical cost for a professional technician to perform the removal and installation. |
OEM Part Numbers & Technical Specifications
The following OEM part numbers are for the instrument cluster bezel/trim. Always verify the exact part number required for your vehicle's specific year, model, and interior trim package with a dealer or specialist before purchasing.
| Part Number | Known Fitment / Notes |
|---|---|
| 400857053 | Base part number for the bezel. |
| 400857053D | Standard Black/Silver finish. |
| 400857053E | Instrument Trim. |
| 400857053F | Carbon Fiber finish. |
| 400857053K | Fits early models (2003-2007). |
| 400857053AE | Fits LP 560-4 Spyder (2008-2013). |
Compatibility Warning: The initial data provided included part numbers starting with 400820 (e.g., 400820319). Research confirms these numbers refer to the instrument cluster assembly itself, not the removable outer bezel. This article and its part numbers focus only on the cosmetic bezel.
Frequently Asked Questions
Can I fix a sticky dash bezel myself?
Yes, it is possible to clean the sticky residue yourself, but it is a labor-intensive process. Many owners report success using non-acetone nail polish remover or isopropyl alcohol on a microfiber cloth, followed by a thorough cleaning. However, this method requires extreme care to avoid damaging the underlying plastic or removing any printed graphics. For a guaranteed, durable result, professional refinishing is the recommended solution.
Is a carbon fiber bezel a direct swap for a standard one?
Yes, an OEM carbon fiber bezel is a direct replacement for the standard bezel on a 2004-2014 Gallardo, provided you have the correct part for your model year range (pre-LP vs. LP models). The mounting points are identical. Many aftermarket companies also sell carbon fiber bezels designed as direct replacements or overlays that stick on top of the original part.
Will a bezel from a Spyder fit a Coupe?
Generally, yes. The dashboard architecture between the Coupe and Spyder models of the same generation (e.g., LP560-4 Coupe and LP560-4 Spyder) is the same, and the dash bezel should be interchangeable. However, always confirm the part number for your specific model to be certain, as minor changes can occur.
My instrument cluster screen is fading. Is that part of the bezel?
No, a fading or pixelated central information screen is a failure of the instrument cluster itself, not the bezel. The bezel is just the trim piece around it. Repairing the screen requires removing the instrument cluster and sending it to a specialist for repair or replacing the internal LCD screen.
Helpful Videos

Technical Specifications
OEM Part Numbers: 400857053 400857053D 400857053E 400857053F 400857053K 400857053AE
Material: Injection-molded plastic with soft-touch coating or genuine carbon fiber with epoxy resin clear coat. Mounting: Secured by plastic clips/tabs and metal screws (T-25 Torx and 8mm bolts).
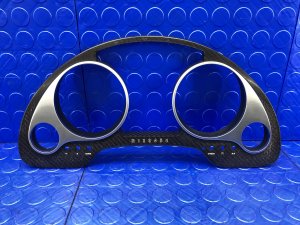
We Have This Part in Stock

The information in this article is provided for general reference and educational purposes only. Vehicle specifications, procedures, and part compatibility can vary by production date, trim level, and region. Always consult your vehicle's factory service manual and verify part numbers before purchasing or performing repairs. Safety-critical components such as airbags, seat belts, and braking systems should be installed by a qualified professional.
- Lamborghini Gallardo:
- 🎬 Helpful Videos
- 🛍️ Shop This Part
- Primary Known Issue: The "Sticky Plastic" Plague
- Common Symptoms of Dash Bezel Failure
- Sticky or Gummy Surface
- Peeling, Cracking, or Fading
- Broken Mounting Tabs
- Buyer's Guide: Inspecting a Used Gallardo Dash Bezel
- Step 1: Verify the Finish and Part Number
- Step 2: Check for Stickiness and Scratches
- Step 3: Inspect All Mounting Tabs
- Step 4: Examine Carbon Fiber for Delamination
- Important Recalls and Service Bulletins
- Replacement Overview & Difficulty
- Cost Comparison: New vs. Used Gallardo Dash Bezels
- OEM Part Numbers & Technical Specifications
- Frequently Asked Questions
- 🎟️ Get 5% Off