

2023-2026 Genesis GV60 Dash Bezel: A Guide to Color Matching and Replacement
Learn how to correctly identify, inspect, and replace the dash bezel in your Genesis GV60, with a special focus on matching the unique Torrent Navy interior.
- Color matching is the most critical step. The GV60 has multiple interior colors like Torrent Navy, Obsidian Black, and Ash Gray/Glacier White that are tied to specific trims.
- When buying a used bezel, the primary inspection point is the back of the panel; ensure all mounting clips and tabs are intact to prevent rattles.
- Failure is almost always cosmetic (cracks, scratches) or structural (broken clips), not electronic. There are no diagnostic codes associated with this part.
- Replacement is a simple DIY job, but a set of plastic trim removal tools is essential to avoid damaging the bezel or surrounding dashboard.
Symptoms of a Failing Dash Bezel
Since the dash bezel is primarily a cosmetic and structural trim part, failures are almost always physical. You won't see any check engine lights or diagnostic codes for this part. Instead, look and listen for these signs:
- Visible Cracks or Scratches: The most obvious sign of failure is physical damage. This can happen from impact, improper removal, or sun exposure over a long period. Deep scratches or cracks are often impossible to repair and require replacement.
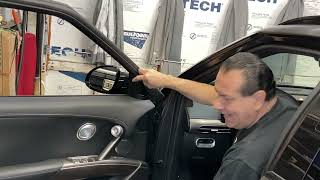
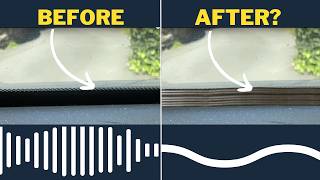
- Rattling or Squeaking Noises: If you hear persistent rattling from the dashboard area, especially on rough roads, it could be a sign of a loose bezel. This is typically caused by broken or weakened mounting clips on the back of the panel, preventing it from sitting tightly against the dashboard assembly. 🎬 Watch: How to find and fix dashboard noises
- Loose Fit and Gaps: A bezel with broken tabs may not align correctly with other dashboard components. You might notice uneven gaps, or the panel may feel loose to the touch. In some cases, components housed within the bezel, like air vents, may also feel loose.
- Discoloration or Peeling Finish: While less common on a new vehicle like the GV60, exposure to harsh cleaning chemicals or intense, prolonged sunlight can eventually cause the finish to fade or peel. This is especially important to check on a used part.
Known Issues, TSBs, and Recalls
As of mid-2026, there are no specific recalls or Technical Service Bulletins (TSBs) issued by Genesis or the NHTSA that directly address the dash bezel of the 2023-2026 GV60. Most recalls for this vehicle pertain to electronic systems like the Integrated Charging Control Unit (ICCU), instrument panel display software, and rearview camera, or other mechanical components like driveshafts and seatbelts.
While no specific TSBs for the bezel exist, owners have noted that the high-gloss interior trim pieces, particularly on the center console, are susceptible to scratching. This highlights the need for care during ownership and cleaning.
Pro Tip: When cleaning your GV60's interior, always use a soft microfiber cloth and a cleaner specifically designed for automotive interiors to avoid damaging the finish on the dash bezel and other trim pieces.
Variant and Color Compatibility
This is the most critical area for a GV60 dash bezel. Genesis offers several distinct interior color schemes that are often tied to specific trim levels (Advanced, Performance).
- Torrent Navy (Paint Code NVZ): This distinctive blue interior is a signature option, primarily available on the Performance AWD trim. 🎬 Watch: See the Torrent Navy interior in person It covers the dash, door panels, and seats, creating a unique, color-saturated environment. When replacing a bezel in a Torrent Navy interior, the match must be exact.
- Obsidian Black Monotone: A common and classic option available on multiple trims.
- Ash Gray / Glacier White: A two-tone option that creates a lighter, more open-feeling cabin.
Warning: Before purchasing a used dash bezel, you must verify your vehicle's interior color. This information can typically be found on the vehicle information sticker located on the driver's side door jamb. Do not rely on photos alone, as lighting can dramatically alter how colors appear.
Buying a Used 2023-2026 GV60 Dash Bezel
A used OEM bezel is often the only cost-effective option for replacement, as aftermarket companies are unlikely to produce color-matched interior trim for a luxury vehicle like the GV60. Here’s what to inspect:
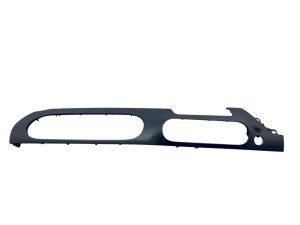
- Verify the Part Number and Color: Cross-reference the part number from the seller with your vehicle's needs. For example, a center-right bezel in gray might be part number 84730-CU100-NNB. Confirm the color name (e.g., Torrent Navy, Obsidian Black) with the seller.
- Inspect All Mounting Tabs and Clips: This is the most important inspection. Turn the bezel over and carefully check every single mounting tab and clip location. Even one broken tab can cause a poor fit or a persistent rattle. Compare the back of the used part to photos of a new one if possible.
- Check for Surface Blemishes: Look at the surface from multiple angles under good light. Check for deep scratches, swirl marks from improper cleaning, and any signs of chemical staining or sun fading.
- Look for Hidden Cracks: Pay close attention to high-stress areas, such as the corners around vent openings or display screens. Flex the part gently to reveal any hairline cracks that may not be immediately visible.
Replacement Overview
Replacing a dash bezel is generally a straightforward task for a DIYer, requiring more patience than specialized skill.
- Difficulty: 2 out of 5.
- Estimated Time: 30-60 minutes.
- Essential Tools: A set of plastic trim removal tools is mandatory. Using metal tools like screwdrivers will scratch or gouge the soft-touch dashboard and the bezel itself.
General Steps:
- Protect a a a a a a a a a a a a a a a a a a a a a a a a a a a a a a a a a a a a a a a a a a a a a a a a a a a a a a a a a a a a a a a a a a a a a a a a a a a a a a a a a a a a a a a a a a a a a a a a a a a a a a a a a a a a a a a a a a a a a a a a a a a a a a a a a a a a a a a a a a a a a a a a a a a a a a a a a a a a a a a a a a a a a a a a a a a a a a a a a a a a a a a a a a a a a a a a a a a a a a a a a a a a a a a a a a a a a a a a a a a a a a a a a a a a a a a a a a a a a a a a a a a a a a a a a a a a a a a a a a a a a a a a a a a a a a a a a a a a a a a a a a a a a a a a a a a a a a a a a a a a a a a a a a a a a a a a a a a a a a a a a a a a a a a a a a a a a a a a a a a a a a a a a a a a a a a a a a a a a a a a a a a a a a a a a a a a a a a a a a a a a a a a a a a a a a a a a a a a a a a a a a a a a a a a a a a a a a a a a a a a a a a a a a a a a a a a a a a a a a a a a a a a a a a a a a a a a a a a a a a a a a a a a a a a a a a a a a a a a a a a a a a a a a a a a a a a a a a a a a a a a a a a a a a a a a a a a a a a a a a a a a a a a a a a a a a a a a a a a a a a a a a a a a a a a a a a a a a a a a a a a a a a a a a a a a a a a a a a a a a a a a a a a a a a a a a a a a a a a a a a a a a a a a a a a a a a a a a a a a a a a a a a a a a a a a a a a a a a a a a a a a a a a a a a a a a a a a a a a a a a a a a a a a a a a a a a a a a a a a a a a a a a a a a a a a a a a a a a a a a a a a a a a a a a a a a a a a a a a a a a a a a a a a a a a a a a a a a a a a a a a a a a a a a a a a a a a a a a a a a a a a a a a a a a a a a a a a a a a a a a a a a a a a a a a a a a a a a a a a a a a a a a a a a a a a a a a a a a a a a a a a a a a a a a a a a a a a a a a a a a a a a a a a a a a a a a a a a a a a a a a a a a a a a a a a a a a a a a a a a a a a a a a a a a a a a a a a a a a a a a a a a a a a a a a a a a a a a a a a a a a a a a a a a a a a a a a a a a a a a a a a a a a a a a a a a a a a a a a a a a a a a a a a a a a a a a a a a a a a a a a a a a a a a a a a a a a a a a a a a a a a a a a a a a a a a a a a a a a a a a a a a a a a a a a a a a a a a a-Surrounding areas: Place a soft towel or blanket over the center console and surrounding trim to prevent accidental scratches.
- Pry Gently: Find a seam and insert a plastic pry tool. Gently twist or pry to release the first clip. Work your way around the panel, releasing clips one by one. Do not force it.
- Disconnect Electronics: If the bezel has any buttons or lights attached, there will be small wiring harnesses to disconnect. These usually have a small tab you must press to release the connector.
- Installation: Installation is the reverse of removal. Connect any wiring, align all the clips with their corresponding holes in the dashboard, and press firmly and evenly around the perimeter until it snaps securely into place.
Cost Comparison
| Part Type | Estimated Cost |
|---|---|
| New OEM | $80 - $300+ (depending on specific piece) |
| New Aftermarket | Not Available |
| Used OEM | $50 - $200 |
| Shop Labor | $75 - $150 |
Frequently Asked Questions (FAQ)
Can I repair a cracked or scratched dash bezel?
Minor surface scratches on a high-gloss finish can sometimes be polished out with a plastic-specific polishing compound. However, deep scratches, cracks, or damage to textured or colored finishes are generally not repairable in a way that looks factory-correct. In these cases, replacement is the best option.
Will a bezel from a different trim level (e.g., Advanced vs. Performance) fit my GV60?
Physically, the bezels are likely to have the same shape and mounting points and will probably fit. However, the color and finish will almost certainly be different. For example, a bezel from a Performance trim with a Torrent Navy interior will not match the Obsidian Black or Ash Gray interior of another model. Compatibility is about color and finish, not just physical fitment.
How do I find the exact part number for my dash bezel?
The best way is to contact a Genesis dealership parts department with your Vehicle Identification Number (VIN). They can look up the exact part number that corresponds to your vehicle's specific interior trim and color. Alternatively, if you remove the old panel, the part number is often stamped on the back.
Is it necessary to disconnect the battery before replacing the dash bezel?
While not always strictly necessary if the bezel is a simple trim piece with no electronics, it is a highly recommended safety practice. The dash area contains sensitive electronics and airbag wiring. Disconnecting the negative battery terminal prevents the risk of short circuits or accidental airbag deployment.
Helpful Videos




Technical Specifications
OEM Part Numbers: 84730-CU100-NNB 84730-CU100-GLW 56171-CU000-GLW 84750-CU000 64101-CU000 81996-CU000 95440-CU120 29110-CU000 888B0-CU500LGW 888B0-CU500NNB 888B0-CU500LGZ
Material: Plastic. Finishes: Torrent Navy (NVZ), Obsidian Black, Ash Gray/Glacier White, various metallic or patterned accents depending on trim level.
We Have This Part in Stock

The information in this article is provided for general reference and educational purposes only. Vehicle specifications, procedures, and part compatibility can vary by production date, trim level, and region. Always consult your vehicle's factory service manual and verify part numbers before purchasing or performing repairs. Safety-critical components such as airbags, seat belts, and braking systems should be installed by a qualified professional.
- GENESIS GV60: