

1999-2002 Toyota 4Runner Corner Lamp: A Guide to Cracks, Moisture, and Replacement
This definitive guide covers common failures, replacement procedures, and how to choose the right used OEM corner lamp for your 3rd Gen 4Runner.
- This part fits 1999-2002 Toyota 4Runner models ONLY and is not interchangeable with earlier years.
- Replacement is a very easy DIY job, requiring only a Phillips screwdriver and about 15 minutes.
- The most common failures are burnt-out bulbs, cracked lenses, and moisture intrusion from failed seals.
- When buying a used part, prioritize intact mounting tabs and a clear, crack-free lens to ensure a good seal and proper fit.
What is the Corner Lamp and Why Does It Fail?
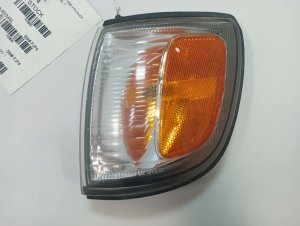
The corner lamp on the 1999-2002 Toyota 4Runner is the amber or clear light assembly located on the fender, right next to the main headlight. Its primary job is to act as a parking light and side marker, making the vehicle's width and presence known to other drivers. It is a simple, non-adaptive halogen light system. This means it uses a basic incandescent bulb and does not have complex components like ballasts, igniters, or LED drivers found in more modern HID or LED systems.
Failures are typically straightforward and fall into a few common categories:
- Bulb Burnout: The most common issue is a simple burnt-out bulb (Type 194 or 2825). This is a normal wear-and-tear item.
- Cracked Lens: Due to its position on the corner of the vehicle, the plastic lens is susceptible to cracking from minor impacts, parking lot bumps, or road debris.
- Moisture Intrusion: Over time, the seals around the lens and the bulb socket can degrade. This allows moisture to enter the housing, causing condensation, a foggy appearance, and eventually corrosion of the bulb socket and electrical connector.
- UV Damage & Hazing: Years of sun exposure can cause the plastic lens to become yellow, hazy, or cloudy, significantly reducing light output and making the vehicle look older.
Known Issues, Recalls, and TSBs
For the 1999-2002 model years, there are no specific factory recalls or Technical Service Bulletins (TSBs) from Toyota directly concerning the OEM corner lamp assemblies. However, the National Highway Traffic Safety Administration (NHTSA) has issued recalls for certain aftermarket replacement lamps. These recalls were for non-compliance with federal safety standards, specifically the lack of proper amber side reflectors, which reduces vehicle visibility. This highlights a key reason to be cautious of cheap, non-certified aftermarket parts.
Pro Tip: While there are no major recalls, moisture intrusion is a widely discussed issue among owners. Forum discussions frequently mention clogged sunroof drains or cowl vents leading to water leaks inside the cabin, which can sometimes be misdiagnosed. However, for the corner lamp itself, the cause of moisture is almost always a failed housing seal or a bad bulb socket gasket.
🎬 Watch: How to fix moisture and condensation in your lightsBuying a Used Cornering Light: What to Inspect
A used OEM corner lamp is often a smart choice, offering better fit and material quality than cheap aftermarket alternatives. Here’s what to look for when buying a recycled part:
- Lens Clarity: Inspect the lens for hazing, yellowing, or deep scratches. A clear, bright lens is a sign of a well-kept part. Minor hazing can sometimes be polished out, but a deeply yellowed or crazed lens should be avoided.
- Check for Cracks: Carefully examine the entire surface, especially around the mounting points and edges, for any cracks. Even hairline cracks can let moisture in.
- Mounting Tab Integrity: There is one primary screw tab at the top and a plastic clip/pin at the bottom that slides into the headlight assembly. Ensure the top screw hole is not cracked and the bottom clip is intact. These are common break points during removal.
- Seal Condition: Look at the seal where the bulb socket twists into the housing. It should be soft and pliable, not dry, brittle, or cracked. This seal is critical for keeping moisture out.
- Connector and Wiring: While the wiring harness is part of the vehicle, inspect the connector on the lamp housing itself (if included) for any signs of corrosion, melting, or damage.
Step-by-Step Replacement Guide
Replacing the corner lamp assembly is a simple DIY job that requires only a Phillips head screwdriver and about 10-15 minutes per side.
- Open the Hood: Access the top of the corner lamp assembly.
- Remove the Screw: Locate and remove the single Phillips head screw at the top of the corner lamp that secures it to the headlight assembly.
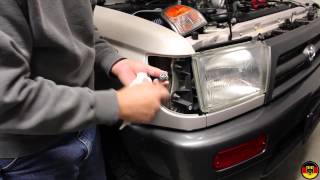
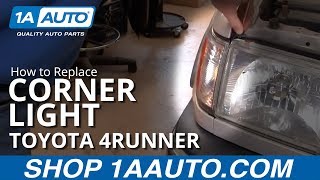
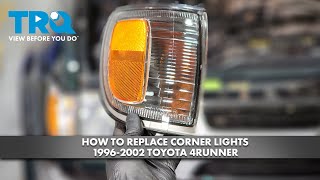
- Pop the Light Out: The assembly is held in by the screw and a plastic clip at the bottom. Firmly and carefully pull the lamp straight forward, away from the vehicle. It may require a bit of force to release the clip, especially if it's the first time being removed. Some people find a firm pop with the palm of their hand works well. 🎬 See this step-by-step corner light replacement video
- Disconnect the Bulb Socket: Once the housing is free, twist the bulb socket counter-clockwise and pull it out of the old housing.
- Install the New Lamp: If you're just changing the bulb, pull the old one straight out and push the new one in. To install the new housing, first insert and twist the bulb socket clockwise into the back of the new assembly.
- Re-seat the Assembly: Align the bottom clip with the corresponding slot in the headlight assembly and push the lamp firmly back into place until it clicks.
- Secure the Screw: Re-install the Phillips head screw at the top. Do not overtighten, as this can crack the plastic tab.
- Test the Light: Turn on your parking lights to ensure the new bulb and assembly are working correctly.
Warning: The retaining clip can be tight. Pull straight forward to avoid breaking the clip or the mounting tabs on the adjacent headlight. Using a plastic trim tool to gently pry can help if it's stuck.
Cost Comparison
| Part Type | Estimated Cost (per side) |
|---|---|
| New OEM | $55 - $70 |
| New Aftermarket | $20 - $40 |
| Used OEM | $30 - $50 |
| Shop Labor | $40 - $80 |
Technical Specifications & Part Numbers
The corner lamps for the 1999-2002 4Runner are specific to this facelifted 3rd generation model. The primary bulb type is a 194, 2825, or T10 wedge base bulb. The assemblies are side-specific.
| Side | OEM Part Number |
|---|---|
| Driver Side (Left) | 81521-35250, 81520-35250 |
| Passenger Side (Right) | 81510-35260, 81610-35330 |
Note: Part numbers can be confusing. Some dealer sites list 81520-35250 as the left side, while others list 81521-35250. Always verify fitment with the seller using your vehicle's VIN. The '81521' prefix generally denotes the lens only, while '81520' can refer to the full assembly.
Frequently Asked Questions (FAQ)
Do I need to aim the corner light after replacing it?
No. This is a fixed marker light, not a headlight. It does not have any provisions for aiming and does not require alignment after installation.
Can I upgrade my corner lights to LED?
Yes, you can replace the stock incandescent bulb with a T10/194-size LED bulb. Be sure to purchase an amber-colored LED if you have clear lenses to remain street legal. Some cheap LEDs can be polarized, meaning if they don't light up, you may need to remove them, flip them 180 degrees, and re-insert them.
🎬 Watch: How to change your corner light bulbsMy new corner light has condensation inside. Is it defective?
Not necessarily. Minor fogging can occur due to temperature and humidity changes and may clear on its own. However, if you see large water droplets or pooling water, the assembly seal is likely bad. Ensure the bulb socket is seated correctly with a good gasket. If the problem persists, the housing itself may be faulty.
What's the difference between the 1996-1998 and 1999-2002 corner lights?
The 1999-2002 4Runner received a facelift which included new headlights and corner lights. The shape is different, and they are not interchangeable with the earlier 1996-1998 models. This part only fits 1999, 2000, 2001, and 2002 4Runners.
Helpful Videos
Technical Specifications
OEM Part Numbers: 81521-35250 81520-35250 81510-35260 81610-35330
Bulb Type: 194 / 2825 / T10 Wedge Base. Lighting Technology: Halogen (incandescent).
We Have This Part in Stock


The information in this article is provided for general reference and educational purposes only. Vehicle specifications, procedures, and part compatibility can vary by production date, trim level, and region. Always consult your vehicle's factory service manual and verify part numbers before purchasing or performing repairs. Safety-critical components such as airbags, seat belts, and braking systems should be installed by a qualified professional.
- Toyota 4Runner: