

1999-2003 Ford Windstar Headlight Assembly: Diagnosis, Part Numbers, and Easy Replacement
This guide covers common failures like dim or dead headlights, clarifies part number differences, and walks you through the simple replacement and aiming process for your Windstar.
- Replacement is extremely easy for DIYers; two retaining pins are pulled up by hand and the assembly slides out.
- The most common failures are hazy/yellowed lenses from UV damage and moisture intrusion from bad seals.
- If one beam is out but the other works, check for a broken wire at the socket before assuming a larger electrical problem.
- New aftermarket assemblies are very affordable ($35-$75) and are often a better value than buying used or attempting to restore a hazy original lens.
Symptoms of a Failing Headlight Assembly
Problems with the Windstar's headlights can stem from the assembly itself, the bulbs, or the vehicle's electrical system. Here are the most common symptoms and their likely causes.
1. One Headlight is Out (Low or High Beam)
If a single beam (low or high) is out on one side, the first step is always to check the bulb. These vans use a dual-filament 9007 bulb, and it's common for one filament to burn out before the other. However, if a new bulb doesn't fix it, the problem often lies elsewhere. Forum users frequently report that a single inoperative low beam, while the high beam still works, is caused by a broken wire inside the wiring harness near the headlight socket or a faulty socket itself. The constant heat and vibration can make the wires brittle over time.
2. Headlights are Dim, Yellow, or Hazy
This is a gradual failure caused by sun exposure. The plastic lens is damaged by UV rays, leading to oxidation that creates a hazy, yellowed surface. This significantly reduces the amount of light that can pass through, making your headlights dangerously dim at night. While lens restoration kits can temporarily improve clarity, the hazing will eventually return. Replacing the entire assembly is the only permanent solution.
3. Moisture or Condensation Inside the Lens
If you see water droplets or fogging inside the headlight, the seal between the lens and the housing has failed. This is a common issue on older vehicles. The moisture can cause the reflective chrome surfaces to peel and will dramatically shorten the life of the bulbs. In some cases, owners have drilled a small drain hole in the bottom of the housing as a temporary fix, but replacement is the correct repair.
4. Both Headlights Don't Work or Fail Intermittently
If both headlights stop working at the same time, the problem is unlikely to be the assemblies themselves. The cause is almost always electrical. Check the headlight fuses and relays in the under-hood fuse box first. If those are good, the next most likely culprits are the main headlight switch on the dashboard or the multi-function (turn signal) stalk on the steering column. On other Ford vehicles from this era, a failing Lighting Control Module (LCM) is a known cause for intermittent or total headlight failure, and while not subject to the same specific recall, the Windstar can exhibit similar behavior.
Known Issues, Recalls, and Technical Service Bulletins (TSBs)
While there are no recalls specifically for the headlight assemblies on the 1999-2003 Windstar, several related issues are worth noting.
- Lighting Control Module (LCM) Failures: A recall on other Ford models (Crown Victoria, Grand Marquis) from the same era was issued for faulty LCMs that could cause the headlights to suddenly turn off while driving. This was due to cracked solder joints inside the module. While the Windstar was not part of this recall, similar symptoms can occur and may point to a faulty LCM or multi-function switch.
- Wiring and Electrical Faults: Owners frequently report issues where one beam fails due to a broken wire at the connector, not a bad bulb or fuse. Troubleshooting should include checking for power and ground directly at the headlight socket with a multimeter.
- Major Corrosion Recalls: The 1999-2003 Windstar was subject to major safety recalls for severe corrosion of the front subframe (Recall 11S16) and rear axle (Recall 10S13), particularly in states that use road salt. While not directly related to the headlights, these are critical safety issues for any owner of this vehicle.
Buying a Used 1999-2003 Windstar Headlight Assembly
Buying a used OEM headlight can be a good value, but careful inspection is critical. Given the low price of new aftermarket assemblies, only consider used if it's in excellent condition.
What to Inspect on a Used Assembly:
- Lens Clarity: This is the most important factor. Look for a crystal-clear lens. Avoid any assembly that is yellow, hazy, or has peeling clear coat. Some sellers will offer "restored" headlights, but the quality of this work varies. A factory-original clear lens is always better.
- Mounting Tabs and Pins: The assembly is held in by two long metal retaining pins. While the assembly itself is robust, ensure the plastic channels where these pins slide are not cracked or broken.
- Housing Integrity: Check the black plastic housing for any cracks, especially around the seams and bulb openings. A cracked housing is the primary cause of moisture intrusion.
- Internal Reflectors: Look inside the lens at the chrome reflectors. They should be bright and shiny. If they are peeling, flaking, or look burnt, the assembly has likely suffered from moisture damage or has been used with incorrect, high-wattage bulbs.
- Wiring and Sockets: If the assembly includes the wiring pigtail and bulb sockets, inspect them for any signs of melting, corrosion, or brittle insulation.
Pro Tip: New aftermarket assemblies for the Windstar are often cheaper than a professional restoration kit and come with perfectly clear lenses and sometimes even new bulbs. For this specific part, a new aftermarket unit from a reputable brand is often a better choice than a used OEM part unless the used one is in near-perfect condition.
Replacement and Aiming Guide
Replacing the headlight assembly on a 1999-2003 Windstar is one of the easiest repairs you can perform on the vehicle.
Step-by-Step Replacement:
- Open the Hood: Secure the hood in the open position.
- Locate Retaining Pins: Look directly behind the headlight assembly. You will see two metal retaining pins, each with a handle on top.
- Remove Retaining Pins: Simply pull straight up on the handles to remove both pins. They may be snug, but no tools are required. A slight wiggle may help.
- Slide Assembly Out: With the pins removed, the entire headlight assembly will slide directly forward, out of the vehicle.
- Disconnect Wiring: Unplug the main electrical connector from the back of the assembly. Twist and remove the turn signal bulb socket to transfer it to the new assembly.
- Installation: Installation is the reverse of removal. Connect the wiring, slide the new assembly into place, and re-insert the two retaining pins, pressing them down firmly until they are fully seated.
Headlight Aiming (Required After Replacement):
Proper aiming is crucial for safety and is legally required. You will need a level surface, a wall or garage door, a tape measure, and a Phillips #2 screwdriver or an E8 Torx socket.
- Park the van on a level surface, exactly 25 feet from a flat vertical wall.
- Measure the height from the ground to the small circle molded into the center of your headlight lens. Mark a horizontal line on the wall at this exact height with tape.
- Turn on the low beams. The top of the bright, horizontal cutoff of the beam pattern should be exactly on or just slightly below your tape line on the wall.
- Locate the vertical adjustment screw on the back of the headlight assembly. Turn this screw to raise or lower the beam until it is properly aligned with your mark on the wall.
Cost Comparison
| Part Type | Estimated Cost (per side) | Notes |
|---|---|---|
| New OEM | $80 - $110 | Largely discontinued and difficult to find. |
| New Aftermarket | $35 - $75 | Readily available from retailers like RockAuto and AutoZone. Often includes new bulbs. |
| Used OEM | $30 - $60 | Condition varies greatly. Risk of hazy lenses and brittle plastic. |
| Shop Labor | $50 - $100 | Replacement takes less than 30 minutes, so labor should be minimal (0.5 hours). |
Frequently Asked Questions (FAQ)
Is this a "Cornering Light" or a "Headlight Assembly"?
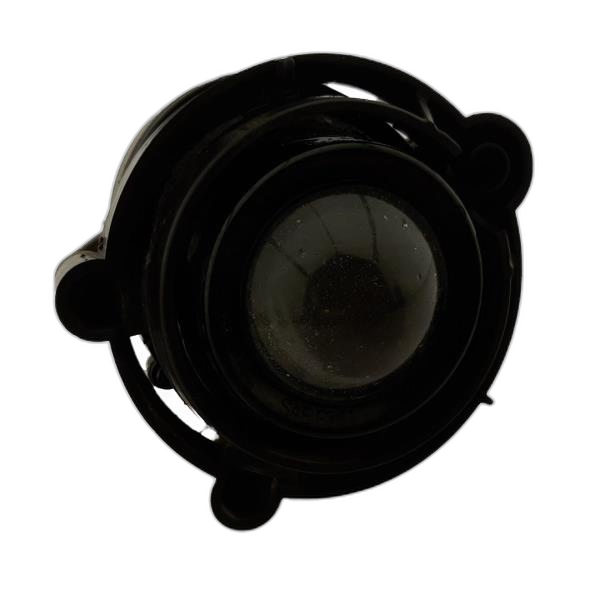
This part is the main Headlight Assembly. It includes the headlight, turn signal, and side marker. Some 1999-2003 Windstars also have a separate, smaller cornering/fog lamp located in the bumper, which is a different part with a different part number (e.g., XF2Z15A201AA). Be sure to identify which light you need before ordering.
Do I need any special tools to replace the headlight?
No tools are needed to remove the assembly itself; it is held in by two pull-up retaining pins. You will only need a screwdriver or Torx bit for the final aiming adjustment.
Are the driver and passenger side headlights the same?
No, they are not interchangeable. They are mirror images of each other and have different part numbers. Be sure to order the correct side for your vehicle.
Can I upgrade to LED or HID headlights?
The 1999-2003 Windstar was only equipped with halogen headlights from the factory. Upgrading to an HID or LED system would require custom wiring, ballasts or drivers, and potentially different housings. Simply putting an LED or HID "plug-and-play" bulb into the original halogen housing is not recommended, as it can create dangerous glare for other drivers and may not produce a safe beam pattern.
My new assembly didn't come with bulbs. What kind do I need?
The main headlight bulb for high and low beams is a 9007 (also known as HB5). The front turn signal bulb is typically a 3457A (the 'A' stands for amber).
Part Numbers & Specifications
Compatibility Note: Part numbers changed for the end of the 2003 model year. The `3F2Z-` prefix parts were used on vehicles built from December 2, 2002, onward and supersede the earlier `XF2Z-` parts. For replacement, they are generally interchangeable across the 1999-2003 range.
| Specification | Details |
|---|---|
| Part Name | Headlamp Assembly, Composite Headlamp |
| Lighting Technology | Halogen |
| Main Headlight Bulb | 9007 / HB5 |
| Turn Signal Bulb | 3457 |
| Passenger Side (RH) P/N | 3F2Z-13008-CA (supersedes XF2Z-13008-AA) |
| Driver Side (LH) P/N | 3F2Z-13008-CB (supersedes XF2Z-13008-BA) |
Technical Specifications
OEM Part Numbers: 3F2Z-13008-CA 3F2Z13008CA XF2Z-13008-AA XF2Z13008AA 3F2Z-13008-CB 3F2Z13008CB XF2Z-13008-BA XF2Z13008BA
Lighting Technology: Halogen. Main Bulb Type: 9007 (HB5). Turn Signal Bulb Type: 3457. Housing Material: Plastic.
We Have This Part in Stock

The information in this article is provided for general reference and educational purposes only. Vehicle specifications, procedures, and part compatibility can vary by production date, trim level, and region. Always consult your vehicle's factory service manual and verify part numbers before purchasing or performing repairs. Safety-critical components such as airbags, seat belts, and braking systems should be installed by a qualified professional.
- Ford Windstar:
- 🛍️ Shop This Part
- Symptoms of a Failing Headlight Assembly
- 1. One Headlight is Out (Low or High Beam)
- 2. Headlights are Dim, Yellow, or Hazy
- 3. Moisture or Condensation Inside the Lens
- 4. Both Headlights Don't Work or Fail Intermittently
- Known Issues, Recalls, and Technical Service Bulletins (TSBs)
- Buying a Used 1999-2003 Windstar Headlight Assembly
- What to Inspect on a Used Assembly:
- Replacement and Aiming Guide
- Step-by-Step Replacement:
- Headlight Aiming (Required After Replacement):
- Cost Comparison
- Frequently Asked Questions (FAQ)
- Part Numbers & Specifications
- 🎟️ Get 5% Off