

Mazda CX-5 & CX-9 Commander Switch Guide: Fixing Sticky Buttons & Failures (2013-2018)
A detailed guide to diagnosing, cleaning, and replacing the infotainment control console in the 2013-2016 Mazda CX-5 and 2016-2018 Mazda CX-9.
- The most common failure is sticky buttons due to spilled drinks, which can often be fixed by disassembling and cleaning the unit.
- This part does NOT require any programming or a dealer visit for replacement, making a used OEM part a safe and cost-effective option.
- A 'sunken' or collapsed unit is caused by broken plastic mounting tabs, not a faulty switch. Inspect these tabs carefully when buying a used part.
- Random 'ghost touch' inputs are typically caused by a failing touchscreen, not the commander switch.
Symptoms of a Failing Control Console

Failures of the commander switch are common and usually fall into one of three categories. These issues are typically caused by either liquid damage or physical wear and tear on plastic components.
1. Sticky, Slow, or Stuck Buttons
This is the most frequent complaint. Due to its location directly behind the cupholders, the control console is extremely vulnerable to liquid spills. Sugary drinks like soda or coffee are especially damaging. When the liquid dries, it leaves a sticky residue inside the button mechanism.
- Buttons become difficult to press.
- Buttons fail to spring back up after being pressed.
- In cold weather, the residue can harden, causing buttons to freeze in place.
- A single stuck button (e.g., the 'Back' button) can make the entire infotainment system difficult to use.
Pro Tip: For minor stickiness, you can try cleaning the buttons without full disassembly. Use a cotton swab or soft brush with a small amount of 90%+ isopropyl alcohol and work it into the gap around the affected button while pressing it repeatedly. Use compressed air to blow out any debris. For severe cases, the unit must be removed and taken apart for a thorough cleaning.
2. Unresponsive Knob Functions
The central commander knob can lose functionality in several ways. This is often a sign of an internal hardware failure rather than just a spill.
- Rotation Failure: The knob rotates, but it does not scroll through menus on the screen. Sometimes it may jump erratically between two options instead of scrolling smoothly.
- Toggle/Nudge Failure: The knob can be rotated and pressed, but nudging it up, down, left, or right does nothing.
- Selection (Press) Failure: The knob rotates and toggles, but pressing it down to make a selection has no effect.
These issues can stem from dirt and debris on the internal contacts or from a failure of the electronic components inside the switch. A hard reset of the infotainment system (press and hold BACK + MUTE + NAV for 10 seconds) can be attempted, but these symptoms usually point to a hardware problem.
3. Sunken or Collapsed Control Unit
The entire commander switch assembly may feel loose, mushy, or sink below the surface of the center console trim. This happens when the small plastic tabs that secure the switch to the underside of the trim panel break. These tabs are brittle and can fail from downward pressure (like leaning on the console or placing a heavy item on it) or simply from age and heat cycles. In this case, the switch itself may still be perfectly functional, but the mounting points are broken.
Is It Your Switch or Your Screen? If your infotainment system is experiencing "ghost touches"—making random selections, changing screens, or calling contacts by itself—the problem is likely NOT the commander switch. This is a well-known symptom of a failing touchscreen digitizer, caused by delamination. The fix for that issue is to replace the screen's digitizer or the entire display unit, not the control console.
Buying a Used Control Console: What You Need to Know

This is an excellent part to purchase as a used OEM component. Because it is a direct input device, it does not contain vehicle-specific data and does not require any programming or dealer visit after installation.
A used unit is plug-and-play.
- Verify Part Numbers: The most common OEM part numbers are KA0G66CM0 and KAYG66CM0. According to parts catalogs and seller data, KAYG66CM0 is a direct replacement for the earlier KA0G66CM0. While these parts fit a range of Mazda vehicles, always confirm compatibility with the seller for your specific year and model.
- Inspect Mounting Tabs: This is the most critical inspection point. Ask the seller for clear photos of the underside of the unit. Look for the small plastic tabs around the perimeter. Ensure they are all present and free of cracks or stress marks. A unit with broken tabs will not mount securely in your console.
- Check for Stickiness: If possible, physically test all buttons and the knob. Each button should depress and return smoothly with a clean click. The rotary knob should turn with light detents, and the toggle function should feel crisp in all four directions. Avoid any unit that feels gummy or slow.
- Ignore Mileage: The mileage of the donor vehicle is not a significant factor for this part. The condition, particularly the integrity of the mounting tabs and the feel of the buttons, is far more important.
Cost to Replace a Mazda Control Console
| Part Type | Estimated Cost | Notes |
|---|---|---|
| New OEM | $200 - $300 | Purchased from a Mazda dealer or online OEM parts retailer. |
| Used OEM | $75 - $150 | A cost-effective, plug-and-play solution. Widely available from online recyclers and eBay. |
| New Aftermarket | $50 - $100 | Available from various online sellers, but quality and longevity may be inconsistent. |
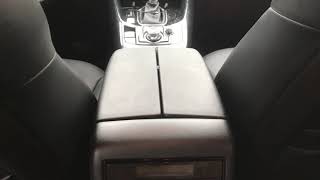
| Shop Labor | $100 - $200 | Replacement takes about 0.5 to 1 hour. 🎬 See these instructions for removing the 2016-2018 CX-9 center console A dealer may charge significantly more; one owner was quoted over $800 for a full repair. |
Frequently Asked Questions (FAQ)
Does a replacement control console need to be programmed?
No. The commander switch is a simple input device. Whether you buy a new or used unit, it does not need to be programmed or coded to your vehicle. It is a plug-and-play replacement.
Can I fix my sunken commander knob assembly?
Yes, often this is repairable. If the unit has fallen into the console, it means the plastic mounting tabs are broken. After removing the console trim, you can sometimes re-secure the unit using strong epoxy, zip ties, or custom-made brackets. Some owners have even created 3D-printed brackets to solve this problem permanently.
My buttons are just sticky from a soda spill. Can I clean them?
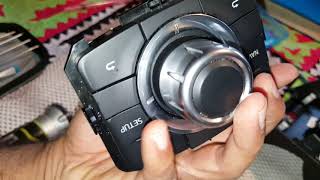
Yes. Cleaning is the most common fix for sticky buttons. You will need to remove the center console trim to access and remove the switch assembly. From there, you can carefully disassemble the switch to clean the button mechanisms and circuit board with isopropyl alcohol and a soft brush. Many owners have successfully restored full function this way, avoiding the cost of a new part.
🎬 Watch how to fix and unstick your Mazda command console knobIs it hard to replace the control console myself? 🎬 Watch this step-by-step Mazda CX-9 center console removal guide
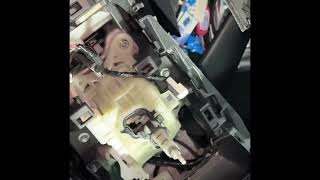
No, this is a relatively easy DIY job for most people. The process involves carefully prying up the center console trim panel, disconnecting one electrical connector, and removing a few screws that hold the switch to the trim piece. No special tools are required beyond basic trim removal tools and a Phillips screwdriver. The entire job can usually be done in under an hour.
Helpful Videos
Technical Specifications
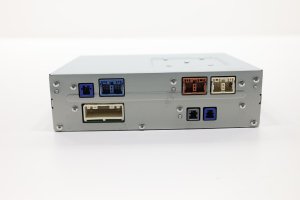
OEM Part Numbers: KA0G66CM0 KAYG66CM0
N/A
We Have This Part in Stock





The information in this article is provided for general reference and educational purposes only. Vehicle specifications, procedures, and part compatibility can vary by production date, trim level, and region. Always consult your vehicle's factory service manual and verify part numbers before purchasing or performing repairs. Safety-critical components such as airbags, seat belts, and braking systems should be installed by a qualified professional.
- Mazda CX-9:
- Mazda CX-5:
- 🎬 Helpful Videos
- 🛍️ Shop This Part
- Symptoms of a Failing Control Console
- 1. Sticky, Slow, or Stuck Buttons
- 2. Unresponsive Knob Functions
- 3. Sunken or Collapsed Control Unit
- Buying a Used Control Console: What You Need to Know
- Cost to Replace a Mazda Control Console
- Frequently Asked Questions (FAQ)
- 🎟️ Get 5% Off