

2016-2025 Volvo XC90 Rear Console Panel: USB Port Failures and Replacement Guide
Your guide to diagnosing faulty rear USB ports, replacing the panel, and what to inspect when buying a used one for your XC90.
- The biggest compatibility trap is the change from dual USB-A ports to dual USB-C ports in later model years (around 2022+); you must buy the correct type.
- Failure is typically either non-working USB ports or physical damage like broken mounting clips, which cause rattles.
- When buying a used panel, getting photos of the back to verify all mounting clips are intact is essential for a secure, rattle-free fit.
- Replacement is a very simple DIY task that takes less than 15 minutes and only requires a plastic trim tool.
Symptoms of a Failing Rear Console Panel

Failure of the XC90's rear console panel typically falls into two categories: electronic failure of the integrated USB ports or physical damage to the panel itself. Here’s what to look for:
1. USB Ports Not Charging or Connecting
The most common functional problem is when the rear USB ports stop working. You might experience one or more of the following:
- No Power: A connected device does not charge or show any indication of being connected.
- Intermittent Charging: The device cycles between charging and not charging. This can sometimes be caused by a loose connection within the port itself.
- Data Connection Failure: On some systems, these ports may also be used for data. A failure could prevent systems like Android Auto or Apple CarPlay from functioning for rear passengers if the vehicle is equipped for it.
Forum users often report trying multiple known-good cables and different devices, which isolates the problem to the vehicle's USB port. Before replacing the panel, it's wise to check the fuse for the "USB hub" in the vehicle's fuse box, as this can sometimes be the cause of the failure.
2. Physical Damage and Rattles
As an interior trim piece in a high-traffic area, the panel is susceptible to cosmetic and structural damage.
- Scratches and Scuffs: Kicks from rear passengers, impacts from cargo, or general wear and tear can scratch or gouge the plastic finish.
- Loose Fit or Rattling: Rattles from interior trim are a common complaint among XC90 owners. This is almost always caused by broken or missing mounting clips on the back of the panel. A previous improper removal or a sharp impact can easily break these clips, preventing the panel from seating securely and causing it to vibrate against the console structure.
- Chipping Chrome Trim: While more common on the forward part of the console, some XC90 owners report issues with chrome trim accents peeling or chipping, creating sharp edges. Inspect any trim on or around the panel for this type of wear.
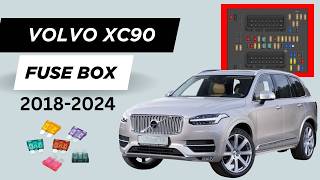
Pro Tip: If your USB ports suddenly stop working, check the fuse panel first. Consult your owner's manual for the location of the fuse box 🎬 Watch: Locate your XC90 fuse box and the specific fuse related to the USB hub. This is a simple check that could save you the cost of a replacement part.
Buying a Used 2016-2025 XC90 Rear Console Panel: What to Check

A used OEM panel is an excellent, cost-effective choice, as aftermarket options are generally not available. However, careful inspection is crucial to ensure you get a compatible, high-quality part. Here’s your checklist:
1. CRITICAL: Verify the USB Port Type (USB-A vs. USB-C)
Volvo updated the rear USB ports during the XC90's production run. This is the most important compatibility check you must make.
- Early Models (approx. 2016-2021): These vehicles are typically equipped with two rectangular USB-A ports.
- Later Models (approx. 2022-2025): These vehicles feature two smaller, oval-shaped USB-C ports.
The wiring connectors on the back of the panel may differ between the two types. Always purchase a panel that has the same type of USB ports as your original. Physically inspect your current panel before ordering a replacement.
Warning: A USB-A panel and a USB-C panel are NOT interchangeable. You must match the port type to your vehicle's model year and original equipment.
2. Inspect All Mounting Clips
This is the second most important check. A panel with broken clips will not install securely and will cause rattles.
- Ask the seller for clear, well-lit photos of the back of the panel.
- Carefully examine every tab and clip mounting point. They should all be present and free of cracks or stress marks. Even one broken clip can lead to a poor fit.
3. Examine the USB Ports for Damage
Look closely at the USB ports themselves. Check for bent or broken pins inside the port, debris, or any signs of corrosion or liquid damage. A port that looks physically damaged is unlikely to work correctly.
4. Check Cosmetic Condition
Review photos of the panel's face to assess its cosmetic condition. Look for deep scratches or gouges that won't be acceptable. Minor scuffs may be expected on a used part, but ensure the overall condition meets your standards.
5. Confirm the Part Number
While visual confirmation is key, matching the OEM part number provides an extra layer of confidence. The verified part number for one common variant is 32241262. However, other numbers like 39827386 (with 12V power outlet) and 39975932 exist. Always prioritize matching the features (USB type, color) over the part number alone, but use it as a reference.
Replacement Guide
Replacing the rear console panel is a straightforward DIY job that requires no special skills.
- Difficulty: 1 out of 5
- Estimated Time: 10 minutes
- Tools Required: Plastic trim removal tool
Step-by-Step Instructions
- Pry Off the Old Panel: Using a plastic trim removal tool to avoid scratching the surrounding console, gently pry around the edges of the panel. It is held in by clips and will pop off with firm, steady pressure. Forum users suggest it can be removed by carefully prizing it off.
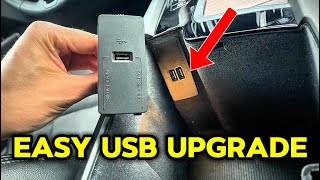
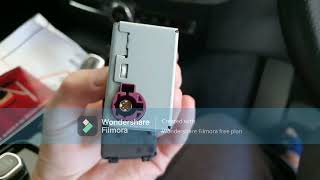
- Disconnect the Electrical Connector: Once the panel is loose, pull it away from the console slightly. You will see a small wiring harness connected to the back of the USB port module. Depress the release tab on the connector and pull it straight out to disconnect it. 🎬 See a similar USB hub replacement walkthrough
- Connect the New Panel: Take your replacement panel and plug the vehicle's wiring harness into the connector on the back. You should hear a click as it locks into place.
- Install the New Panel: Align the clips on the back of the new panel with the corresponding slots in the center console. Press firmly and evenly around the perimeter of the panel until all the clips snap securely into place.
- Test the Ports: Turn on the vehicle's ignition and test the new USB ports with a charging cable and device to ensure they are working correctly.
Cost Comparison
Pricing for this part is relatively low, but buying used can still offer savings.
| Part Type | Estimated Cost |
|---|---|
| New OEM | $30 - $50 |
| Used OEM | $20 - $40 |
| New Aftermarket | Not commonly available |
| Shop Labor | $50 - $100 (0.5 hours) |
Frequently Asked Questions (FAQ)
Why did my rear USB ports stop working?
The most common causes are a blown fuse, a damaged port from debris or bent pins, or internal failure of the port's electronics. Always check the fuse labeled for the 'USB hub' before assuming the part itself has failed.
What is the difference between early and late model XC90 rear console panels?
The primary difference is the type of USB port. Earlier models (approx. 2016-2021) typically have dual USB-A ports, while later models (approx. 2022-2025) have dual USB-C ports. They are not interchangeable, so you must buy the correct version for your vehicle.
Can I replace just the USB module instead of the whole panel?
No, the USB ports are typically integrated into the trim panel as a single assembly. The entire panel must be replaced even if only the electronic component has failed.
Is any programming or calibration needed after installing a new panel?
No. This is a simple plug-and-play component. No software programming or vehicle calibration is required after replacement.
Helpful Videos

Technical Specifications
OEM Part Numbers: 32241262
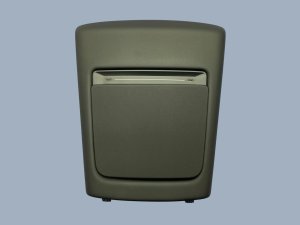
Material: Molded Plastic (Charcoal/Black Finish). Features: Integrated dual USB charging ports. Variations exist with USB-A (approx. 2016-2021) or USB-C (approx. 2022-2025) ports.
We Have This Part in Stock



The information in this article is provided for general reference and educational purposes only. Vehicle specifications, procedures, and part compatibility can vary by production date, trim level, and region. Always consult your vehicle's factory service manual and verify part numbers before purchasing or performing repairs. Safety-critical components such as airbags, seat belts, and braking systems should be installed by a qualified professional.
- Volvo XC90:
- 🎬 Helpful Videos
- 🛍️ Shop This Part
- Symptoms of a Failing Rear Console Panel
- 1. USB Ports Not Charging or Connecting
- 2. Physical Damage and Rattles
- Buying a Used 2016-2025 XC90 Rear Console Panel: What to Check
- 1. CRITICAL: Verify the USB Port Type (USB-A vs. USB-C)
- 2. Inspect All Mounting Clips
- 3. Examine the USB Ports for Damage
- 4. Check Cosmetic Condition
- 5. Confirm the Part Number
- Replacement Guide
- Step-by-Step Instructions
- Cost Comparison
- Frequently Asked Questions (FAQ)
- 🎟️ Get 5% Off