

2025-2026 MINI Cooper Console Trim: Gas (F66) vs. Electric (J01) Fitment Guide
Learn the critical differences between the gasoline (F66) and all-electric (J01) console panels to ensure you purchase the correct part and avoid installation headaches.
- The single most critical factor is vehicle model: panels for the gas (F66) and electric (J01) MINI Coopers are NOT interchangeable.
- Before buying a used panel, verify the part number (e.g., 5A31DB8/5A31DB9 for the gas model) and inspect the back for any broken mounting clips.
- Failure is always physical (rattles, damage), not electrical or mechanical. There are no associated warning lights or error codes.
- Replacement is a simple DIY job requiring only plastic trim tools and can be completed in under 30 minutes.
Critical Compatibility Warning: Gas (F66) vs. Electric (J01)
Warning: For the 2025-2026 model years, MINI produced two distinct versions of the Cooper that look similar but are built on entirely different platforms. The gasoline-powered model has the chassis code F66, while the all-electric model is the J01. The center consoles and their corresponding trim panels are NOT interchangeable between these two models. The F66 (gas) model has a more traditional center console with a larger armrest, inherited from the new Countryman, while the J01 (electric) has a slimmer design with a smaller, seat-mounted armrest due to the flat floor and different interior packaging. Always verify the part number of your existing panel before purchasing a replacement.
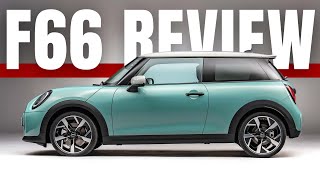
🎬 Watch: Compare the J01 and F66 designs side-by-sideSymptoms of a Failing Console Trim Panel
Since this is a cosmetic part, failure is related to physical damage rather than mechanical or electrical issues. There are no fault codes associated with this part. Symptoms are usually straightforward:
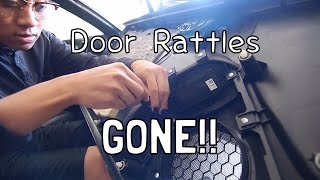
- Rattling or Buzzing Noises: The most common symptom is noise. A broken or loose mounting clip can cause the panel to vibrate against the console frame or other interior parts, creating annoying rattles, especially on rough roads. 🎬 See: How to find and fix interior trim rattles
- Poor Fit and Gaps: If a panel is warped from heat or has been improperly removed in the past, it may not sit flush. This can create unsightly gaps between the panel and the dashboard, carpet, or main console body.
- Visible Cosmetic Damage: Scratches, scuffs, and gouges from keys, bags, or shoes are common. In more severe cases, the panel can be cracked or have a piece broken off from an impact.
- Loose Feel: The panel may feel loose or move when you press on it, indicating that the clips holding it in place have lost their tension or are broken.
Known Issues, TSBs, and Recalls
As of mid-2024, there are no specific recalls or Technical Service Bulletins (TSBs) issued by MINI or the National Highway Traffic Safety Administration (NHTSA) for the console trim panels on the 2025-2026 MINI Cooper.
However, there are several recalls for the 2025-2026 MINI Cooper for other components:
- NHTSA Campaign Number 25V616000: This recall addresses a potential issue with the front seat belt retractors, which may have been damaged during production and might not properly restrain an occupant in a crash.
- NHTSA Campaign Number 24V697000: This recall is for a potential defect in the integrated brake control module, where faulty welds could lead to a loss of power brake assist and other braking system malfunctions.
Early owner feedback on forums for the 2025 models sometimes mentions general complaints about the new interior design, such as the reliance on the central touchscreen and the feel of some materials, but no widespread defects regarding the console trim panels have been reported.
Buying a Used 2025-2026 Console Trim Panel: What to Check
Purchasing a used OEM trim panel is an excellent way to save money, especially since aftermarket options for such a new vehicle are rare. Here’s what to inspect carefully:
- Verify the Part Number: This is the most critical step. Confirm if you need a panel for the gas F66 or the electric J01. The part numbers 5A31DB8 (Left Side) and 5A31DB9 (Right Side) are for the F66 gas model. Ensure the part you are buying matches your vehicle's chassis code and the specific side you need.
- Inspect All Mounting Clips: Turn the panel over and check every single mounting clip and tab. These are essential for a secure, rattle-free fit. If even one clip is broken, the panel may not sit flush or could start to vibrate over time. Do not buy a panel with broken clips unless you are experienced with plastic repair.
- Check for Warping: Lay the panel on a flat surface to ensure it is not warped or twisted. Interior plastics can sometimes deform if stored improperly or exposed to extreme heat, which will prevent it from fitting correctly.
- Examine the Surface Finish: Look for deep scratches, cracks, or discoloration. Minor scuffs in the lower footwell area are common and may be acceptable, but deep gouges or cracks in visible areas cannot be easily repaired.
- Match the Color and Texture: MINI offers different interior trim packages (e.g., Classic, Favoured) which may use slightly different colors or textures. Compare the used part to your existing interior to ensure it's a perfect match.
Pro Tip: For a part this new, a used OEM panel is almost always a better choice than a new aftermarket one (if one even exists). The fit, color, and texture of an original part will be a perfect match, which is difficult for aftermarket companies to replicate perfectly on a first-year model.
Cost Comparison
Prices for these new models can fluctuate, but here is a general cost expectation:
| Part Type | Estimated Cost | Notes |
|---|---|---|
| New OEM | $110 - $140 per side | Sourced from a MINI dealership or online OEM parts retailer. Part numbers 5A31DB8 and 5A31DB9 are listed around $111. |
| Used OEM | $50 - $90 per side | Dependent on condition and availability from automotive recyclers. |
| New Aftermarket | Not Yet Available | Aftermarket manufacturers typically do not produce cosmetic trim for brand-new models immediately. |
| Shop Labor | $75 - $150 | Typically involves 0.5 to 1.0 hour of labor. |
Installation Guide (Difficulty: 2/5)
Replacing a console side trim panel is a straightforward task that is feasible for most DIYers. The primary tool required is a set of plastic trim removal tools to prevent scratching or damaging the surrounding panels.
Estimated Time: 30 minutes
Tools Needed:
- Plastic trim removal tool kit
- Small flathead screwdriver (optional, for clips)
General Steps:
- Start at the Rear: Begin at the end of the panel closest to the seats. Gently insert a plastic pry tool into the seam between the trim panel and the console body or carpet.
- Release the Clips: Work your way forward, carefully prying to release the retaining clips that hold the panel in place. You will hear them pop as they disengage. Do not use excessive force; the clips are plastic and can break.
- Detach the Panel: Once all clips are loose, the panel should pull away from the center console. There are typically no screws holding these specific side panels in place.
- Install the New Panel: Align the clips on the new panel with the corresponding holes in the console frame. Start by seating one end, then firmly press along the length of the panel. You should hear and feel the clips snap securely into place.
- Final Check: Run your hand along the seams to ensure the panel is flush and secure. Gently try to wiggle it to confirm it is fully seated and does not rattle.
Frequently Asked Questions (FAQ)
Will a console trim panel from a gas 2025 MINI Cooper fit my electric 2025 MINI Cooper?
No. The gasoline (F66) and electric (J01) models have completely different center console structures and dimensions. The trim panels are not interchangeable. You must buy the part that corresponds to your specific model.
My console trim panel is rattling. Do I need to replace it?
Not necessarily. First, try to identify the source of the rattle by pressing on different areas of the panel while driving. Often, a rattle is caused by a single loose clip. You may be able to remove the panel and add a small piece of foam tape to the back or re-secure the loose clip to solve the problem without needing a new part.
🎬 Watch: Easy tricks to silence car interior squeaksCan I paint or vinyl wrap my existing console trim panel?
Yes. The console trim panels are typically made of ABS plastic, which can be painted or wrapped. For a durable finish, the panel should be removed from the vehicle, cleaned thoroughly, and properly prepped with an adhesion promoter before painting or wrapping.
Where is the part number located on my console trim panel?
The part number is typically molded into the plastic on the back (non-visible) side of the panel. You will need to remove the panel from the vehicle to see it.
Helpful Videos










Technical Specifications
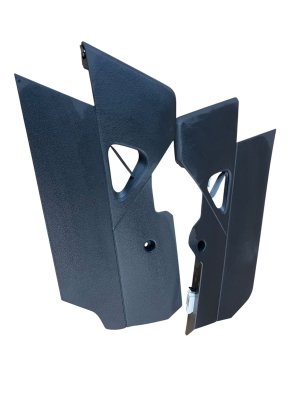
OEM Part Numbers: 5A31DB8 5A31DB9
Material: ABS Plastic. Fitment specific to chassis code (F66 or J01).
We Have This Part in Stock

The information in this article is provided for general reference and educational purposes only. Vehicle specifications, procedures, and part compatibility can vary by production date, trim level, and region. Always consult your vehicle's factory service manual and verify part numbers before purchasing or performing repairs. Safety-critical components such as airbags, seat belts, and braking systems should be installed by a qualified professional.
- MINI Cooper:
- 🎬 Helpful Videos
- 🛍️ Shop This Part
- Critical Compatibility Warning: Gas (F66) vs. Electric (J01)
- Symptoms of a Failing Console Trim Panel
- Known Issues, TSBs, and Recalls
- Buying a Used 2025-2026 Console Trim Panel: What to Check
- Cost Comparison
- Installation Guide (Difficulty: 2/5)
- Frequently Asked Questions (FAQ)
- 🎟️ Get 5% Off