

2018-2023 Kia Stinger Console Trim: Scratches, Replacement, and Shifter Type Guide
This guide covers the common cosmetic issues, replacement costs, and critical shifter compatibility warnings for the 2018-2023 Kia Stinger center console trim panel.
- The single most critical factor is compatibility: you MUST match the panel to your car's 'shift-by-wire' or 'shift-by-cable' gear selector. They are not interchangeable.
- The glossy 'piano black' finish is extremely prone to scratches and swirl marks; inspect used parts carefully in bright light.
- When buying used, demand photos of the underside to ensure all mounting tabs are intact to prevent future rattles.
- Replacement is a feasible DIY job that requires plastic trim tools and patience to avoid breaking clips.
Symptoms of a Failing Console Trim Panel
Unlike mechanical parts, the console trim panel's failure is almost always visual or physical. There are no associated fault codes. Owners typically seek to replace this part due to cosmetic degradation or physical damage that affects its use or appearance.
Most Common Symptoms:
- Scratches and Swirl Marks: The most frequent complaint is the susceptibility of the gloss black or "piano black" finish to fine scratches and swirl marks from routine 🎬 Watch: How to easily restore scratched interior trim cleaning or contact.
- Cracked Plastic: Dropped objects or excessive force during removal can cause cracks in the panel, especially around the edges or mounting points.
- Broken Mounting Tabs: The panel is secured by hidden clips and tabs. During removal for other repairs, these tabs can become brittle and break, leading to a loose, rattling console.
- Peeling or Worn Finish: On higher-mileage vehicles, the finish around frequently used controls like the drive mode knob or gear selector may begin to wear or peel.
- Sticky or Gritty Buttons: While not a failure of the panel itself, buttons housed within the trim can become sticky or feel gritty, sometimes prompting a full console disassembly for cleaning.
Known Issues, Recalls, and TSBs
While there are no recalls or Technical Service Bulletins (TSBs) specifically for the console trim panel itself, several related issues are worth noting:
- Interior Rattles: Some Stinger owners report various interior rattles. While often traced to the sunroof or hatch area, a loose console panel due to broken clips can also be a source of noise.
- Shift Lever TSB (ELE294): For some models, a TSB was issued to inspect the shift lever position and potentially replace the detent damper if a remote start failure occurred. This repair requires accessing the area under the console trim.
- Overhead Console TSB (BOD314): A TSB was released for repairing the overhead console sunglass door latch, which is a separate but related interior trim piece.
- Safety Recalls: The 2018-2023 Stinger has been subject to safety recalls for potential engine fire risks related to the HECU (Hydraulic Electronic Control Unit) and a turbocharger oil feed pipe leak. These issues are unrelated to the console trim but are critical for owners to be aware of.
Critical Compatibility Warning: The most important factor when replacing this panel is the type of gear selector your Stinger has. Panels are NOT interchangeable between the two systems.
- Shift-by-Wire (SBW): This is an electronic shifter, typically found on higher trim levels like the GT2. It's a smaller, joystick-like controller that sends an electronic signal to the transmission. The console panel for this system has a specific cutout. Part number 84610-J5500CLA is for SBW models. 🎬 See this step-by-step center console swap video
- Shift-by-Cable: This is a traditional, mechanical gear lever that is physically connected to the transmission via a cable. It is found on other trims like the GT and GT1. The console panel has a larger, different-shaped opening to accommodate the lever's movement.
Before purchasing, you MUST verify which system your vehicle has by looking at your gear selector.
Buying a Used Console Trim Panel
Purchasing a used OEM console panel can be a cost-effective way to restore your Stinger's interior, but careful inspection is key. Used OEM parts guarantee a perfect match for color, texture, and fitment, which can be a gamble with aftermarket alternatives.
What to Check Before You Buy:
- Confirm Shifter Type: This is the most critical step. Ensure the part you are buying matches your vehicle's shift-by-wire or shift-by-cable system. Get a photo of the part number and the shifter opening.
- Inspect the Surface: Ask for high-resolution photos in bright, direct light. This will reveal the fine scratches and swirl marks common on the piano black finish. Minor scratches can often be polished out, but deep gouges cannot.
- Check All Mounting Tabs: The underside is as important as the top. Request clear pictures of the back of the panel to verify that all mounting clips and tabs are intact. A single broken tab can lead to a poor fit and persistent rattles.
- Examine Button and Knob Cutouts: Check for cracks or stress marks around the openings for the drive mode knob, shifter, and buttons. These are common weak points.
- Verify the Part Number: The center console is an assembly of multiple parts. The main panel is often sold under part number 84610-J5500CLA (for shift-by-wire). Side panels, rear covers, and armrests are separate parts with their own numbers (e.g., 84640-J5000WK for the rear cover). Be sure you are buying the exact piece you need.
Replacement Difficulty and Cost
Replacing the center console trim is a manageable DIY project for those with patience and the right tools. The process involves carefully prying up various trim pieces, removing several screws, and disconnecting electrical connectors for the components housed in the panel.
- Installation Difficulty: 2/5 (Requires care and proper tools)
- Special Tools: A set of plastic trim removal tools is essential to avoid scratching or damaging the console and surrounding dashboard parts. A Phillips head screwdriver and a 10mm socket are also needed.
- Procedures: The process generally involves removing side panels, unscrewing bolts inside the armrest compartment, and carefully lifting the main assembly, being mindful of the fragile tabs and connected wires underneath.
Pro Tip: When removing the main console trim, pull up from the front/middle section near the cup holders. Do not pull from the rear, as this can easily break the mounting tabs.
🎬 Watch: How to safely remove the center consoleCost Breakdown
| Part Type | Estimated Cost |
|---|---|
| New OEM (Main Panel) | $115 - $180 |
| New Aftermarket (Overlays) | $50 - $150 (Typically stick-on covers, not full replacements) |
| Used OEM (Main Panel) | $75 - $125 |
| Shop Labor for Installation | $100 - $200 |
Frequently Asked Questions (FAQ)
How can I fix the scratches on my existing console trim?
For minor swirl marks and light scratches, a high-quality plastic polish like Meguiar's ScratchX 2.0 or PlastX, applied with a clean microfiber towel, can significantly improve the appearance. For deeper scratches, replacement is often the only solution. To prevent future scratches, consider applying a clear protective film (PPF) or a ceramic coating to the panel.
Will this console panel fit my Stinger GT1?
It depends. The key is the shifter type, not the trim name itself. While GT2 models are typically shift-by-wire, some GT1 models may have the traditional shift-by-cable system. You must visually inspect your car's gear selector to confirm compatibility before ordering any parts.
Is the replacement a difficult DIY job?
For most DIYers, the replacement is straightforward but requires patience. The main challenges are not breaking the plastic tabs and carefully disconnecting the multiple wiring harnesses underneath. Using a set of plastic trim removal tools is mandatory to avoid damaging adjacent parts. The entire process can take 1-2 hours.
Are the carbon fiber console panels a good alternative?
Many aftermarket companies sell carbon fiber replacements or stick-on covers. True replacements can be high quality but expensive. Cheaper options are often adhesive-backed overlays. While these can cover up scratches, the fit, finish, and long-term durability may not match the OEM part. Be sure to read reviews before purchasing an aftermarket solution.
Helpful Videos
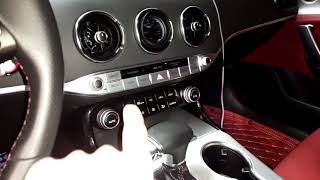

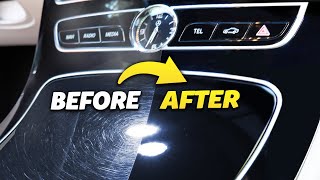


Technical Specifications
OEM Part Numbers: 84610-J5500CLA 84610J5500CDY 84640-J5000WK 84640J5000 84641J5000WK 84650J5080CLA 84657J5100WK 84658J5100WK 84660J5200CD4
Material: Plastic with gloss black finish. Compatibility is dependent on gear selector type (Shift-by-Wire vs. Shift-by-Cable).
We Have This Part in Stock



The information in this article is provided for general reference and educational purposes only. Vehicle specifications, procedures, and part compatibility can vary by production date, trim level, and region. Always consult your vehicle's factory service manual and verify part numbers before purchasing or performing repairs. Safety-critical components such as airbags, seat belts, and braking systems should be installed by a qualified professional.
- Kia Stinger: