

2011-2014 Hyundai Genesis Console Trim: Solving Peeling Finishes & Navigation Compatibility
This guide covers the common cosmetic failures, critical compatibility checks, and replacement procedure for the center console trim panel in 2011-2014 Genesis sedans.
- The most critical step is verifying compatibility: the panel MUST match your car's factory navigation system (or lack thereof).
- Peeling and bubbling of the top finish is the most common failure; carefully inspect used parts for any signs of delamination, especially around edges.
- Verify all option cutouts (heated/cooled seats, ashtray) and color (Black vs. Cashmere) before purchasing a replacement.
- Replacement is a straightforward DIY task that requires basic trim tools and about an hour, primarily involving prying clips and disconnecting wires.
Symptoms of a Failing Console Trim Panel
Failure of the Genesis console trim is typically cosmetic or mechanical, rather than electrical. However, these issues can affect the usability of the controls mounted within it.
1. Peeling or Bubbling Finish
The most widely reported issue is the delamination or peeling of the panel's top finish. This often starts as small bubbles or lifting at the edges, particularly around the shifter opening or button cutouts. Over time, the clear coat or woodgrain/metallic finish can flake off, leaving the plastic base exposed. This is primarily caused by heat, UV exposure, and sometimes reactions to cleaning chemicals. While cosmetic, the peeling edges can be sharp.
2. Sticky or Malfunctioning Buttons
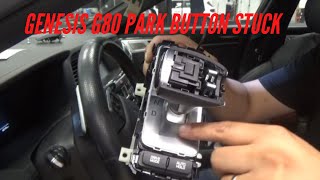
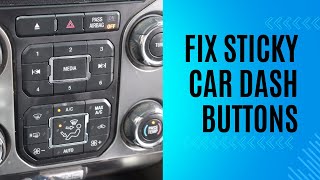
Spilled drinks and accumulated dust can cause the buttons for the seat heaters, DIS system, or the park-release button to become sticky or difficult to press. In some cases, a button may get stuck in the depressed position. 🎬 Watch: How to clean and fix sticky console buttons While the button itself might be the issue, a warped or misaligned trim panel can also put pressure on the switches, causing them to bind.
3. Broken or Rattling Panel
The console panel is held in place by a series of plastic clips and a few screws. These clips can become brittle with age and break during removal for other repairs. If the panel is loose, it can rattle or creak as the vehicle moves. This indicates that one or more mounting points have failed and the panel is no longer secure.
4. Malfunctioning DIS Control Knob or Buttons
While often a separate electronic failure, problems with the main control knob and surrounding buttons can sometimes be linked to the panel. A loose panel can allow the wiring harness underneath to shift, potentially straining connections. If your controls stop working, it's worth checking that all connectors are securely plugged into the back of the panel.
Warning: This guide is for the 2011-2014 Genesis Sedan. The console trim for the Genesis Coupe is a completely different part and is not interchangeable.
Buying a Used Console Trim Panel: What to Check
A used OEM panel is often the best choice, as aftermarket options are scarce and may not match the factory quality. However, careful inspection is crucial.
1. CRITICAL: Match Your Navigation System
This is the most important compatibility check. The console panels for Genesis models with the factory navigation system are different from those without navigation. The button layout and the DIS controller are completely different. The provided OEM part numbers, such as 84610-3M110-M5 and 84651-3M100-PB2, are specifically for models equipped with the navigation system. Always verify the seller's description and compare the button layout in the product photos to your existing panel.
2. Verify Button and Accessory Cutouts
Genesis sedans were available with different options. Before buying, check that the used panel has the correct cutouts for your car's features:
- Heated Seats
- Heated AND Cooled (Ventilated) Seats
- Ash Tray vs. Storage Cubby
- Parking Sensor Button
A panel missing a cutout for a feature your car has will not work without modification.
3. Inspect the Finish Thoroughly
Ask the seller for high-resolution photos of the entire top surface. Look closely for:
- Edge Peeling: Check the perimeter of the shifter opening and around the DIS knob. This is where delamination usually starts.
- Bubbling: Look for any raised areas or bubbles under the clear coat.
- Scratches and Stains: Note any deep scratches or discoloration, especially from spilled drinks.
4. Check for Intact Mounting Tabs
Flip the panel over. There are numerous plastic clips and tabs that secure it to the center console structure. These are fragile and essential for a rattle-free installation. Ensure none are broken or missing. A seller should be able to provide photos of the underside.
5. Match the Color
The two most common colors are Black and Cashmere (a beige/tan color). Part number 84610-3M110-M5 corresponds to the Cashmere color for navigation models. Part number 84651-3M100-PB2 is for the black version. Confirm the color with the seller, as lighting in photos can be misleading.
Known Issues, Recalls, and TSBs
As of mid-2024, there are no specific recalls or Technical Service Bulletins (TSBs) from Hyundai or the NHTSA that directly address peeling or failing console trim panels for the 2011-2014 Genesis sedan. While some general TSBs exist for interior trim staining on newer Genesis models, they do not apply to this specific part and generation. The peeling finish is considered a cosmetic wear-and-tear issue. There was a recall involving the ABS module that posed a fire risk for 2015-2016 models, but this does not apply to the 2011-2014 generation.
Replacement Difficulty & Procedure
Replacing the console trim panel is a relatively straightforward DIY job for most owners.
- Difficulty: 2 out of 5
- Estimated Time: 1 hour
- Tools Needed: Plastic trim removal tools, Phillips head screwdriver.
Pro Tip: Using a set of plastic trim removal tools is highly recommended to avoid scratching or damaging the surrounding console pieces. A flathead screwdriver wrapped in tape can work but carries a higher risk of damage.
Step-by-Step Replacement Guide (Simplified)
- Shift to Neutral: Turn the vehicle's power on (without starting the engine), depress the brake, and move the gear selector to Neutral. This provides clearance to remove the panel.
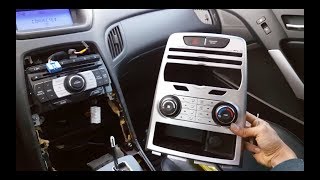
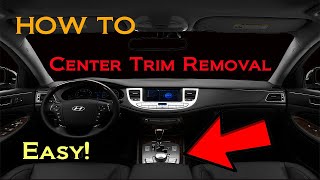
- Pry Up the Panel: Start at the rear of the panel, near the armrest. Insert a plastic trim tool and gently pry upwards. Work your way around the edges, releasing the clips. 🎬 See this center console trim removal walkthrough
- Lift and Disconnect: Once all clips are free, lift the panel up a few inches. Do not pull it away completely. There are several electrical connectors on the underside for the buttons and DIS controller.
- Disconnect Wiring: Carefully reach underneath and disconnect each wiring harness. They have small release tabs that need to be pressed. There are typically 4-5 connectors for the heated seats, DIS controller, and cigarette lighter.
- Install the New Panel: Connect all wiring harnesses to the replacement panel. Position the panel, ensuring it's aligned correctly, and press down firmly around the edges to engage all the clips.
- Test Functionality: Before finishing, turn the car's power on and test all buttons (seat heaters/coolers, DIS knob, etc.) to ensure they are working correctly.
- Return to Park: Shift the gear selector back to Park and turn the vehicle off.
Cost Comparison for Console Trim Panel
| Part Type | Estimated Cost | Notes |
|---|---|---|
| New OEM | $400 - $850+ | Price varies significantly by specific part number and color. For example, the upper shift panel (84651-3M100-PB2) can be around $430, while a full console assembly (84610-3M010-M5) can exceed $800. |
| New Aftermarket | Not Widely Available | Complete console panels are generally not produced by aftermarket companies. Only generic vinyl or dash kit overlays are available. |
| Used OEM | $75 - $250 | Price depends heavily on condition, especially the finish. Found on sites like eBay and from salvage yards. |
| Shop Labor | $100 - $200 | Typically 1-1.5 hours of labor at a standard shop rate. |
Frequently Asked Questions
Can I just wrap or paint my peeling console trim?
Yes, this is a popular and cost-effective alternative to replacement. You can remove the panel, sand down the peeling finish, and either paint it with automotive interior paint or wrap it in vinyl. This allows for customization but requires careful prep work for a durable finish.
Will a console from a 2009-2010 Genesis fit my 2012-2014 model?
Yes, the console panels are generally compatible across the 2009-2014 Genesis sedan model years, provided you match the Navigation vs. Non-Navigation and button options. However, always double-check part numbers, as minor revisions can occur.
Why do my seat heater buttons work but the DIS knob doesn't?
The controls can be on separate circuits and have different connectors. If only a specific group of buttons fails, it could be a loose connector for that function, a failure within the DIS control unit itself, or a break in the wiring, rather than an issue with the entire panel.
Can I install a navigation console panel in my non-navigation car?
No, this is not a simple plug-and-play swap. The wiring harnesses and the underlying control modules are completely different. You cannot gain navigation functionality simply by swapping the trim panel and controls.
Helpful Videos
Technical Specifications
OEM Part Numbers: 84610-3M011-M5 84610-3M110-M5 846103M110M5 84651-3M100-PB2 846513M100PB2 84660-3M110-H7 846603M110H7 84666-3M100-V2 846663M100V2 84680-3M011-M5 84651-3M100-PW2 84610-3M010-M5 84610-3M110-H66
Fitment: 2009-2014 Hyundai Genesis Sedan. Key Variants: With Factory Navigation System, Without Factory Navigation System. Colors: Black (e.g., 84651-3M100-PB2), Cashmere (e.g., 84610-3M110-M5).
We Have This Part in Stock




The information in this article is provided for general reference and educational purposes only. Vehicle specifications, procedures, and part compatibility can vary by production date, trim level, and region. Always consult your vehicle's factory service manual and verify part numbers before purchasing or performing repairs. Safety-critical components such as airbags, seat belts, and braking systems should be installed by a qualified professional.
- Hyundai Genesis:
- 🎬 Helpful Videos
- 🛍️ Shop This Part
- Symptoms of a Failing Console Trim Panel
- 1. Peeling or Bubbling Finish
- 2. Sticky or Malfunctioning Buttons
- 3. Broken or Rattling Panel
- 4. Malfunctioning DIS Control Knob or Buttons
- Buying a Used Console Trim Panel: What to Check
- 1. CRITICAL: Match Your Navigation System
- 2. Verify Button and Accessory Cutouts
- 3. Inspect the Finish Thoroughly
- 4. Check for Intact Mounting Tabs
- 5. Match the Color
- Known Issues, Recalls, and TSBs
- Replacement Difficulty & Procedure
- Step-by-Step Replacement Guide (Simplified)
- Cost Comparison for Console Trim Panel
- Frequently Asked Questions
- 🎟️ Get 5% Off