

2018-2021 Honda Clarity Console Trim Panel: Fixing Rattles and Scratches
A detailed guide to identifying, inspecting, and replacing the driver-side console trim panel (77285-TRT-A01ZA) to resolve common interior noises and cosmetic issues.
- The primary failure of this panel is physical, leading to annoying rattles that are highly noticeable in the Clarity's quiet cabin.
- When buying a used panel, the integrity of the rear mounting clips is the most important factor; broken clips will lead to a poor fit and more rattles.
- Replacement is a simple, 15-minute DIY task requiring only a plastic pry tool.
- This specific part (77285-TRT-A01ZA) is for the driver's side and has a Deep Black finish (*NH900L*).
Common Failure Symptoms
Since this is a simple plastic trim piece, "failure" relates to its physical condition and fit, not its function. Symptoms are typically more annoying than critical.
Rattling or Buzzing Noises
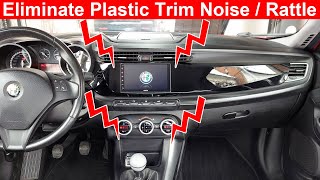
This is the most frequent complaint from Clarity owners. In the near-silent environment of the car's electric drive mode, small interior noises become very obvious. A loose panel, a broken mounting clip, or pressure between two plastic pieces can cause vibrations and buzzing sounds, especially over rough roads. 🎬 Watch: How to diagnose and eliminate cabin trim noise These noises are often the primary reason for replacing the panel.
Cosmetic Damage
The panel features a Deep Black (*NH900L*) finish that is susceptible to cosmetic damage. Scratches from keys, bags, or even cleaning can mar the surface. Deeper gouges can occur from impacts, and chemical spills from air fresheners or cleaning products can cause permanent discoloration or peeling of the finish.
Poor Fit or Loose Panel
Over time or after being removed for a previous repair, the mounting clips on the back of the panel can weaken or break. This results in a panel that feels loose to the touch, has visible gaps between it and the main console, and is a likely source of rattles.
Buying a Used Console Trim Panel
Buying a used OEM trim panel is a cost-effective way to restore your interior, but a careful inspection is essential to ensure you get a quality part. Aftermarket versions of this specific panel are not commonly available, making used OEM the best alternative to a new part.
What to Inspect Before You Buy
- Inspect All Mounting Clips: This is the most critical step. Turn the panel over and carefully examine every mounting tab and clip. Look for any that are broken, bent, or show white stress marks in the plastic. A panel with even one broken clip may not install securely and could be the source of future rattles.
- Check for Cracks and Warping: Inspect the entire panel, especially around the edges and corners, for any hairline cracks. Lay it on a flat surface to ensure it is not warped, as a warped panel will not sit flush against the console.
- Evaluate Surface Condition: Look at the finish under bright, direct light. While minor surface scuffs might be acceptable and can sometimes be polished, avoid panels with deep scratches that you can feel with a fingernail, as these cannot be easily repaired.
- Verify the Part Number: Confirm the part is 77285-TRT-A01ZA to ensure it is the correct piece for the driver's side of a 2018-2021 Clarity. While other trim pieces look similar, only the correct part number guarantees a perfect fit.
Known Issues, TSBs, and Recalls
There are no official recalls or Technical Service Bulletins (TSBs) from Honda or the NHTSA that specifically address this console trim panel. However, interior rattles are a widely discussed topic among owners in forums. These issues are generally considered a nuisance rather than a safety defect and are often traced back to plastic trim clips and contact points between panels.
Replacement Overview (DIY Difficulty: 1/5)
Replacing this panel is a straightforward DIY job that requires minimal tools and time. While no specific guide for the Clarity is readily available, the process is similar to other Honda models of the same era.
Estimated Time: 15 minutes
Tools Required:
- Plastic trim removal tool kit
- Felt tape (optional, for preventing rattles)
General Steps:
- Using a plastic pry tool, carefully insert it into the seam between the trim panel and the main center console.
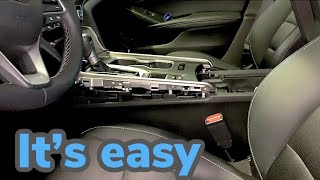
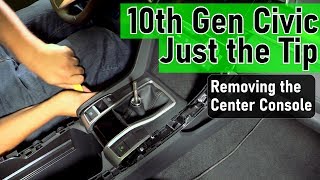
- Gently pry to release the retaining clips. Work your way around the panel until it is free. Pulling directly by hand may also work if there is enough 🎬 Watch: Tips for safely prying off Honda console trim of a gap to get a grip.
- Before installing the new panel, consider applying small pieces of felt or Tesa tape to the contact points and clips. This is a professional technique to prevent future rattles. 🎬 See how to fix interior rattles with felt tape
- Align the new panel's clips with the slots in the console and press firmly and evenly until all clips snap securely into place.
Pro Tip: Using plastic trim removal tools is highly recommended. Using a screwdriver or other metal tool will almost certainly scratch or gouge the surrounding soft-touch plastics of the center console.
Cost Comparison
| Part Type | Estimated Cost |
|---|---|
| New OEM | $20 - $30 |
| Used OEM | $15 - $25 |
| New Aftermarket | Not commonly available |
| Shop Labor | $40 - $90 |
Frequently Asked Questions (FAQ)
Is this the same part for all 2018-2021 Clarity models (Plug-in, Electric, Fuel Cell)?
Yes, part number 77285-TRT-A01ZA fits all versions of the Honda Clarity produced from 2018 to 2021, including the Plug-In Hybrid, Electric, and Fuel Cell models.
Can I repair scratches on the panel instead of replacing it?
For very light surface scuffs, a high-quality plastic polish may reduce their appearance. However, for scratches that are deep enough to be felt with a fingernail, replacement is the only way to achieve a like-new finish.
Why is a rattle from a small plastic panel so noticeable?
The Honda Clarity's powertrain is extremely quiet, especially when running in full electric (EV) mode. Without the background noise of a gasoline engine, small interior sounds like trim rattles, clicks, and buzzes become much more prominent and annoying to the driver.
Is there a matching panel for the passenger side?
Yes, there is a corresponding trim panel for the passenger side. While the inspection and replacement process is similar, it will have a different part number. This article and part number 77285-TRT-A01ZA are specifically for the driver's side.
Helpful Videos
Technical Specifications
OEM Part Numbers: 77285-TRT-A01ZA
Color/Finish: Deep Black (*NH900L*), Position: Driver Side, Center Console
We Have This Part in Stock


The information in this article is provided for general reference and educational purposes only. Vehicle specifications, procedures, and part compatibility can vary by production date, trim level, and region. Always consult your vehicle's factory service manual and verify part numbers before purchasing or performing repairs. Safety-critical components such as airbags, seat belts, and braking systems should be installed by a qualified professional.
- Honda Clarity:
- 🎬 Helpful Videos
- 🛍️ Shop This Part
- Common Failure Symptoms
- Rattling or Buzzing Noises
- Cosmetic Damage
- Poor Fit or Loose Panel
- Buying a Used Console Trim Panel
- What to Inspect Before You Buy
- Known Issues, TSBs, and Recalls
- Replacement Overview (DIY Difficulty: 1/5)
- Cost Comparison
- Frequently Asked Questions (FAQ)
- 🎟️ Get 5% Off