

2012-2018 Audi A6, A7, S6, S7 & RS7 Console Trim Panel Guide
A detailed guide to identifying, inspecting, and replacing the center console side trim panels on the Audi C7 platform, focusing on common wear and ensuring a perfect interior match.
- This panel's failure is purely cosmetic; common issues are scratches, worn leather, and broken clips causing rattles.
- Matching your interior is critical. Locate the interior trim code on the sticker in the spare tire well before buying a replacement.
- When buying used, the most important check is for intact mounting clips. A panel with broken clips will not fit securely.
- Replacement is simple for a DIYer and only requires plastic trim removal tools to pry the old panel off and snap the new one in.
Known Issues and Symptoms of Failure
Failure of the console trim panel is almost always cosmetic or related to its mounting points. Since it is not a mechanical part, you will not see any warning lights or receive diagnostic trouble codes. Instead, look for physical signs of wear and tear.
Common Problems
- Scuffs and Scratches: The most common issue is cosmetic damage from shoes, bags, and other objects. The lower position makes these panels susceptible to kicks and scrapes during entry and exit.
- Peeling or Worn Leather: On models equipped with leather-wrapped panels, the leather can delaminate, peel, or crack over time, especially in high-wear areas or from sun exposure.
- Broken Mounting Clips: The plastic clips that hold the panel to the console frame can become brittle and break during removal for other repairs or from being kicked. A broken clip will cause the panel to fit loosely, create a gap, or produce rattling and creaking noises while driving.
- Discoloration: Exposure to sunlight and cleaning chemicals can cause the plastic or leather to fade or become discolored over time, leading to a mismatch with the rest of the interior.
Pro Tip: Many owners of the A6, S6, A7, S7, and RS7 models complain about scratches on the piano black trim surrounding the shifter and MMI controls. While this guide focuses on the side panels, be aware that the entire center console area is prone to cosmetic wear.
Verifying Your Interior Trim Code
To ensure a perfect match when buying a used console trim panel, you must identify your vehicle's interior trim code. This is more important than the exterior paint code for interior parts.
On 2012-2018 Audi A6, A7, and related models, the interior trim code is found on a paper sticker called the Vehicle Identification Sticker. This sticker is typically located in the trunk, inside the spare tire wheel well. It may be on the floor of the well or on the underside of the trunk's floor cover. The sticker contains a list of option codes, and the interior trim code is usually a multi-character code that specifies the color and material combination (e.g., black, beige, gray, with or without leather).
Buying a Used Console Trim Panel: What to Inspect
Buying a used OEM panel is often the most cost-effective way to restore your interior's appearance. Aftermarket options for this specific part are virtually nonexistent, making used OEM the best choice over expensive new parts. Here’s what to look for:
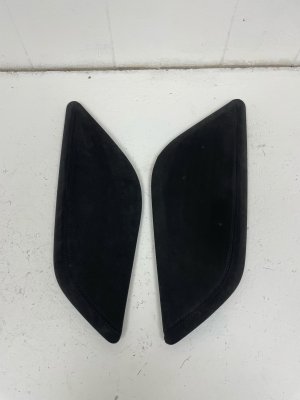
- Verify the Part Number and Trim Code: The base part number is 4G0863305, but it will have different suffixes depending on color and material (e.g., 4G0-863-305-A-24A for black without leather, 4G0-863-305-G-CA5 for beige with leather). Always confirm the seller's part came from a vehicle with the same interior trim code as yours.
- Inspect All Mounting Clips: This is the most critical inspection point. Carefully examine the back of the panel. Ensure every single mounting tab and clip location is intact and free of stress marks or cracks. A single broken clip can prevent the panel from sitting flush and cause persistent rattles.
- Check for Cosmetic Damage: Scrutinize the surface for deep scratches, gouges, or scuffs that won't come out with a simple cleaning. For leather-wrapped panels, check for peeling at the edges, cracks, or heavy wear. Minor scuffs in the footwell area are common and may be acceptable depending on your standards.
- Confirm Color and Finish: Photos can be deceiving. Confirm with the seller that the color is an exact match. Be aware of variations like "Soul Black" vs. other blacks, or different shades of beige and gray used across model years.
Replacement Procedure Overview
Replacing the center console side panels is a straightforward task that can be done by a DIYer with basic tools. The panels are primarily held in by clips.
- Gather Your Tools: You will need a set of plastic trim removal tools to avoid scratching or damaging the console and surrounding parts.
- Position the Front Seats: Move both front seats as far back and recline them to create maximum working space around the center console.
- Pry Off the Panel: Starting from the front (near the dashboard/footwell), carefully insert a plastic pry tool between the panel and the center console frame. Gently pry to release the clips, working your way towards the back of the panel.
- Disconnect Electrical Components (If Applicable): Some vehicles may have footwell lights or other small electrical components attached to the panel. If so, carefully disconnect the wiring harness before fully removing the panel.
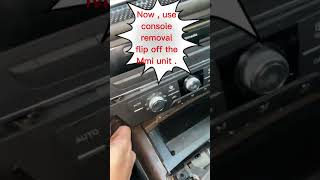
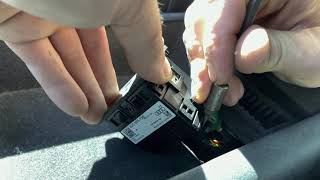
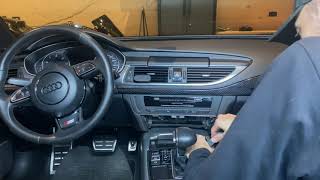
- Install the New Panel: Align the clips on the new panel with the slots in the console frame. Firmly press the panel into place until you hear and feel the clips snap securely. Start at one end and work your way to the other to ensure all clips are engaged. 🎬 Watch: How to remove interior trim on an Audi C7
Warning: While replacing just the side panels is simple, removing the entire center console assembly for other repairs is a much more involved job that requires disconnecting the MMI controller, shifter, and multiple wiring harnesses.
Recalls and Technical Service Bulletins (TSBs)
My research found no recalls or TSBs that specifically address the console side trim panels. However, there are a few related items for the C7 platform that owners should be aware of:
- NHTSA Recall 18V325000: Affects 2012-2018 A6 and A7 models for a malfunctioning passenger occupant detection sensor in the seat, which could cause the airbag to not deploy. This does not involve the console trim.
- NHTSA Recall 18V059000: Pertains to a potentially leaking fuel line on 2012-2014 A6 and A7 models.
- TSBs for Rattles: Audi has issued TSBs for other interior rattles, such as from the MMI screen area on newer models, but not specifically for these side panels. If you have a rattle, a loose or broken side panel clip is a likely culprit.
Cost Comparison
| Part Type | Estimated Cost |
|---|---|
| New OEM | $140 - $525 per side, depending on color and material |
| New Aftermarket | Not generally available |
| Used OEM | $40 - $150 per side |
| Shop Labor | $50 - $125 |
Frequently Asked Questions
Do I need to replace both console trim panels at the same time?
No, you can replace just the damaged side. However, if your interior is faded from age or sun exposure, a single new or used panel might not be a perfect color match to the older, opposite side.
Are the panels for the A6 and A7 the same?
Yes, the 2012-2018 Audi A6, S6, A7, S7, and RS7 all share the same C7 platform and use the same center console structure, so the side panels are interchangeable provided the color and material match.
Can I wrap my console trim panels in vinyl or new leather?
Yes, many owners choose to wrap their interior trim pieces, including these panels, in vinyl (like carbon fiber or gloss black) or have them professionally re-upholstered to repair damage or customize the look.
🎬 Watch: Full interior trim removal and carbon fiber wrappingIs it difficult to remove the entire center console?
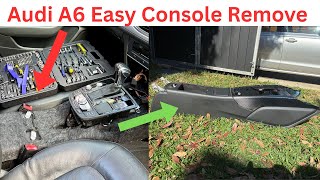
Yes, removing the entire center console is significantly more complex than just removing the side panels. It involves removing the rear air vents, shifter assembly, MMI control unit, and multiple hidden bolts and electrical connectors. This is generally only done for major repairs 🎬 See this step-by-step Audi A6 center console removal guide or to wrap the main upper trim pieces.
Helpful Videos
Technical Specifications
OEM Part Numbers: 4G0863305 4G0863305ERQ 4G0863305GCA5 4G0863305AKN4 4G0863305A24A 4G0863305ADA4
Material: Molded plastic, available with or without leather covering. Colors: Black, Beige, Gray, and other specific Audi interior shades. Fitment: Left (Driver Side) and Right (Passenger Side) specific parts.
We Have This Part in Stock

The information in this article is provided for general reference and educational purposes only. Vehicle specifications, procedures, and part compatibility can vary by production date, trim level, and region. Always consult your vehicle's factory service manual and verify part numbers before purchasing or performing repairs. Safety-critical components such as airbags, seat belts, and braking systems should be installed by a qualified professional.
- Audi S7:
- Audi A7:
- Audi S6:
- Audi A6:
- Audi RS7: