

2010-2024 Toyota 4Runner Console Guide: Overhead Rattles and Center Console Variants
A detailed reference for identifying, inspecting, and replacing the various overhead and center console panels in the 5th Generation Toyota 4Runner.
- There are two distinct parts: the 'overhead console' on the ceiling and the 'center console' between the seats. They are not interchangeable.
- Compatibility is critical. Match your vehicle's exact options like sunroof, Crawl Control (for overhead), and 4WD type (for center) before buying.
- The most common failures are minor: rattling from the overhead console due to broken clips and cosmetic scratches on the center console's silver trim.
- When buying used, the most important check is to inspect all plastic mounting tabs and clips for cracks or breaks, as this is the primary cause of rattles.
Understanding 4Runner Console Panels: Overhead vs. Center

When discussing console panels for the 2010-2024 Toyota 4Runner, it's essential to distinguish between two separate parts: the overhead console mounted on the ceiling and the center console located between the front seats. These parts have different functions, failure points, and part numbers. Buyers must carefully identify which console they need to replace, as they are not interchangeable and vary significantly based on vehicle trim and options.
Part Variants and Compatibility

Compatibility is the single most important factor when purchasing a replacement console panel. Using a part from the wrong trim level or option package will result in either a physically incorrect fit or non-functioning features.
Overhead Console Variants
The overhead console is one of the most option-dependent parts in the 4Runner interior. Before purchasing, you must verify your vehicle's exact configuration:
- Sunroof vs. No Sunroof: Models with a sunroof have a different console shape and include sunroof controls.
- Off-Road Controls: TRD Off-Road, TRD Pro, and some Trail Edition models are equipped with a larger overhead console that houses the Multi-Terrain Select (MTS) and Crawl Control dials. Standard models (like most SR5 and Limited trims) have a smaller, simpler console.
- HomeLink: The optional HomeLink universal garage door opener is integrated into some overhead consoles.
- Safety Connect: The SOS (Safety Connect) button is another feature that dictates the specific console version.
Warning: An overhead console from a TRD Off-Road model with Crawl Control will NOT fit an SR5 or Limited model that was not factory-equipped with these features. The wiring and headliner cutouts are completely different.
Center Console Variants
The center console is an assembly of multiple trim pieces. The main components that are often replaced are the upper trim panel around the shifter and the armrest lid.
- Trim Level Finishes: The silver-painted plastic trim on SR5 and TRD models is a common wear item, prone to scratches. Limited models may have different finishes. Some TRD models feature a carbon-fiber style pattern.
- Switches: The presence of heated seat switches, a rear window switch, or 4WD controls will determine the correct upper panel part number.
- Armrest Material: Armrest lids come in fabric, SofTex (a synthetic leather), and genuine leather, depending on the trim level (e.g., SR5 vs. Limited vs. TRD Pro). Colors also vary between black, beige, and gray.
- 4WD vs. 2WD: The upper console panel has a different cutout for part-time 4WD shifters versus 2WD models.
Symptoms of Failure

Failure of console panels is typically related to physical damage or wear rather than mechanical breakdown. The most common issues are cosmetic or result in annoying noises.
- Rattling or Buzzing Noises: This is the most frequent complaint, especially for the overhead console. It's often caused by broken or loose plastic retaining clips that can no longer hold the console tightly against the headliner. Rattles can also come from the sunroof wind deflector, but are often misdiagnosed as the console itself.
- Scratched or Peeling Finish: The silver-painted trim on the center console is notoriously easy to scratch from keys, phones, or normal use. This is a purely cosmetic issue but is very common.
- Broken Latches or Hinges: The latch for the center console armrest is a known weak point and can break, preventing the armrest from staying closed. The sunglass holder door in the overhead console can also fail.
- Malfunctioning Lights or Switches: In the overhead console, the map lights may stop working due to a bad connection, faulty switch, or a problem with the wiring harness connector.
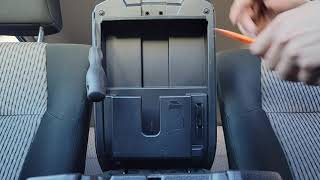
- Lifting or Peeling Upholstery: The vinyl or leather on the center console armrest can begin to lift or separate from the plastic base due to heat, sun exposure, and wear from elbows resting on it. 🎬 Learn how to remove the armrest lid for new upholstery.
Buying a Used Console Panel: Inspection Guide

A used OEM console panel can be an excellent value, offering perfect factory fitment and color matching that is often superior to new aftermarket parts. However, careful inspection is critical to avoid buying a part with the same problems you're trying to fix.
What to Check Before You Buy:
- Inspect All Mounting Points: This is the most important step. Carefully examine every plastic tab, clip receiver, and screw hole on the back of the panel. Look for stress marks (white lines in the plastic) or hairline cracks. A single broken tab can be the source of a persistent rattle. For overhead consoles, ensure the metal clips are present on the tabs, as they often get lost during removal.
- Verify Features and Part Numbers: Double-check that the used part has the exact same features as your original. For an overhead console, count the buttons and switches (Sunroof, MTS, Crawl Control, SOS). For a center console, verify the cutouts for 4WD, heated seats, etc. If possible, match the OEM part number stamped on the back of the part.
- Check the Surface Finish: Hold the panel under a light and inspect for deep scratches, gouges, and stains. Be aware that photos can hide the severity of cosmetic damage. For armrests, check for peeling upholstery, especially around the edges and near the latch.
- Test Moving Parts: If buying in person, operate any doors or latches. Open and close the sunglass holder on an overhead console. Test the latch on a center console armrest to ensure it clicks securely.
Pro Tip: When buying an overhead console, ask the seller to confirm it was removed from a vehicle with the same sunroof and off-road package as yours. This is the most common compatibility mistake.
Known Issues, TSBs, and Recalls
While there are no major recalls specifically for the plastic console panels themselves, there are related items to be aware of.
- Common Rattles: Rattles from the overhead console area are a frequent topic in owner forums. The cause is almost always broken plastic clips from removal/reinstallation or age. While not a safety issue, it is a common annoyance.
- Instrument Panel Recall (2025 Models): Certain 2025 model year 4Runners are part of a recall (Toyota reference 25TB08 / NHTSA ID 25V595000) where the 12.3-inch digital instrument panel may go blank at startup. This is a separate component from the center or overhead console trim but is located in the same general area of the dashboard.
- No Specific TSBs: Searches for Technical Service Bulletins (TSBs) related to console panel failure, rattles, or breakage did not yield specific documents. Most issues are addressed as standard repairs.
Replacement Overview and Difficulty
Replacing either the overhead or center console panels is a straightforward job that is very feasible for a DIYer with basic tools.
- Installation Difficulty: 1.5 out of 5
- Estimated Time: 0.5 - 1 hour
- Tools Required: Plastic trim removal tool kit, Phillips head screwdriver, 10mm socket (for some center console bolts).
Overhead Console Removal Steps:
- Open the sunglass holder.
- Remove the two Phillips head screws located inside the sunglass holder area.
- Gently pull the front edge (closest to the windshield) of the console straight down. It is held in by clips.
- Once the front releases, the rear will unhook. Lower the console and disconnect the electrical connector(s) by pressing the release tab. 🎬 Watch this quick walkthrough of the overhead console removal process.
Center Console Upper Trim Removal Steps:
- Unscrew the main gear shift knob and the 4WD shift knob (if equipped) by turning them counter-clockwise.
- Using a plastic trim tool, gently pry up the edges of the main console trim piece that surrounds the shifters and cup holders. It is held in by clips.
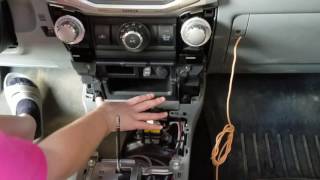
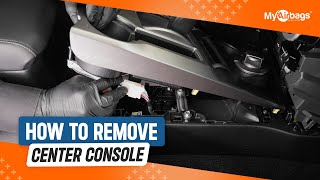
- Lift the panel up carefully and disconnect any electrical connectors for switches underneath. 🎬 See a step-by-step guide for removing the center console trim.
Warning: Always use plastic trim removal tools. Using a screwdriver or metal pry bar will scratch and gouge the soft plastic of the console and surrounding dashboard panels.
Cost Comparison
Prices for console components can vary widely based on the specific part and its features.
| Part | New OEM | New Aftermarket | Used OEM |
|---|---|---|---|
| Center Console Upper Panel (SR5/TRD) | $175 - $265 | $70 - $150 | $80 - $170 |
| Center Console Armrest Lid | $180 - $270 | $50 - $100 (Covers only) | $90 - $150 |
| Overhead Console (Base/SR5) | $200 - $350 | Not Widely Available | $100 - $200 |
| Overhead Console (TRD w/ Crawl Control) | $450 - $600+ | Not Available | $250 - $400 |
| Shop Labor | $75 - $150 | ||
Frequently Asked Questions (FAQ)
How do I stop my overhead console from rattling?
The most common cause of a rattling overhead console is broken or loose retaining clips. The best fix is to remove the console (two screws in the sunglass holder, then pull down) and inspect the clips. If the clips on the console body are broken, the console needs to be replaced. If the metal clips that slide onto the plastic tabs are missing, you may be able to order new ones. Some owners also add small pieces of foam tape to pressure points to dampen vibrations.
Can I upgrade to a TRD overhead console with Crawl Control in my SR5?
No, this is not a simple plug-and-play swap. The vehicle's wiring harness, body control module (BCM), and other systems are not equipped to handle the inputs from the TRD-specific off-road controls. The headliner cutout is also a different size. You must replace your console with one that matches your vehicle's original factory options.
My center console trim is badly scratched. What's the best fix?
You have three main options. 1) Replace the panel with a new or used OEM part for a perfect match. 2) Purchase an aftermarket overlay kit, which is a thin piece of plastic or vinyl that sticks on top of your existing trim. 3) Remove the panel, sand it smooth, and repaint it with an interior trim paint. For most people, replacing the panel is the most reliable and durable solution.
Is the center console armrest latch replaceable by itself?
While Toyota typically sells the entire armrest lid assembly, some aftermarket companies sell heavy-duty replacement latches specifically to address this common failure point. This can be a much more affordable option than replacing the entire lid if only the latch is broken.
Helpful Videos
Technical Specifications
OEM Part Numbers: 5880435540 5880435550 58821351850 5891035340C3 5891035360C5 5891035380C0 81260-35550-B0 81260-35650-B0 81260-35651-B0 81260-35740-B0 8126035680B0 8126035681B0 8126035770B0 8126035771B0 58905-35130-C0 63395-12150
Varies significantly by trim and options. Physical inspection and matching to vehicle features is required.
We Have This Part in Stock



The information in this article is provided for general reference and educational purposes only. Vehicle specifications, procedures, and part compatibility can vary by production date, trim level, and region. Always consult your vehicle's factory service manual and verify part numbers before purchasing or performing repairs. Safety-critical components such as airbags, seat belts, and braking systems should be installed by a qualified professional.
- Toyota 4Runner:
- 🎬 Helpful Videos
- 🛍️ Shop This Part
- Understanding 4Runner Console Panels: Overhead vs. Center
- Part Variants and Compatibility
- Overhead Console Variants
- Center Console Variants
- Symptoms of Failure
- Buying a Used Console Panel: Inspection Guide
- What to Check Before You Buy:
- Known Issues, TSBs, and Recalls
- Replacement Overview and Difficulty
- Overhead Console Removal Steps:
- Center Console Upper Trim Removal Steps:
- Cost Comparison
- Frequently Asked Questions (FAQ)
- 🎟️ Get 5% Off