

2013-2019 Lincoln MKT Console Panel: Latch Failures and Option Matching
A guide to the common broken armrest latch, peeling trim, and how to buy the correct used console by matching critical options like Lane Departure Warning.
- Compatibility is critical: The replacement console must match your MKT's specific options (WITH Lane Departure Warning, WITHOUT Park Assist, WITHOUT the 2nd-row console).
- The most common point of failure is the armrest lid latch, which breaks and prevents the console from staying closed.
- Before purchasing a used unit, always verify the interior trim color code (found on the driver's door jamb sticker) to ensure a perfect match.
- Inspect used consoles for peeling trim, especially around the cupholders, and ensure the wiring harness and all mounting points are intact.
Known Issues and Symptoms of Failure
Failures of the Lincoln MKT center console are typically related to physical wear and tear on high-contact surfaces rather than electrical problems. These issues can affect convenience, interior appearance, and the overall ownership experience.
Broken Console Lid Latch
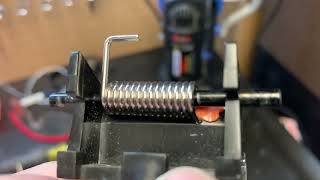
The most common and frustrating issue is the failure of the console armrest latch. The latch mechanism uses a small plastic hook that becomes brittle and snaps over time from repeated use and pressure. Because the armrest hinge is spring-loaded, a broken latch means the lid will no longer stay closed. It will pop open on its own, especially when driving over bumps or accelerating. This problem is shared with the Ford Flex, which uses an identical console design. Ford previously issued a Technical Service Bulletin (TSB 09-25-2) for the Flex, 🎬 Watch: DIY Ford Flex armrest latch repair guide indicating that a replacement latch kit was available without needing to replace the entire lid assembly.
Worn or Peeling Trim
Like many vehicles from this era, the trim surfaces on the MKT console can show significant wear. The silver-painted plastic trim around the gear shifter and cupholders is prone to scratching and peeling, exposing the black plastic underneath. Additionally, the leatherette or vinyl material on the side panels of the console can begin to bubble or peel away from the base structure due to failing adhesive, often aggravated by heat and contact from the driver's and passenger's legs.
Inoperative Buttons or Controls
While less common, some owners have experienced failures of the electronic control panel housed within the console. This can lead to unresponsive buttons for the radio, climate controls, or other vehicle features. Diagnosing this can be complex, as the issue could be the button itself, the underlying control module, or a wiring fault.
Pro Tip: A broken console lid latch can sometimes be repaired without replacing the entire lid. Some owners have successfully fashioned a new latch pin from a small finishing nail, while others use Velcro strips as a simple, effective way to keep the lid closed.
Buying a Used 2013-2019 MKT Console Panel
Purchasing a used console is an excellent way to save money, but careful verification is essential to ensure you get a part that fits and functions correctly. The MKT console has several variations based on vehicle options.
CRITICAL: Verify Vehicle Options
Before buying, you must confirm the donor vehicle's options match your own. This specific console assembly is for models that meet three criteria:
- Equipped WITH Lane Departure Warning: Look for the button showing a car drifting out of a lane.
- WITHOUT Automatic Park Assist: There should NOT be a button with a steering wheel icon and a 'P'.
- WITHOUT the optional second-row center console: These models have a pass-through design for the front console, not a unit that connects to a large rear console with a refrigerator.
Failure to match these options will result in incorrect button layouts and incompatible wiring harnesses.
Physical Inspection Checklist
- Check the Lid Latch: Open and close the armrest several times. Ensure the latch clicks securely and holds the lid down against its spring pressure. Inspect the plastic hook on the lid for any stress marks or cracks.
- Inspect Trim Surfaces: Look closely at the silver trim for peeling paint. Check the side panels for any signs of bubbling or separating material.
- Test Hinges: Make sure the armrest hinge operates smoothly and is not loose or cracked.
- Examine Mounting Points: Flip the console over and check that all plastic mounting tabs and screw holes are intact. Broken tabs will cause the console to fit poorly and creak or rattle once installed.
- Verify Wiring Integrity: Ensure the main wiring harness is included and that no connectors have been cut. Sourcing and splicing individual connectors can be very difficult.
Match Your Interior Color
Lincoln offered several interior colors for the MKT. The color of the console plastic and armrest must match your interior. Locate the Vehicle Certification Label on your driver's side door jamb. Find the 'INT TR' (Interior Trim) code and match it with the part you intend to buy.
Technical Service Bulletins (TSBs) & Recalls
As of mid-2026, there are no specific recalls or TSBs issued by Lincoln directly for the front center console panel on the 2013-2019 MKT. While numerous recalls exist for the MKT, they pertain to other areas like rearview cameras, B-pillar trim, and suspension components. The common latch failure was addressed for the related Ford Flex under TSB 09-25-2, but not officially for the MKT.
Cost Comparison
| Part Type | Estimated Cost |
|---|---|
| New OEM | $450 - $700+ for the main console base assembly, not including all top panels or lids. |
| New Aftermarket | Not commonly available. Repair kits for specific components like latches may be found for $20 - $50. |
| Used OEM | $150 - $350 depending on condition, color, and included components. |
| Shop Labor | $150 - $250 |
Replacement Guide (Difficulty: 2/5)
Replacing the center console is a manageable DIY project that requires basic tools and patience. The process generally takes 1-2 hours.
- Disconnect the Battery: Always disconnect the negative battery terminal before working on interior components with electrical connections.
- Remove Side Panels: Using a plastic trim removal tool, carefully pry off the side panels that run along the transmission tunnel and connect to the console.
- Remove Screws: Locate and remove all retaining screws. These are typically 7mm hex-head screws and are found:
- At the rear of the console, often on the sides near the floor.
- Inside the main storage compartment under a small mat.
- Underneath the cupholder insert or other small trim pieces.
- Free the Shifter Trim: Put the vehicle in Neutral to allow the shifter and surrounding trim to be lifted up and away.
- Lift and Disconnect: Carefully lift the console assembly. It will still be attached by several electrical connectors for power outlets, lights, and control buttons. Methodically disconnect each one, paying attention to their locking tabs.
- Install the New Console: Installation is the reverse of removal. Connect all electrical plugs before seating the new console. Start all screws by hand to avoid cross-threading, and do not overtighten them in the plastic bosses. Reconnect the battery and test all functions before re-installing the final trim pieces.
Frequently Asked Questions (FAQ)
Can I fix just the broken armrest latch?
Yes. While finding an official latch repair kit can be difficult, many owners perform a DIY fix using a small finishing nail cut to size to replace the broken plastic pins. Alternatively, applying strong Velcro strips to the lid and console body is a simple and effective workaround.
Can I upgrade to a console with different options?
This is not recommended. The wiring harnesses are different for consoles with features like Park Assist. Attempting to swap them would require complex and difficult wiring modifications.
What tools are needed to replace the MKT center console?
You will typically need a set of plastic trim removal tools, a 7mm socket with an extension, and possibly a Phillips head screwdriver. A small flathead screwdriver can also be helpful for releasing electrical connector tabs.
Is the wood or aluminum trim on the console replaceable by itself?
Generally, no. The decorative trim pieces are often permanently attached to the larger console panel or lid. If your trim is damaged, you will likely need to replace the entire panel that it is part of.
Helpful Videos
Technical Specifications
OEM Part Numbers: AE9Z-74045-E24CA AE9Z74045E24CA DE9Z-74045-A36HA DE9Z74045A36HA DE9Z-74045-A76DA DE9Z74045A76DA DE9Z-7406024-AC DE9Z7406024AC
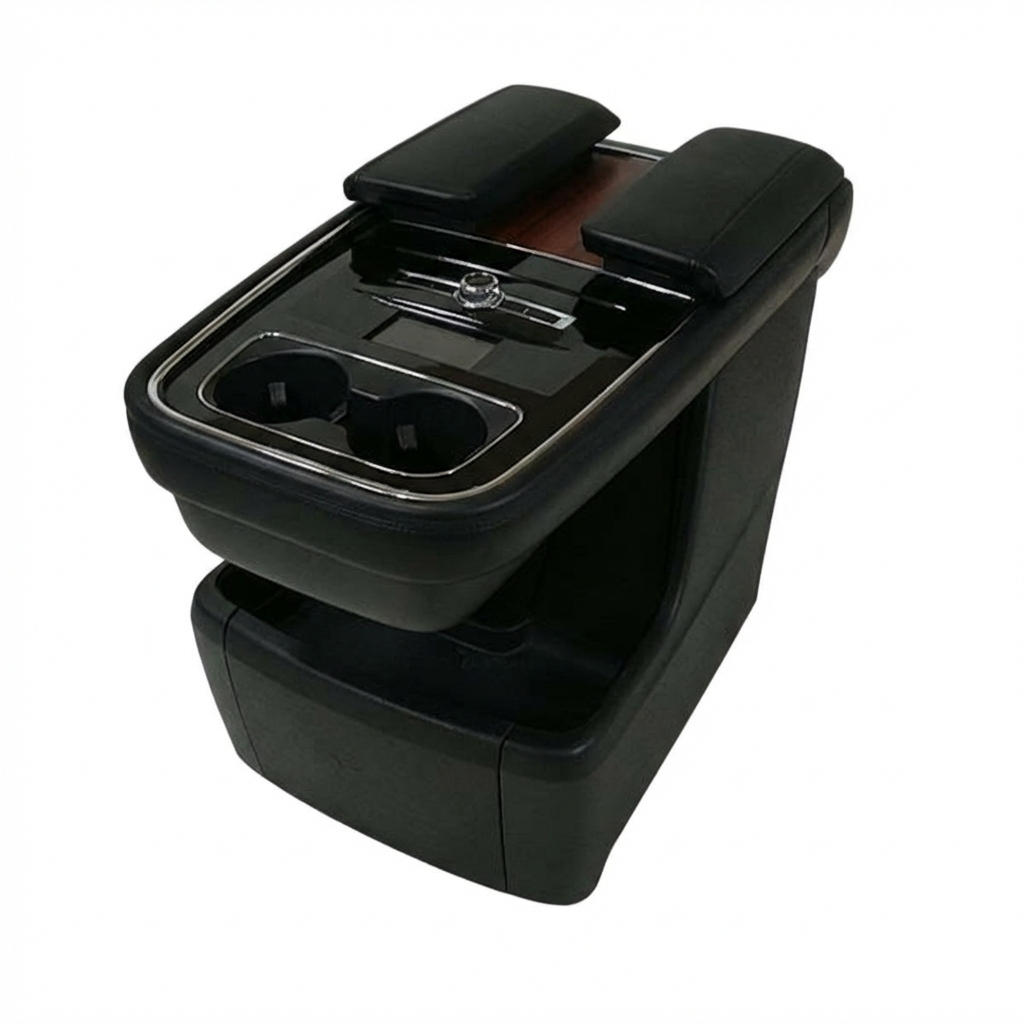
Varies by vehicle options. Key differentiators are the button cutouts for Lane Departure Warning and Park Assist, and whether it is designed for a vehicle with or without the optional second-row console.
We Have This Part in Stock




The information in this article is provided for general reference and educational purposes only. Vehicle specifications, procedures, and part compatibility can vary by production date, trim level, and region. Always consult your vehicle's factory service manual and verify part numbers before purchasing or performing repairs. Safety-critical components such as airbags, seat belts, and braking systems should be installed by a qualified professional.
- Lincoln MKT:
- 🎬 Helpful Videos
- 🛍️ Shop This Part
- Known Issues and Symptoms of Failure
- Broken Console Lid Latch
- Worn or Peeling Trim
- Inoperative Buttons or Controls
- Buying a Used 2013-2019 MKT Console Panel
- CRITICAL: Verify Vehicle Options
- Physical Inspection Checklist
- Match Your Interior Color
- Technical Service Bulletins (TSBs) & Recalls
- Cost Comparison
- Replacement Guide (Difficulty: 2/5)
- Frequently Asked Questions (FAQ)
- 🎟️ Get 5% Off