

2007-2012 Lexus LS460 Console Panel: Fixing Sticky Trim & Compatibility Guide
Your complete guide to diagnosing common failures like melting surfaces and choosing the correct used console for your specific LS460 configuration.
- The most common failure is the interior plastic surfaces becoming sticky or melting, a known defect Lexus once covered under an expired warranty program.
- Compatibility is extremely specific. You must match your vehicle's wheelbase (SWB/LWB), rear A/C options, and interior color code to get the correct part.
- Verify your interior color code (e.g., LA20 for Black) on the driver's door jamb sticker before purchasing a used part to ensure a perfect match.
- Individual components like the armrest lid or shifter trim can often be purchased and replaced separately, which is much cheaper than replacing the entire console.
Common Failure Points and Symptoms

While generally well-built, the console panels on the 2007-2012 LS460 are known for several specific issues, mostly related to material degradation over time due to heat and humidity.
Sticky or Melting Surfaces
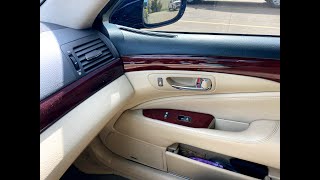
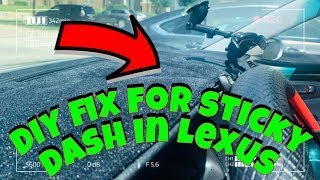
This is the most infamous issue affecting this generation of Lexus vehicles. The soft-touch plastic surfaces, particularly on the sides of the console and the console box lid, can degrade. This is caused by a reaction of the plastic to prolonged heat and humidity. The surface becomes shiny, soft, and unpleasantly sticky to the touch 🎬 Watch: How to easily clean and fix sticky interior panels, sometimes leaving a chalky residue on fingers. In severe cases, the material can be easily gouged or scratched.
Peeling or Worn Finishes
The silver-painted trim around the gear shifter and on various control buttons is prone to peeling and wear. Constant contact from hands and cleaning products can break down the finish, exposing the black plastic underneath. Similarly, the leather on the armrest can become worn, compressed, or cracked from the driver's elbow resting on it over many years.
Broken Latches and Mechanisms
Mechanical components within the console can also fail. The most common culprits are the ash tray lid failing to latch closed and the main armrest/console box latch breaking, preventing it from staying shut. The smooth, damped movement of these doors can also be lost if the internal springs or gears fail.
Malfunctioning Electronics
The console houses numerous electronic components that can fail with age. This includes burnt-out LED illumination behind buttons, dead 12V power outlets, or unresponsive switches for features like suspension mode or traction control. Sometimes, these issues can be caused by a simple fuse, but they can also point to a failure within the switch itself or its wiring.
Known Issue: Lexus acknowledged the sticky/melting interior panel problem and issued a Warranty Enhancement Program (WEP), also known as Customer Support Program ZLZ. This program covered the replacement of affected panels, including the console box, on 2007-2014 LS460 models. However, this program expired for most vehicles and is no longer active. When buying a used part, assume it was not replaced under this program unless the seller can provide documentation.
Buying a Used Console Panel: A Step-by-Step Guide

Purchasing a used console panel for an LS460 is complex due to the high number of variations. Following these steps is critical to ensure you get a part that fits and functions correctly.
Step 1: Identify Your Vehicle's EXACT Configuration
This is the most important step. The fitment of the center console depends on several key options. You cannot mix and match.
- Wheelbase: Do you have a standard wheelbase (SWB) or a Long Wheelbase (LWB) model? LWB models may have different console configurations, especially related to rear-seat features.
- Rear AC & Entertainment: Does your car have rear climate controls and vents on the back of the center console? Does it have a rear entertainment display? The presence of these options completely changes the rear section of the console.
- Suspension: Does your car have standard suspension or the optional air suspension? The control button layout on the console is different.
- Heated/Cooled Seats: While standard on most, verify your car has these options as the controls are located on the console.
Step 2: Match Your Interior Color Code
To get a perfect color match, you must identify your car's trim code. This is found on the manufacturer's sticker in the driver's side door jamb.
On the sticker, look for the line that starts with "C/TR". The second code, a four-character sequence, is your interior trim code. Common codes include:
- LA20: Black
- LA01 or LA02: Gray
- LA40: Ivory / Mellow White
Pro Tip: When ordering, provide the seller with your VIN and the trim code. A reputable seller will use this information to verify an exact match before shipping.
Step 3: Physical Inspection Checklist for a Used Part
- Check for Stickiness: Ask the seller to take a short video of them touching the soft-plastic surfaces. This is the best way to confirm the part is not suffering from the common melting issue.
- Inspect Finishes: Look closely at photos of the silver trim and buttons for any signs of peeling or bubbling.
- Test Mechanicals: If possible, ask the seller to test the armrest latch, cupholder lid, and any other moving doors to ensure they open, close, and latch correctly.
- Examine Mounting Points: Check for any broken plastic tabs or clips, especially on the underside. These are essential for a rattle-free installation.
- Verify Wiring: Ensure all wiring harnesses and connectors are intact and have not been cut or damaged.
Installation Overview

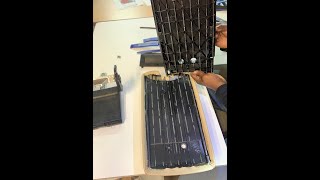
Replacing the center console assembly is a feasible DIY job for someone with patience and the right tools, but it is involved. The process generally involves carefully prying off various trim pieces, starting from the shifter surround 🎬 Watch: How to disassemble the center console assembly and working your way back. Using plastic trim removal tools is essential to avoid scratching or breaking adjacent panels. The main console box is typically held in by several bolts. Always disconnect the battery before unplugging any electrical connectors.
Cost Comparison
| Part Type | Estimated Cost |
|---|---|
| New OEM (Full Assembly) | $1,200 - $1,800+ |
| New OEM (Individual Pieces) | $150 - $500+ per piece |
| Used OEM (Full Assembly) | $250 - $600 |
| Shop Labor Cost | $200 - $400 |
Frequently Asked Questions (FAQ)
Can the sticky/melting surface be repaired?
Yes, but it's a cosmetic repair. There are specialty kits available that involve cleaning the sticky residue off and applying a new color-matched, matte topcoat. This is a labor-intensive process and the results can vary. For a perfect factory finish, replacing the panel is the only option.
Do I need to reprogram anything after replacing the console?
No. The center console panels and their associated switches are generally plug-and-play. As long as you have purchased a part with the exact same options as your original, no programming is required.
Can I just replace the armrest lid?
Yes. The armrest lid is often sold separately as a used part and can be replaced without removing the entire console. 🎬 See this step-by-step armrest lid replacement walkthrough The replacement involves removing a rear trim panel and a few screws. You can also buy just a leather cover and have an upholstery shop re-wrap your existing lid, which can be a cost-effective option for a perfect match.
Some of my console buttons are dark. What's the fix?
The buttons in the LS460 console are illuminated by small LEDs soldered onto a circuit board. Over time, these LEDs can fail, causing dim or dark spots. Repairing this requires disassembling the switch unit and soldering new 1206-size SMD LEDs onto the board. It is a delicate job that requires electronics repair skills.
Helpful Videos

Technical Specifications
OEM Part Numbers: 35971-50091 58805-50050-B0 58805-50060-B0 5880550050B0 5880550060B0 58810-50070-A0 58810-50070-B0 58810-50070-C0 58810-50120-A2 58810-50120-C1 58810-50251-A0 5881050070A0 5881050251A0 58822-50070 58903-50040-B0
Compatibility is determined by vehicle options (wheelbase, rear AC, suspension) and interior color code (e.g., LA20, LA01, LA40).
We Have This Part in Stock



The information in this article is provided for general reference and educational purposes only. Vehicle specifications, procedures, and part compatibility can vary by production date, trim level, and region. Always consult your vehicle's factory service manual and verify part numbers before purchasing or performing repairs. Safety-critical components such as airbags, seat belts, and braking systems should be installed by a qualified professional.
- Lexus LS460:
- 🎬 Helpful Videos
- 🛍️ Shop This Part
- Common Failure Points and Symptoms
- Sticky or Melting Surfaces
- Peeling or Worn Finishes
- Broken Latches and Mechanisms
- Malfunctioning Electronics
- Buying a Used Console Panel: A Step-by-Step Guide
- Step 1: Identify Your Vehicle's EXACT Configuration
- Step 2: Match Your Interior Color Code
- Step 3: Physical Inspection Checklist for a Used Part
- Installation Overview
- Cost Comparison
- Frequently Asked Questions (FAQ)
- 🎟️ Get 5% Off