

2018-2023 Kia Stinger Console: Shifter Type, Button Failures, and Trim Issues
This guide covers the critical differences between console types, common electronic and cosmetic problems, and how to buy the right used part for your 2018-2023 Kia Stinger.
- The most critical factor when buying is matching the shifter type: electronic 'shift-by-wire' (mainly GT2 trim) or mechanical 'shift-by-cable' (other trims). They are not interchangeable.
- Beyond the shifter, you must match the exact button layout for options like heated/cooled seats and camera views to ensure all features work.
- Common failures include unresponsive buttons, cosmetic peeling of the silver trim, and electronic glitches with the shift-by-wire system like the 'Shift to P' error.
- Replacement is a feasible DIY job requiring basic tools and careful prying of trim panels; no programming is needed.
Critical Compatibility Warning: Shift-by-Wire vs. Shift-by-Cable
Warning: Before purchasing a replacement console panel, you MUST identify which gear selector your Kia Stinger has. The panels for the two types are NOT interchangeable.
The 2018-2023 Kia Stinger was equipped with two different types of automatic gear selectors, and the console panel is designed specifically for one or the other.
- Shift-by-Wire (SBW): This is a smaller, electronic joystick-style shifter that returns to a central position after you select a gear. It sends an electrical signal to the transmission. Generally, the high-end GT2 trim level is equipped with the shift-by-wire system.
- Shift-by-Cable: This is a traditional, mechanical gear lever that moves through a gate (P-R-N-D) and stays in the position you select. It is physically connected to the transmission by a cable. Most other trims, including the Base, Premium, GT, and GT1, typically use this system.
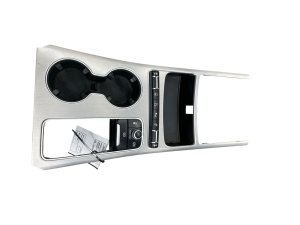
Visually inspect your current shifter and compare it to the part you plan to buy. A panel for a shift-by-cable car will have a long, open slot for the lever, while a shift-by-wire panel will have a smaller, more compact opening for the electronic joystick.
Symptoms of a Failing Console Panel
Problems with the Stinger's console panel can be electronic, mechanical, or purely cosmetic.
Electronic and Shifter-Related Symptoms
- "Shift to P" Warning: The instrument cluster may display a "Shift to P" warning and the car may remain in accessory mode even when the shifter is in Park. This can be caused by a faulty park position switch within the shifter assembly or a software glitch.
- Shifter Jumps to Neutral: When using the shift-by-wire system, some owners report that if you move the joystick too aggressively, it can overshoot Drive or Reverse and land in Neutral. This was more common on early models and may require a more deliberate shifting motion to avoid.
- Unresponsive Buttons: Buttons for heated/ventilated seats, drive mode, or the parking brake may stop working. This can be caused by a failed switch, a loose electrical connector underneath the panel, or a blown fuse.
- Sticky or Gritty Buttons: Buttons may feel strange to press, make a clicking noise, or be slow to return to their position. This can happen even without spills and may be caused by dust or debris getting into the switch mechanism.
Cosmetic Symptoms
- Peeling Trim: The silver or chrome-painted finish on the trim pieces around the shifter and buttons can start to peel or flake off over time. This is often due to wear from hands, cleaning products, or heat.
- Scratches and Scuffs: The console is a high-touch area and is prone to scratches from keys, phones, or other objects.
Known Issues, Recalls, and TSBs
While there are no recalls specifically for the console panel itself, several important safety recalls exist for the 2018-2023 Stinger that owners should be aware of, as they relate to the vehicle's electrical system and fire risk.
- NHTSA Campaign 18V754000: Affects some 2018 models. A front wiring harness could be damaged by a metal burr, potentially causing an electrical short and increasing the risk of a fire.
- HECU Fire Risk: An expanded recall affects certain 2018-2021 Stinger models. An electrical short can occur in the Anti-lock Brake Hydraulic Electronic Control Unit (HECU), potentially causing an engine compartment fire.
- NHTSA Campaign 24V169000: For 2018-2023 Stingers with the 3.3L engine, the left turbocharger oil feed pipe may deteriorate and leak oil, creating a fire risk.
Pro Tip: Some electronic shifter issues, like the "Shift to P" error, may be resolved with a software update from a Kia dealer. It's worth checking for any available Technical Service Bulletins (TSBs) related to the transmission or body control module.
Buying a Used 2018-2023 Stinger Console Panel
Buying a used OEM console panel is often the most cost-effective way to fix a broken or cosmetically damaged unit. Aftermarket support for the entire console assembly is virtually nonexistent, with options limited to expensive carbon fiber overlays or simple stick-on trim pieces. Here’s what to look for in a used part.
How to Inspect a Used Console Panel
- Confirm Shifter Type: This is the most important step. Ensure the panel matches your car's shift-by-wire or shift-by-cable system.
- Match Button Layout EXACTLY: Console panels are configured for specific vehicle options. Carefully compare the button layout to your original panel. Check for the presence and correct location of switches for:
- Heated Seats
- Ventilated (Cooled) Seats
- Heated Steering Wheel
- 360-degree Camera View
- Parking Sensors
- Inspect for Cosmetic Damage: Look closely at high-resolution photos or inspect the part in person. Check for peeling paint on the silver trim, deep scratches in the plastic, and wear on the button graphics.
- Check All Mounting Points: Flip the panel over and inspect the plastic tabs and screw holes. These are essential for a secure, rattle-free installation. If tabs are broken, the panel may not sit flush or could vibrate while driving.
- Verify the Shifter (If Included): If the shift-by-wire joystick is included, ensure it moves freely and the boot is not torn.
Cost of Replacing a Kia Stinger Console Panel
Prices can vary based on the specific configuration (shifter type and options) and condition.
| Part Type | Estimated Cost |
|---|---|
| New OEM | $110 - $250 (for the main upper panel only) |
| Used OEM | $75 - $200+ (depending on condition and included components) |
| Aftermarket | Not commonly available as a full replacement. Stick-on trim kits cost $30-$100. |
| Shop Labor | $100 - $200 |
Replacement Difficulty: 2/5
Replacing the center console is a manageable DIY project for those with patience and basic tools. The process mainly involves removing trim pieces, unscrewing bolts, and disconnecting wiring. No special programming is required.
Estimated Time: 1-1.5 hours
Tools Needed:
- Plastic trim removal tools (to prevent scratching)
- 10mm socket with extension
- Phillips head screwdriver
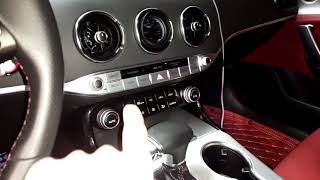
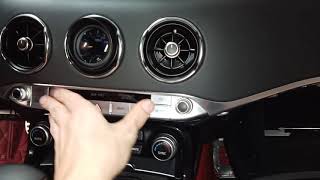
The basic process involves prying off the side panels 🎬 Check out these pro tips for removing interior trim safely. of the console, removing screws located at the sides and inside the armrest storage bin, carefully lifting the main console trim (starting from the front near the dash), and disconnecting the various electrical connectors for the switches and shifter before fully removing the unit.
Frequently Asked Questions (FAQ)
How do I know for sure if I have a shift-by-wire or shift-by-cable Stinger?
Look at your gear shifter. If it's a small, electronic joystick that always returns to the middle, it's shift-by-wire (common on GT2 trims). If it's a larger lever that you physically move and it stays in the P, R, N, or D position, it's shift-by-cable.
Can I just replace the peeling silver trim piece?
Generally, no. The silver trim is often integrated into the larger console panel assembly. To fix it with an OEM part, you typically have to replace the entire panel. Alternatively, you can use aftermarket vinyl wraps or stick-on covers to hide the damage.
My heated seat button stopped working. Is the whole console bad?
Not necessarily. The first step is to check the fuses related to the climate control and interior functions. If the fuses are good, the problem could be a loose connector under the console or a failure of the individual switch. In some cases, the entire switch bank may need to be replaced, which can often be done without replacing the entire console panel.
Is it hard to replace the console panel myself?
It is a straightforward but detailed process. You need to be careful not to break the plastic clips on the trim pieces. Watching a video tutorial of the process is highly recommended before you begin. The main challenges are keeping track of screws and being gentle when prying panels and disconnecting wires.
Helpful Videos
Technical Specifications
OEM Part Numbers: 84610-J5500CLA 84610J5500CDY 84640-J5000WK 84640J5000 84641J5000WK 84650J5080CLA 84657J5100WK 84658J5100WK 84660J5200CD4
Varies by trim. Key variants include Shift-by-Wire (SBW) vs. Shift-by-Cable, and configurations with/without buttons for heated seats, ventilated seats, heated steering wheel, and 360-degree camera.
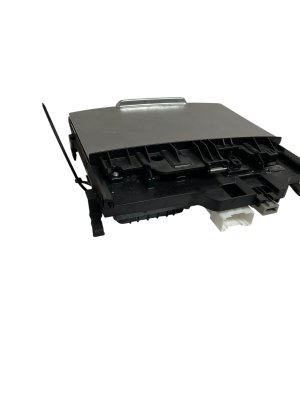
We Have This Part in Stock



The information in this article is provided for general reference and educational purposes only. Vehicle specifications, procedures, and part compatibility can vary by production date, trim level, and region. Always consult your vehicle's factory service manual and verify part numbers before purchasing or performing repairs. Safety-critical components such as airbags, seat belts, and braking systems should be installed by a qualified professional.
- Kia Stinger:
- 🎬 Helpful Videos
- 🛍️ Shop This Part
- Critical Compatibility Warning: Shift-by-Wire vs. Shift-by-Cable
- Symptoms of a Failing Console Panel
- Electronic and Shifter-Related Symptoms
- Cosmetic Symptoms
- Known Issues, Recalls, and TSBs
- Buying a Used 2018-2023 Stinger Console Panel
- How to Inspect a Used Console Panel
- Cost of Replacing a Kia Stinger Console Panel
- Replacement Difficulty: 2/5
- Frequently Asked Questions (FAQ)
- 🎟️ Get 5% Off