

2015-2018 Kia Sedona Console Panel: Fixing Broken Latches and Faulty USB Ports
A complete guide to diagnosing common physical and electrical issues with the center console in the third-generation Kia Sedona, and what to look for when buying a used replacement.
- The most common failure is a broken armrest lid latch, which is often sold as part of the complete armrest assembly.
- Verify features and color before buying a used console, as they vary significantly between trim levels.
- Inoperative USB/12V ports are frequently caused by a simple blown fuse, which should be checked before replacing any parts.
- Replacement is a straightforward DIY task requiring basic tools and careful removal of trim panels to avoid damage.
Symptoms of a Failing Console Panel

Failure of the console panel in the 2015-2018 Kia Sedona is typically related to physical damage from regular use or electrical issues with its integrated components. These problems are usually straightforward to identify.
1. Broken Armrest Latch or Hinge
The most common failure point is the latch that secures the armrest lid. Repeated opening and closing can cause the plastic latch or its spring mechanism to break, preventing the lid from staying closed. The hinges can also crack or break, causing the lid to become misaligned or detach completely. You may notice the lid rattling or refusing to lock into place.
2. Inoperative USB or 12V Power Ports
If you can no longer charge your phone or other devices, the issue might be with the console's built-in ports. This can be caused by a blown fuse, a loose internal wiring connection, or physical damage to the port itself from repeated plugging and unplugging of cables. Sometimes, debris can accumulate inside the port, preventing a proper connection.
3. Peeling, Scratched, or Cracked Trim
The console's surfaces are subject to constant contact, leading to cosmetic wear. You might see the finish peeling away, deep scratches from keys or other objects, or cracks in the plastic, especially around high-stress areas like the cupholders or mounting points. While this doesn't affect functionality, it can significantly detract from the interior's appearance.
4. Sticky or Non-Functioning Buttons
For models equipped with buttons on the console (such as for heated seats), spilled drinks or food can cause them to become sticky and difficult to operate. In some cases, the electronic switch beneath the button can fail, rendering the function inoperable.
Buying a Used 2015-2018 Sedona Console Panel: An Inspection Checklist

A used OEM console panel can be a cost-effective replacement. However, careful inspection is crucial to ensure you get a quality part that matches your vehicle's specific trim and features.
Pro Tip: The center console is made of multiple components. Identify the specific piece you need (e.g., armrest lid, main body, rear cover) and match the part number exactly. Sellers on platforms like eBay often list these pieces separately.
1. Verify Trim Level and Features
Sedona consoles vary significantly by trim level. Before buying, check for the presence and correct type of features like USB ports, 12V outlets, and heated seat switches. The color and texture of the trim (e.g., gray, beige, leather) must also match your interior. Using your vehicle's VIN to confirm the original part number is the most reliable method.
2. Inspect the Armrest Lid Thoroughly
This is the most failure-prone component. Open and close the lid multiple times, checking for a solid, positive click from the latch. Examine the latch mechanism itself for any cracks or stress marks. Wiggle the lid to ensure the hinges are tight and free of cracks.
3. Check All Moving Parts
Test any sliding trays, cupholder mechanisms, or removable dividers. Ensure they move smoothly without binding. For cupholders with spring-loaded grips, press on them to confirm they are functional.
4. Examine Electrical Connectors and Ports
Look at the underside of the console and inspect the wiring harnesses and connector plugs for any signs of damage, corrosion, or cut wires. Check the USB and 12V ports for debris or bent pins. While you can't test them electronically, a clean physical appearance is a good sign.
5. Look for Hidden Structural Damage
Carefully inspect all mounting points and screw holes. Cracks in these areas can prevent the console from being installed securely, leading to rattles and squeaks. Flex the main body of the console slightly to reveal any hidden stress fractures.
Known Issues, Recalls, and Technical Service Bulletins (TSBs)
While there are no recalls specifically for the center console panel, the 2015-2018 Sedona has been subject to several recalls and TSBs for other components. Notably, recall SC164 (NHTSA 18V338) was issued for a problem with the Power Sliding Door (PSD) module, which could prevent the door from auto-reversing if an obstruction was detected. Another recall involved the Occupant Detection System (ODS) wiring harness under the passenger seat, which could break and cause the airbag to deploy improperly in a crash. While not directly related to the console, these highlight the importance of checking for open recalls on any vehicle.
No specific TSBs for the center console were found, but general TSBs exist for issues like troubleshooting USB ports across various Kia models.
🎬 See how these multimedia and USB power ports function.Replacement Guide

Replacing the center console is a manageable DIY project for those with basic tools and patience. The process generally involves removing trim pieces, disconnecting electrical connectors, and unfastening several bolts and screws.
- Disconnect the Battery: Before starting any work involving electrical components, disconnect the negative battery terminal.
- Remove the Shift Knob: Pull straight up on the gear shift knob to remove it.
- Pry Up the Upper Console Cover: Using a plastic trim removal tool, carefully pry around the edges of the upper console cover (the piece surrounding the shifter and cupholders) to release the clips holding it in place.
- Disconnect Electrical Connectors: Once the upper cover is loose, lift it carefully and disconnect any electrical connectors for the power outlets, USB ports, and switches.
- Remove Mounting Hardware: Locate and remove the screws and bolts securing the main console assembly to the vehicle floor. These are often found inside the storage compartment and on the sides of the console.
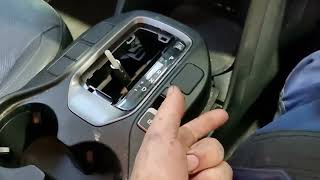
- Remove the Console Assembly: With all fasteners and connectors removed, the entire console assembly can be lifted out of the vehicle. 🎬 Watch a step-by-step walkthrough of the center pedestal removal.
- Installation: Installation is the reverse of removal. Ensure all connectors are securely plugged in and replace any clips that were damaged during removal.
Warning: Use plastic trim removal tools to avoid scratching or damaging the console and surrounding dashboard panels.
Cost of a Replacement Console Panel (2015-2018 Kia Sedona)
| Part Type | Estimated Cost |
|---|---|
| New OEM (Armrest Assembly) | $310 - $480 |
| New OEM (Other Console Pieces) | $40 - $190 |
| New Aftermarket | Not Commonly Available |
| Used OEM | $70 - $250 (depending on component and condition) |
| Shop Labor | $120 - $250 |
Frequently Asked Questions (FAQ)
My USB port stopped working. Do I need to replace the whole console?
Not usually. First, check the fuse that controls the accessory power outlets. If the fuse is good, try cleaning the port with compressed air or a non-metallic pick to remove debris. The issue could also be the charging cable itself. If the port is physically damaged, it can often be replaced as a separate component without replacing the entire console.
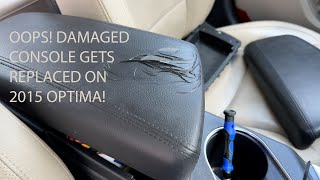
🎬 Watch this quick guide on replacing just the armrest lid.Can I install a console from a higher trim level into my Sedona?
It might be possible, but it can be complicated. While the main console body may physically fit, the wiring for features your vehicle doesn't have (like heated seat switches) will not be present. This would require significant custom wiring to make those features functional.
Why is my armrest lid latch broken?
The armrest latch is one of the most frequently used moving parts of the console. Over time, the plastic components can become brittle and crack from the stress of repeated use, leading to failure. This is a very common issue across many vehicle makes and models.
Is it difficult to replace just the armrest lid?
Replacing only the armrest lid (or armrest assembly) is typically easier than replacing the entire console. It usually involves removing the rear console cover and then unfastening a few screws that hold the armrest hinge to the main console body.
Helpful Videos
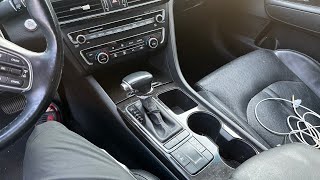
Technical Specifications
OEM Part Numbers: 84611A9000BND 84612A9000BND 84621A9000BND 84660A9000EAC 84680A9310DAA
Varies by trim level and included options (e.g., color, material, presence of USB/12V ports, heated seat switches).
We Have This Part in Stock



The information in this article is provided for general reference and educational purposes only. Vehicle specifications, procedures, and part compatibility can vary by production date, trim level, and region. Always consult your vehicle's factory service manual and verify part numbers before purchasing or performing repairs. Safety-critical components such as airbags, seat belts, and braking systems should be installed by a qualified professional.
- Kia Sedona:
- 🎬 Helpful Videos
- 🛍️ Shop This Part
- Symptoms of a Failing Console Panel
- 1. Broken Armrest Latch or Hinge
- 2. Inoperative USB or 12V Power Ports
- 3. Peeling, Scratched, or Cracked Trim
- 4. Sticky or Non-Functioning Buttons
- Buying a Used 2015-2018 Sedona Console Panel: An Inspection Checklist
- 1. Verify Trim Level and Features
- 2. Inspect the Armrest Lid Thoroughly
- 3. Check All Moving Parts
- 4. Examine Electrical Connectors and Ports
- 5. Look for Hidden Structural Damage
- Known Issues, Recalls, and Technical Service Bulletins (TSBs)
- Replacement Guide
- Cost of a Replacement Console Panel (2015-2018 Kia Sedona)
- Frequently Asked Questions (FAQ)
- 🎟️ Get 5% Off